Class paperwork: from Course Builder to approval
Class paperwork now follows one simple path. You set up your forms once in Course Builder. After that, every class shows you the next step, from preparing the packet to getting it approved.
Part 1: Set up your forms (once per course)
1. Add your forms
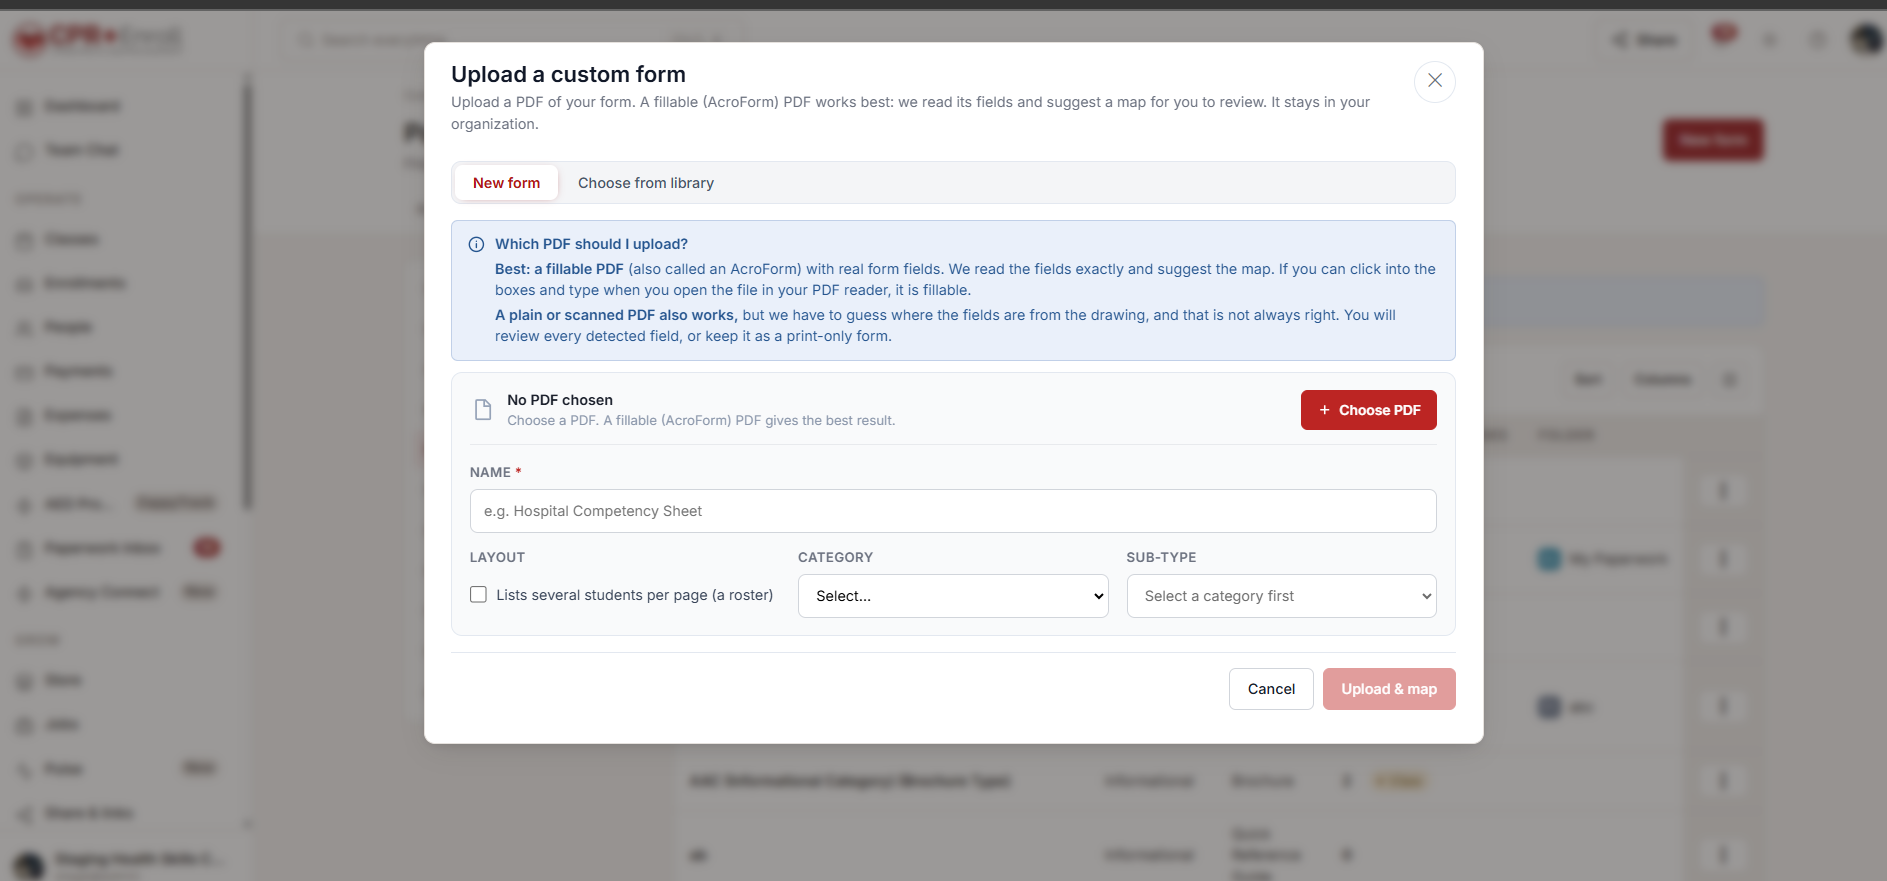
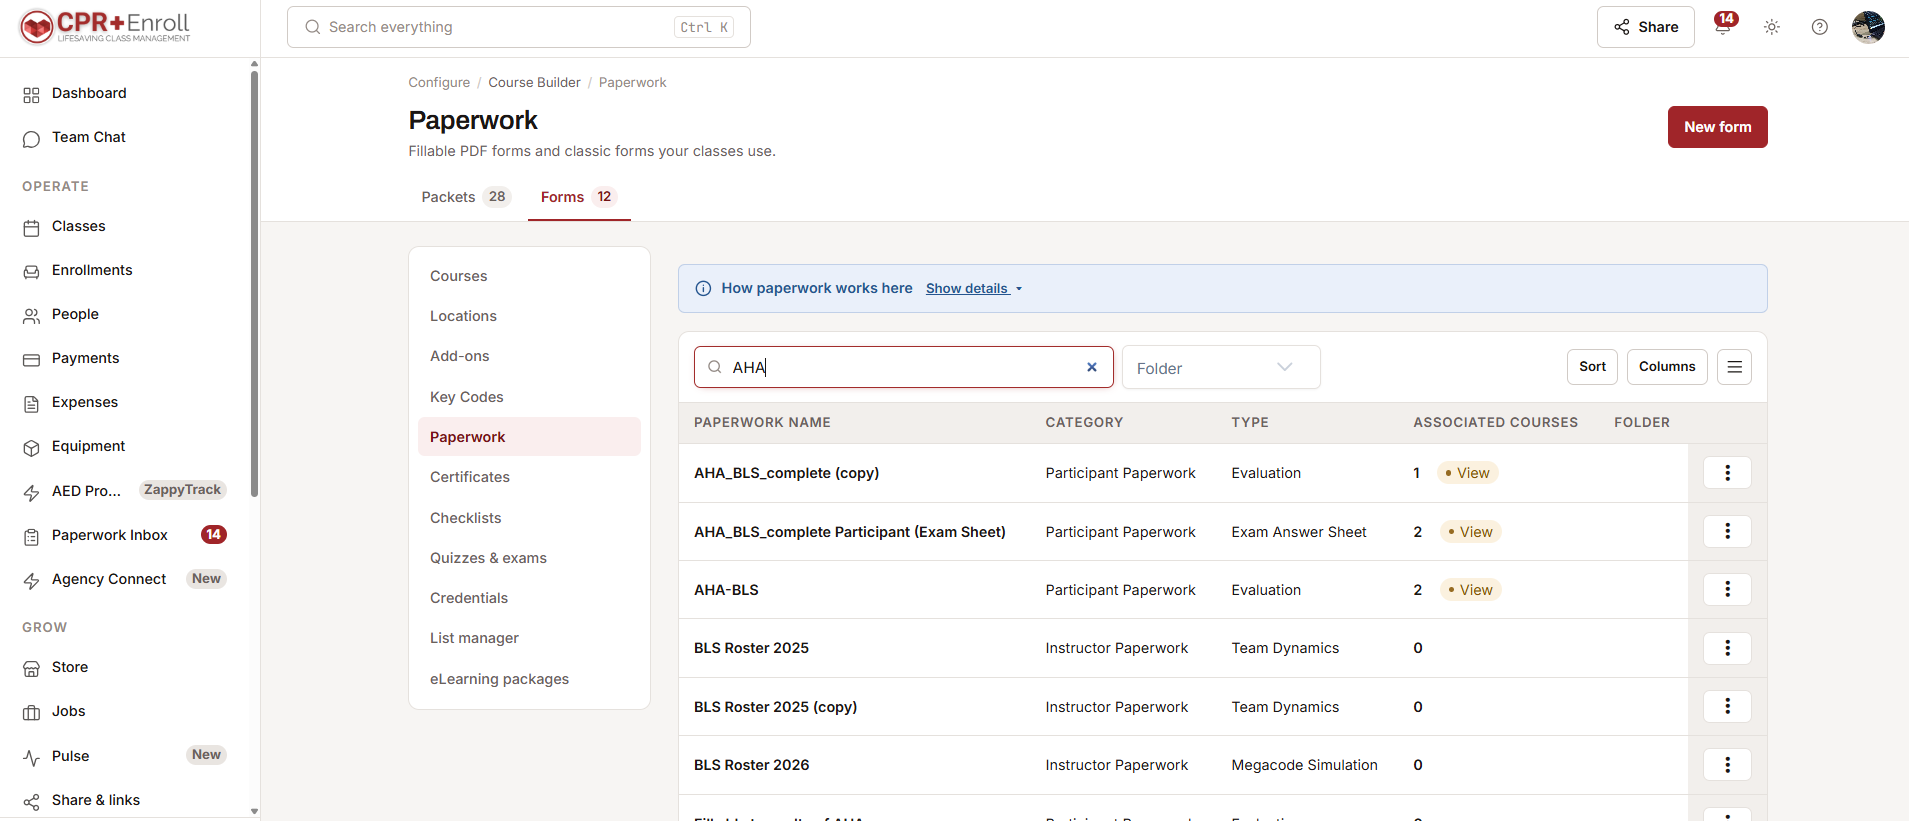
Go to Course Builder › Paperwork › Forms and click New form. Choose your PDF, give it a name and pick a Category. The category tells the system who fills the form: the student, the instructor, or nobody (an informational sheet).
A fillable PDF works best. It is a PDF you can click into and type in. We read its fields and fill most of them for you from the class, instructor and student details. You can check or change any field before you save.
Tick Lists several students per page (a roster) only for a sign-in sheet or course roster. A roster lists 10 students per page and adds pages for the rest. Leave it unticked for a form filled once per student.
Your forms are listed on the Forms tab, with the courses that use each one.
Already have a similar form? Use Choose from library in the same window to start from a copy of it.
2. Put the forms in a packet
A packet is the set of forms a course uses. Go to the Packets tab and click New packet. Name it, add your forms in the order you want them printed, and tick the courses that use it.
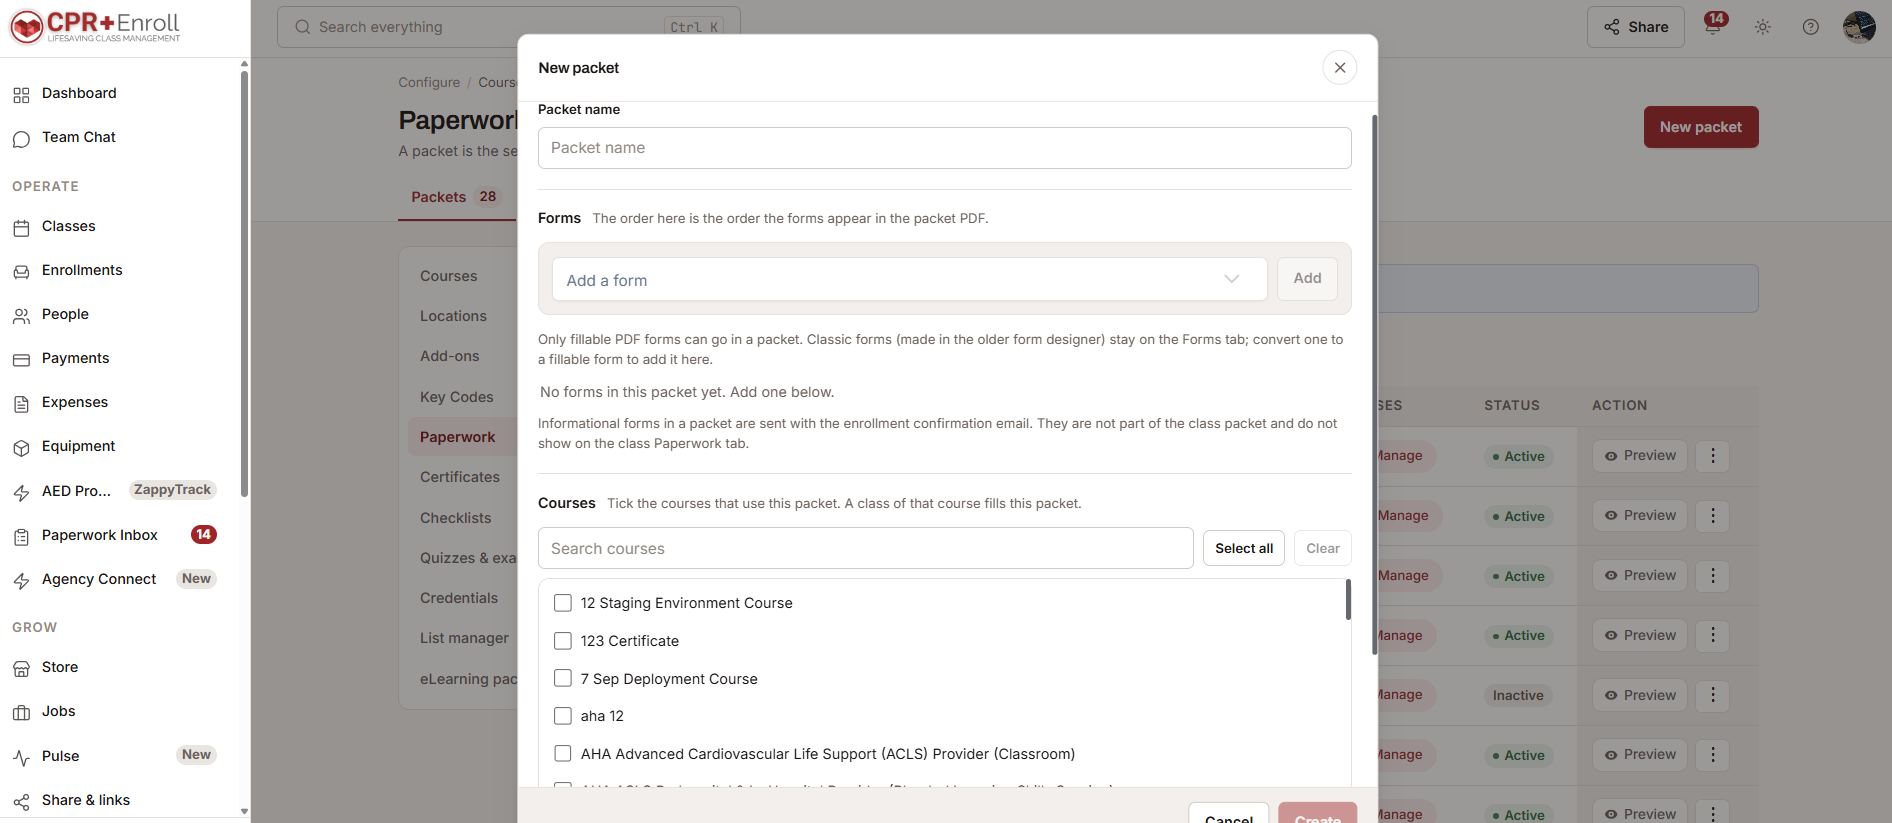
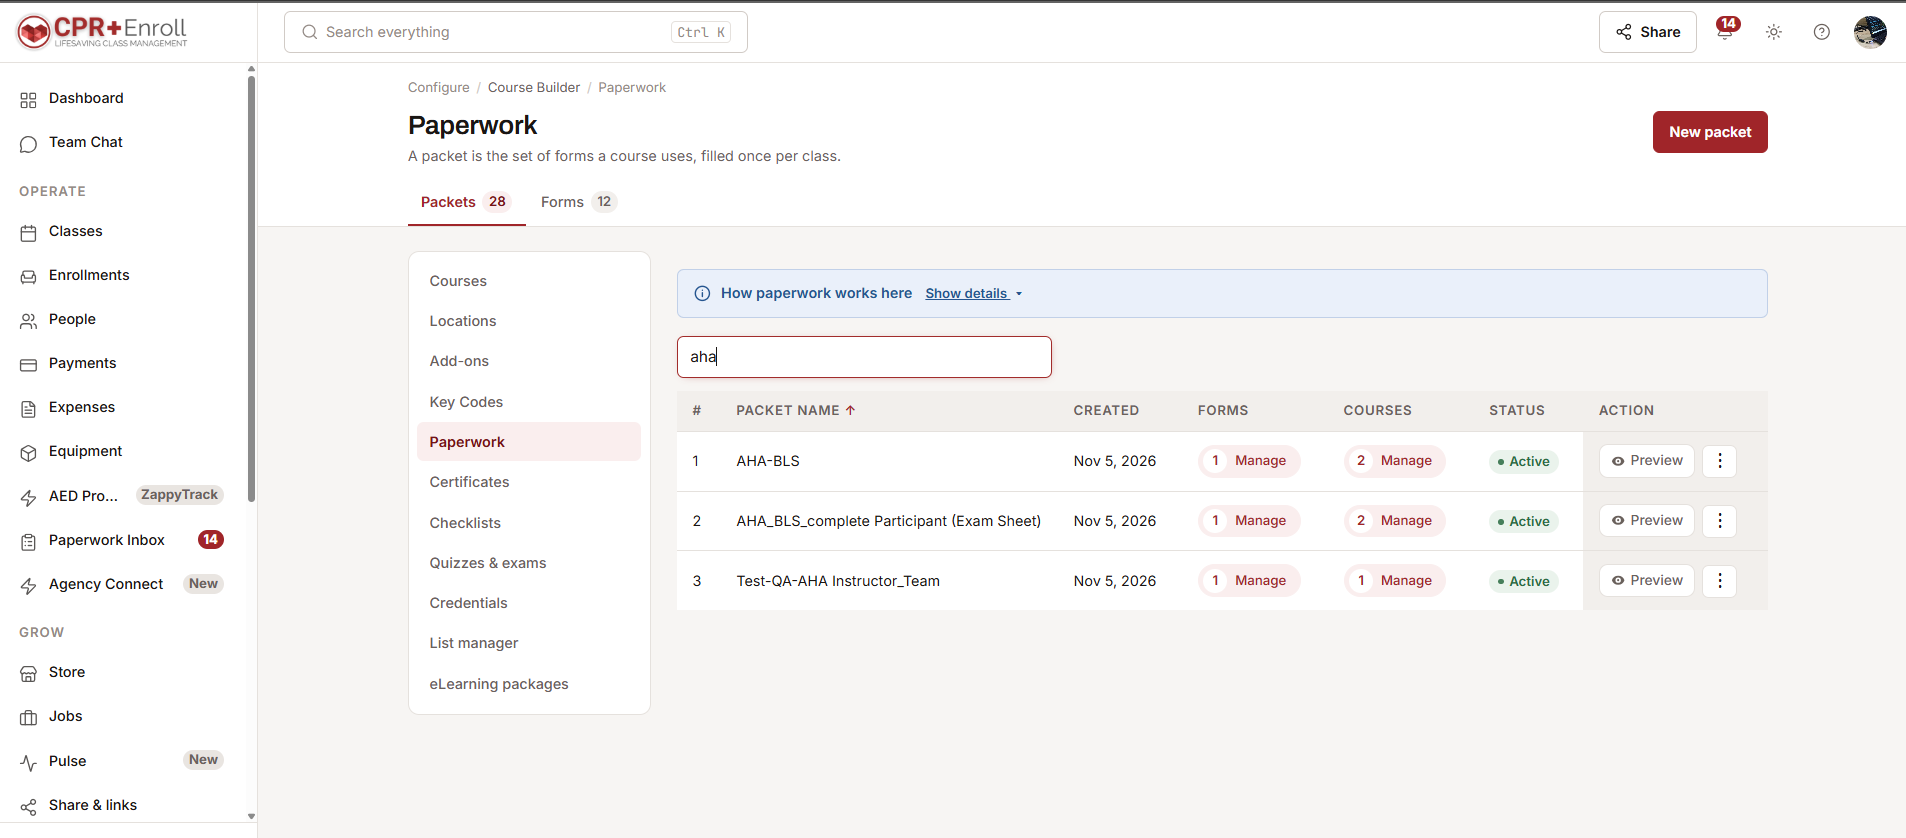
Informational forms, such as a pamphlet, are sent with the enrollment confirmation email. They do not appear on the class Paperwork tab.
Part 2: Complete the paperwork for a class
Open the class and go to the Paperwork tab. You will see the course's packet and five steps. A highlighted Next box always shows the one thing to do now, with its button.
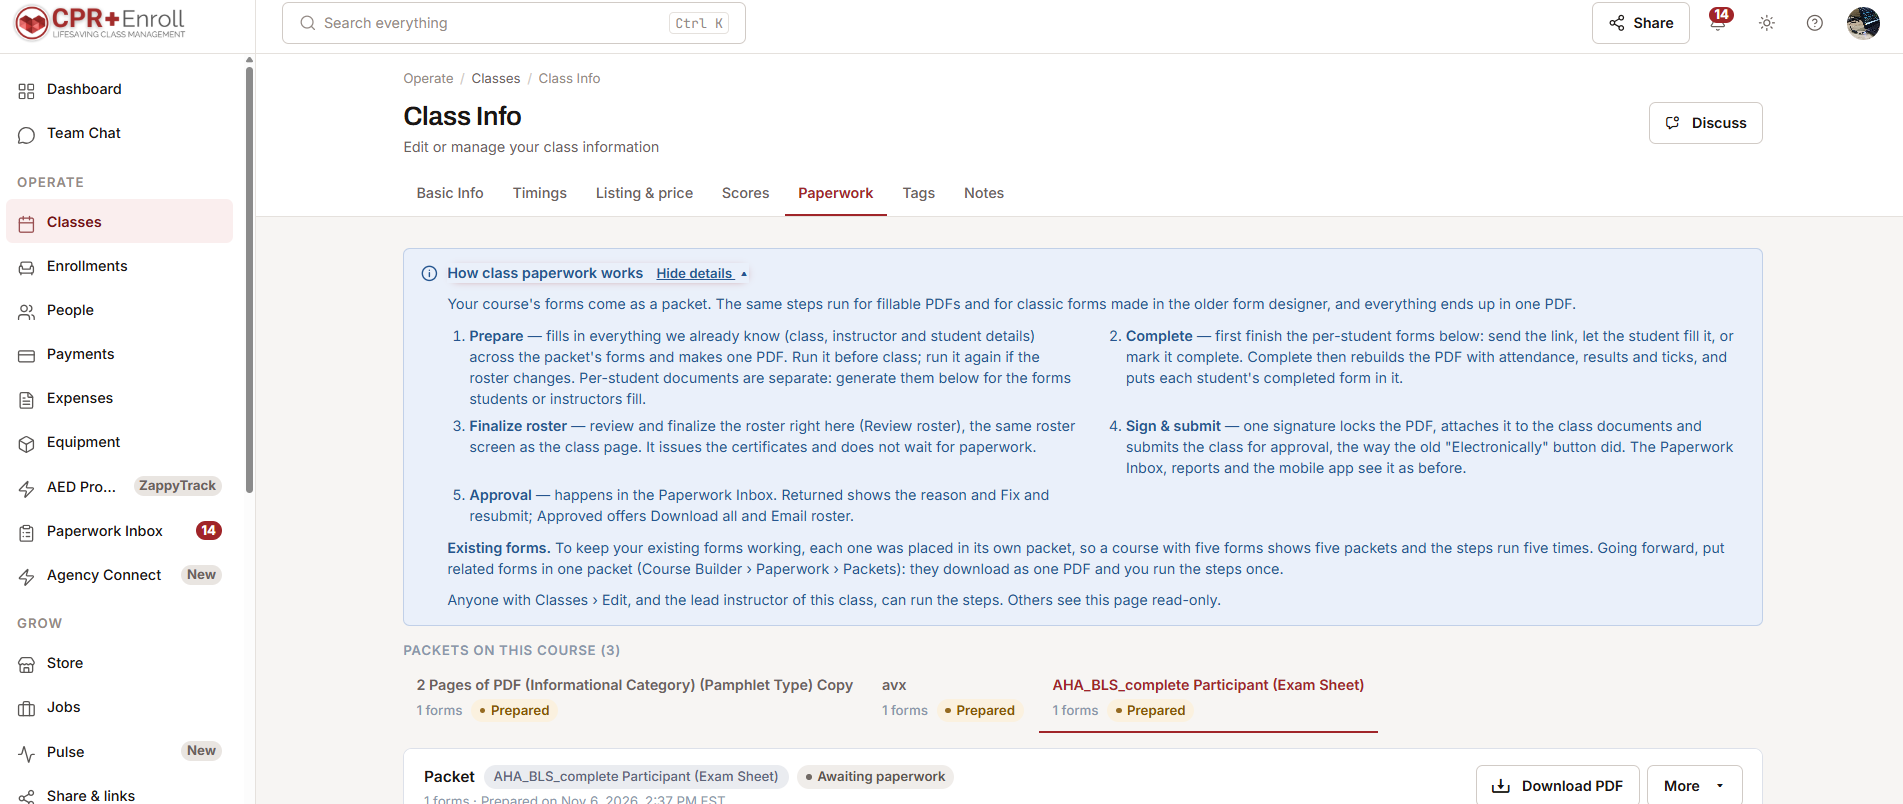
Step 1: Prepare
Click Prepare Packet. We fill in everything we already know and build one PDF. Run it before class, and again if the roster changes.
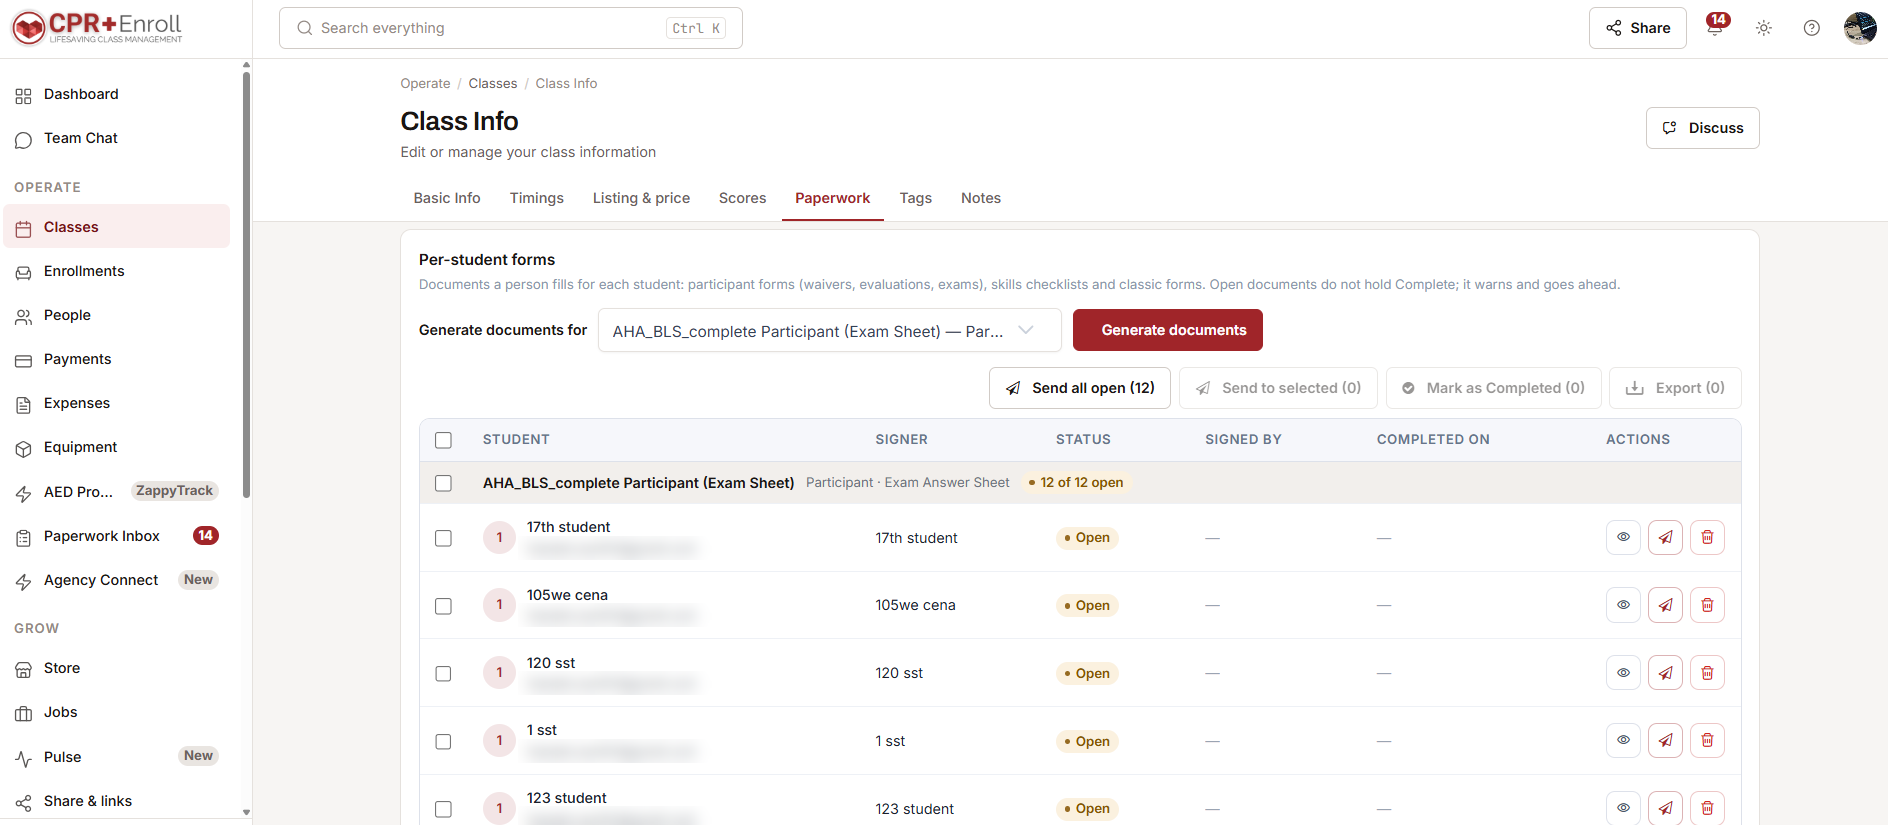
Forms students or instructors fill
Some forms need one copy per student, such as an exam sheet or a skills checklist. Under Per-student forms, pick the form and click Generate documents. Then send the link to students with Send all open, or send one at a time. You can also fill a copy yourself or click Mark as Completed.
When a student submits, the copy shows Submitted. The signer then completes it.
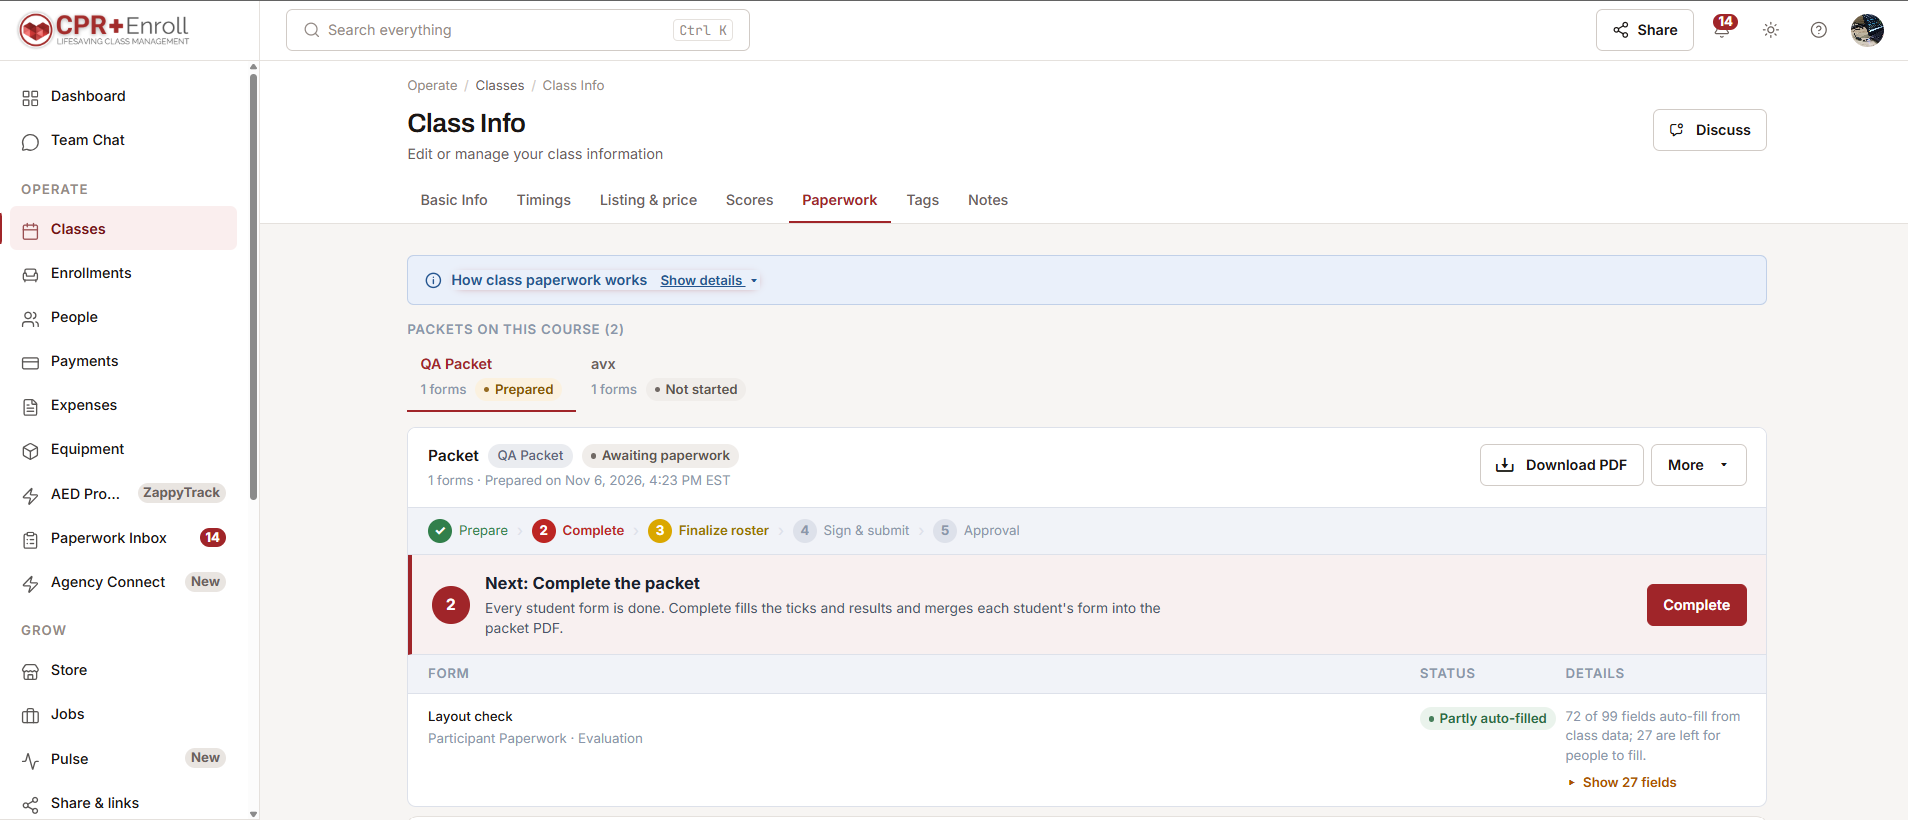
Step 2: Complete
After class, click Complete. We fill in attendance, results and ticks, and add each student's form to the packet PDF. If some forms are still open, you will be asked before going ahead.
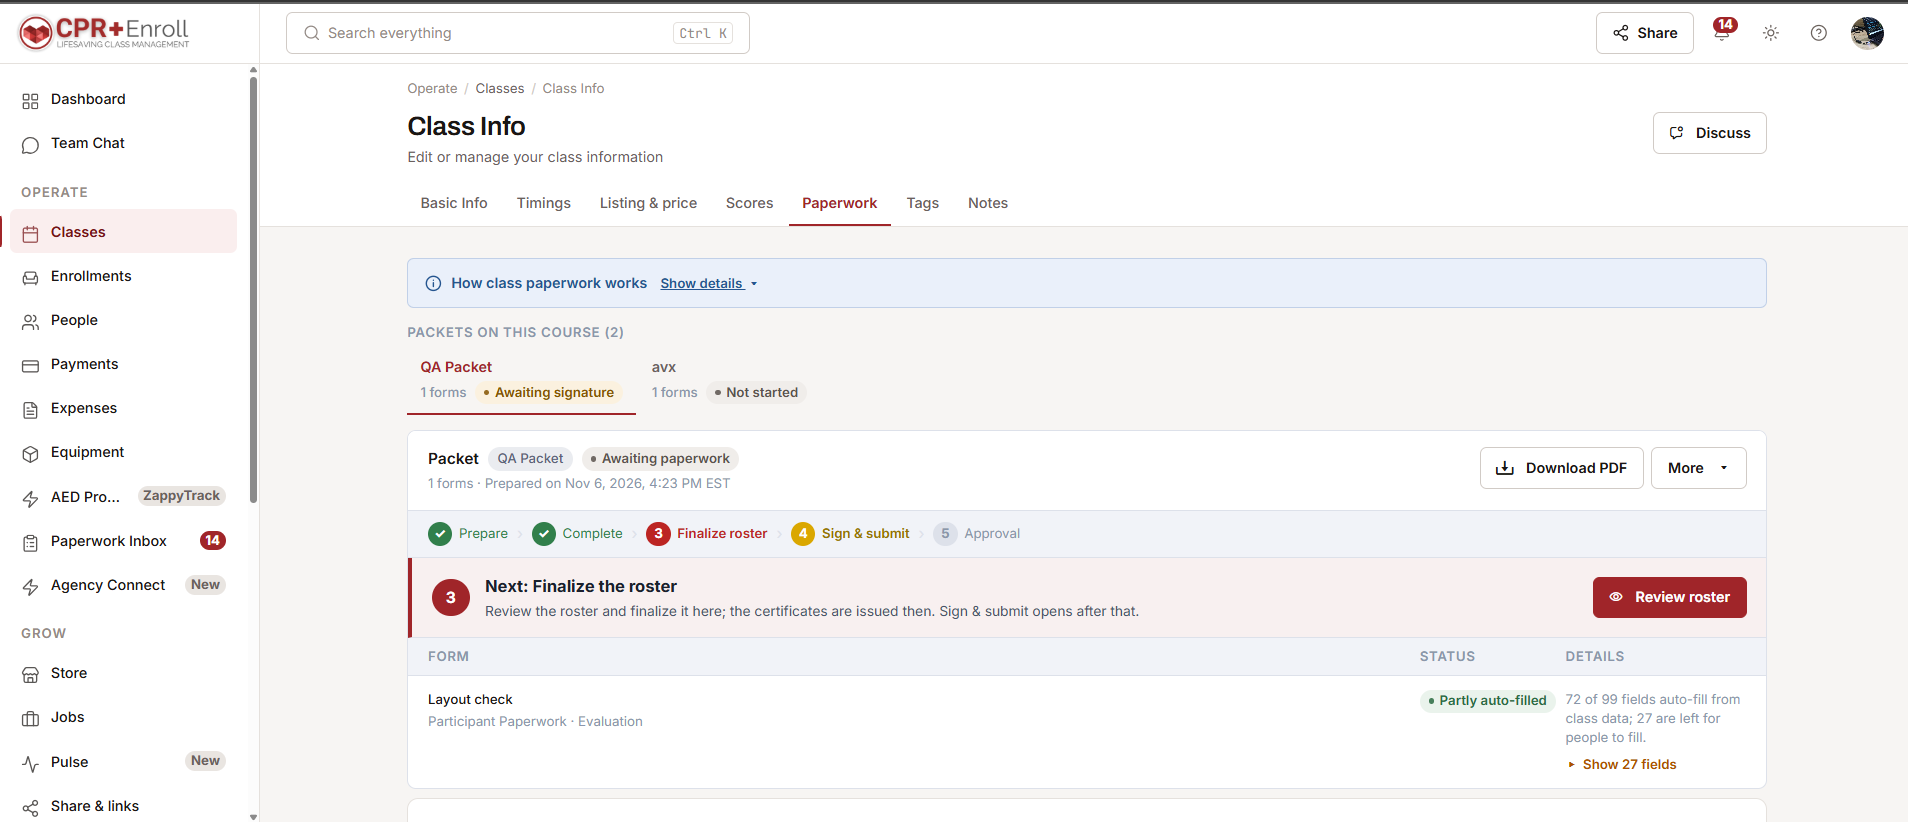
Step 3: Finalize roster
Click Review roster and finalize it right here. Certificates are issued at this point.
Step 4: Sign & submit
Click Sign & submit and sign. This locks the PDF, saves it with the class documents and sends the class for approval.
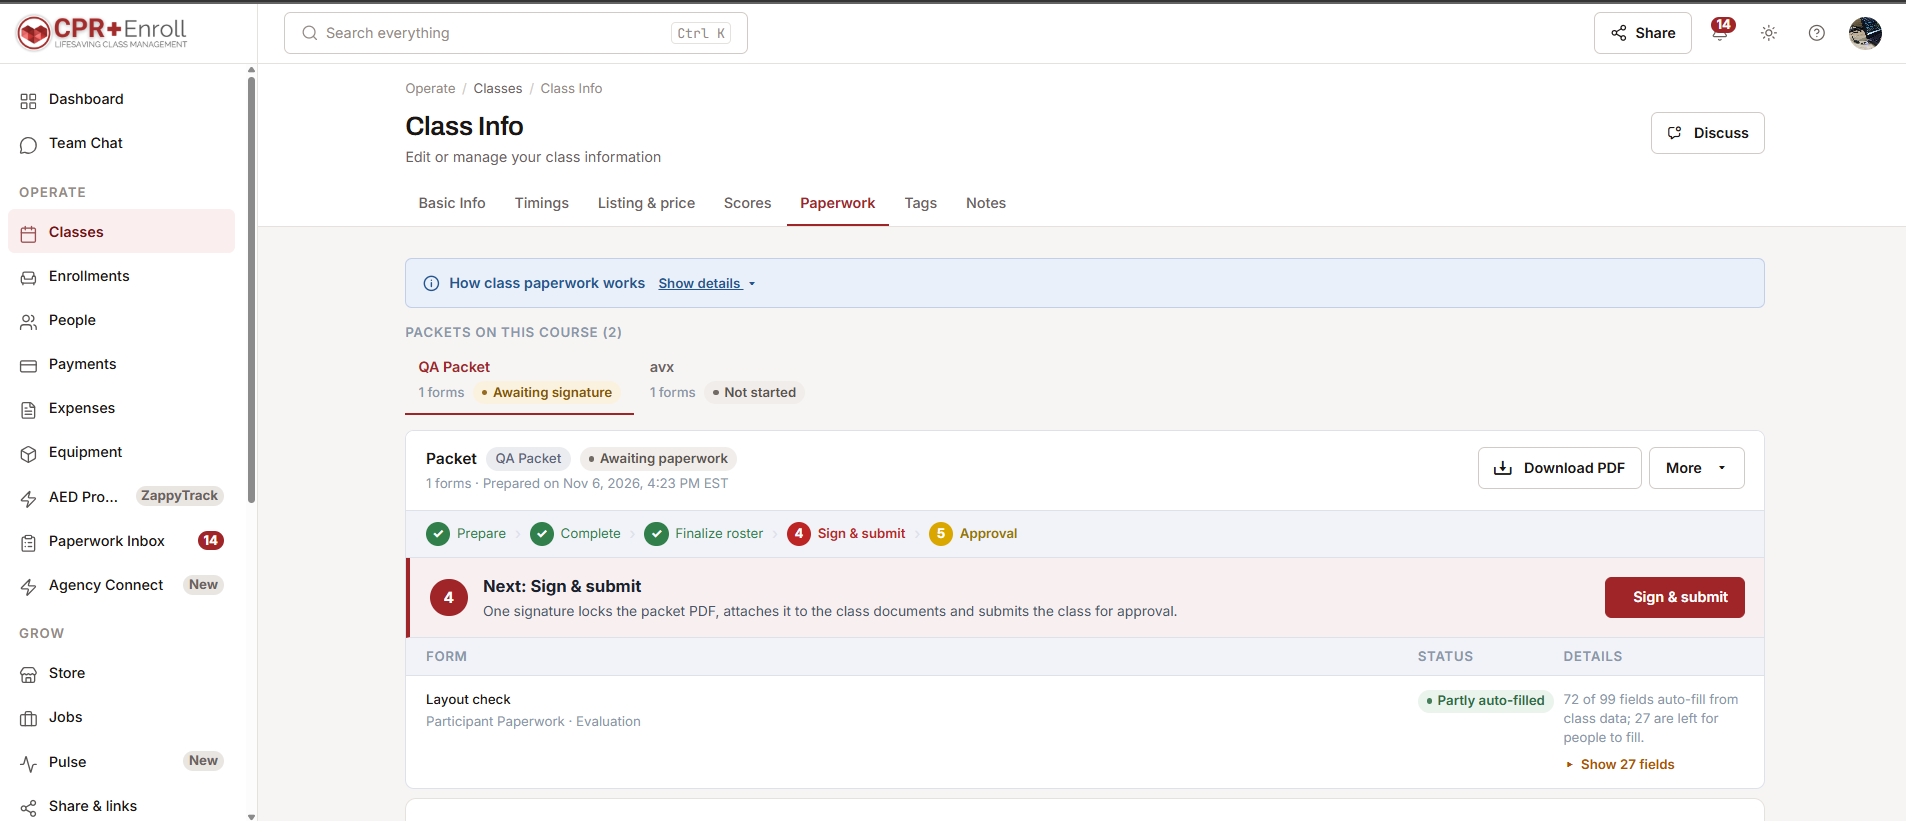
Step 5: Approval
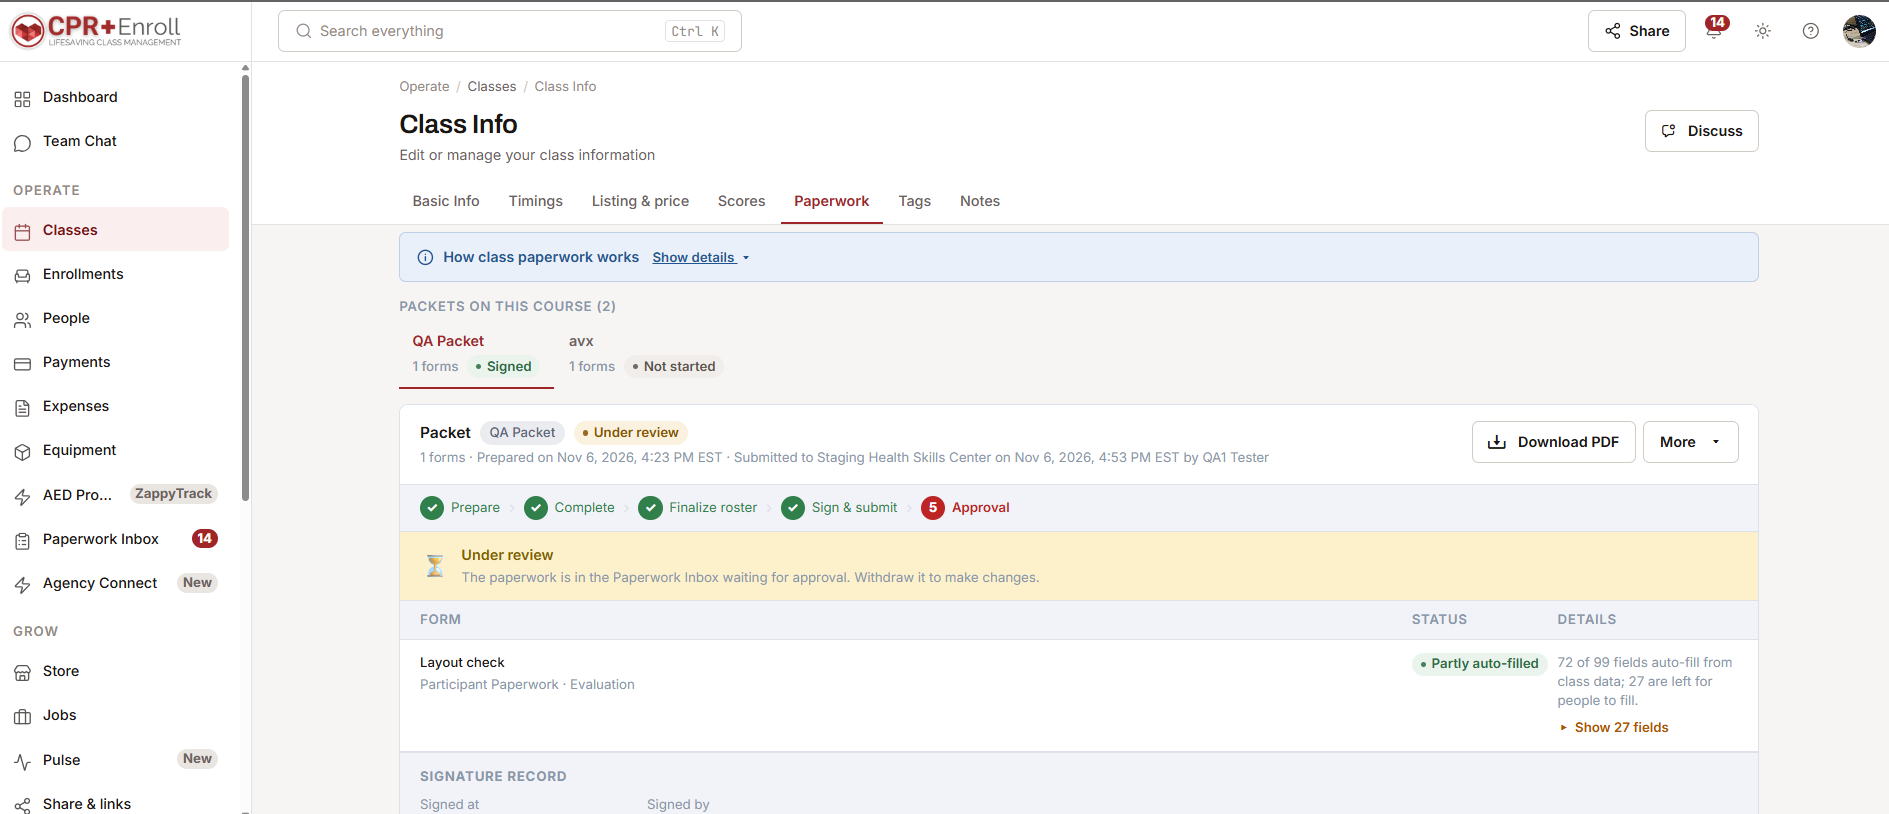
The class now shows Under review and waits in the Paperwork Inbox. Need to change something? Withdraw it first.
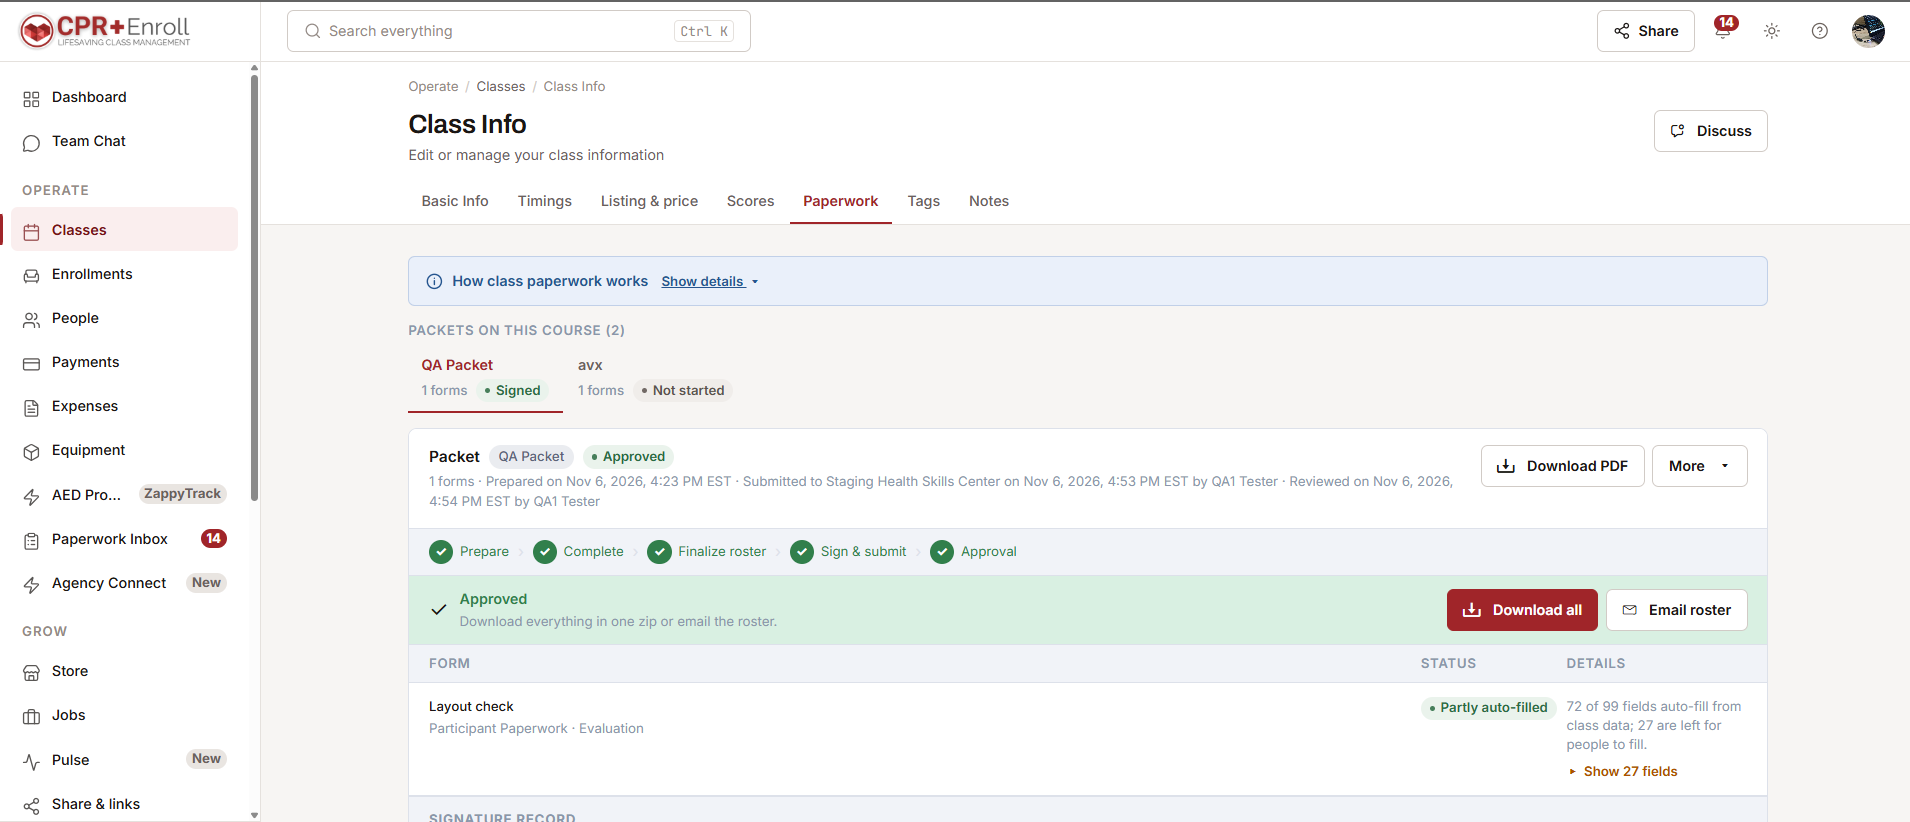
Once approved, the class shows Approved. Click Download all for one zip of everything, or Email roster. If it is returned, you will see the reason and a Fix and resubmit button.
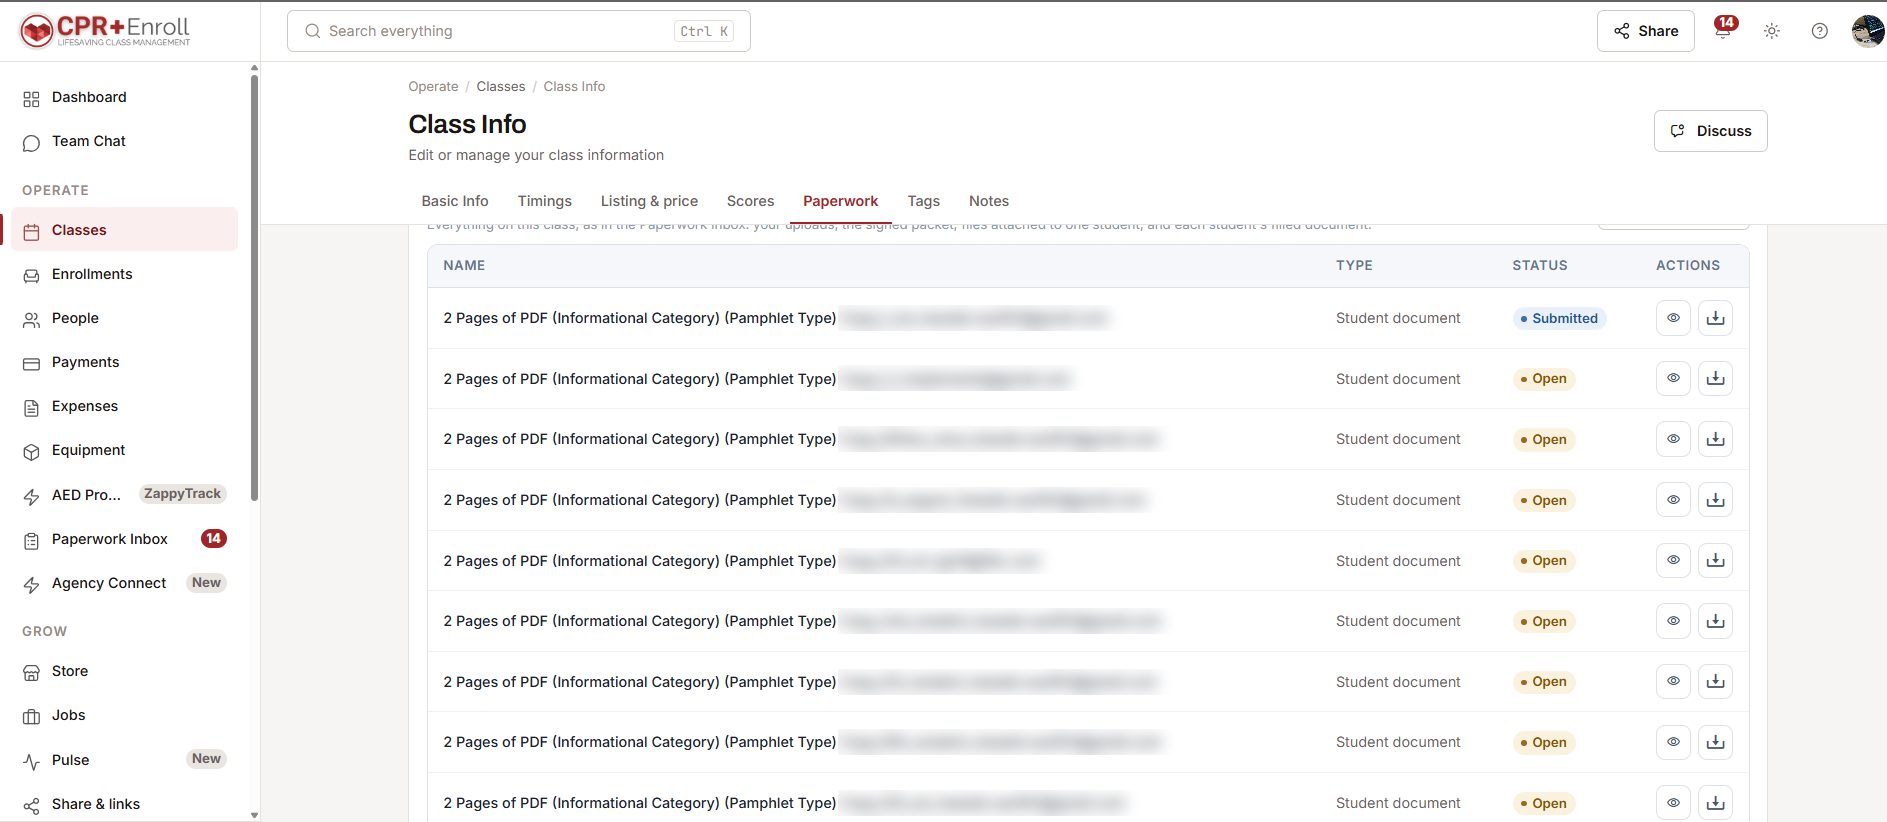
All the class's files in one list
At the bottom of the tab, Attachments lists your uploads, the signed packet and each student's document, with its status. Download any single file to share it, or click Download all.
Good to know
- Who can do this: anyone with Classes › Edit, and the class's lead instructor. Others see the tab read-only.
- Older forms: forms made in the older form designer are called classic forms. They still work. To add one to a new packet, open it in Forms and convert it by uploading a fillable PDF.
- More than one packet: a course can have several packets. Each shows as a tab, and the class is submitted once every started packet is signed.
Was this article helpful?