The Store is a built-in catalog where instructors and students browse and buy training materials, equipment and digital products at any time — separately from class registration. You build the catalog, they buy from it, and you fulfill the orders that come out the other end.
The Three Store Tabs
Open Store from the sidebar and you land on three tabs:
- Build — assemble and arrange the storefront your buyers see.
- Buy — the storefront itself, the way a buyer experiences it.
- Fulfillment — orders and payments, with the pipeline that moves an order from New to Completed.
What Can Be Sold
- Physical training materials — textbooks, pocket masks, AED training units, gloves.
- Digital products — eCards, eLearning access codes, downloadable guides.
- Instructor equipment — manikins, AED trainers, CPR feedback devices.
- Branded merchandise and certification-related materials.
Step 1: Create Store Products
- Go to Operate > Payments and click the Catalog tab, then Products.
- The Store products grid lists each product with its Collections, Price, Tax treatment, Fulfillment method and Status. The All / In store / Invoice-only filters separate what buyers can browse from what exists only to be invoiced.
- Click + New product.
- Enter the product Code (SKU), Name and Price. Optionally assign a Collection, write a Description, and upload a product image.
- Set shipping and tax: whether shipping charges apply, whether tax applies, an optional Stripe Tax code, and whether tax is included in the price.
- Save the product. Use Collections, next to Products, to group related items — buyers filter the storefront by collection.
Step 2: See What Buyers See
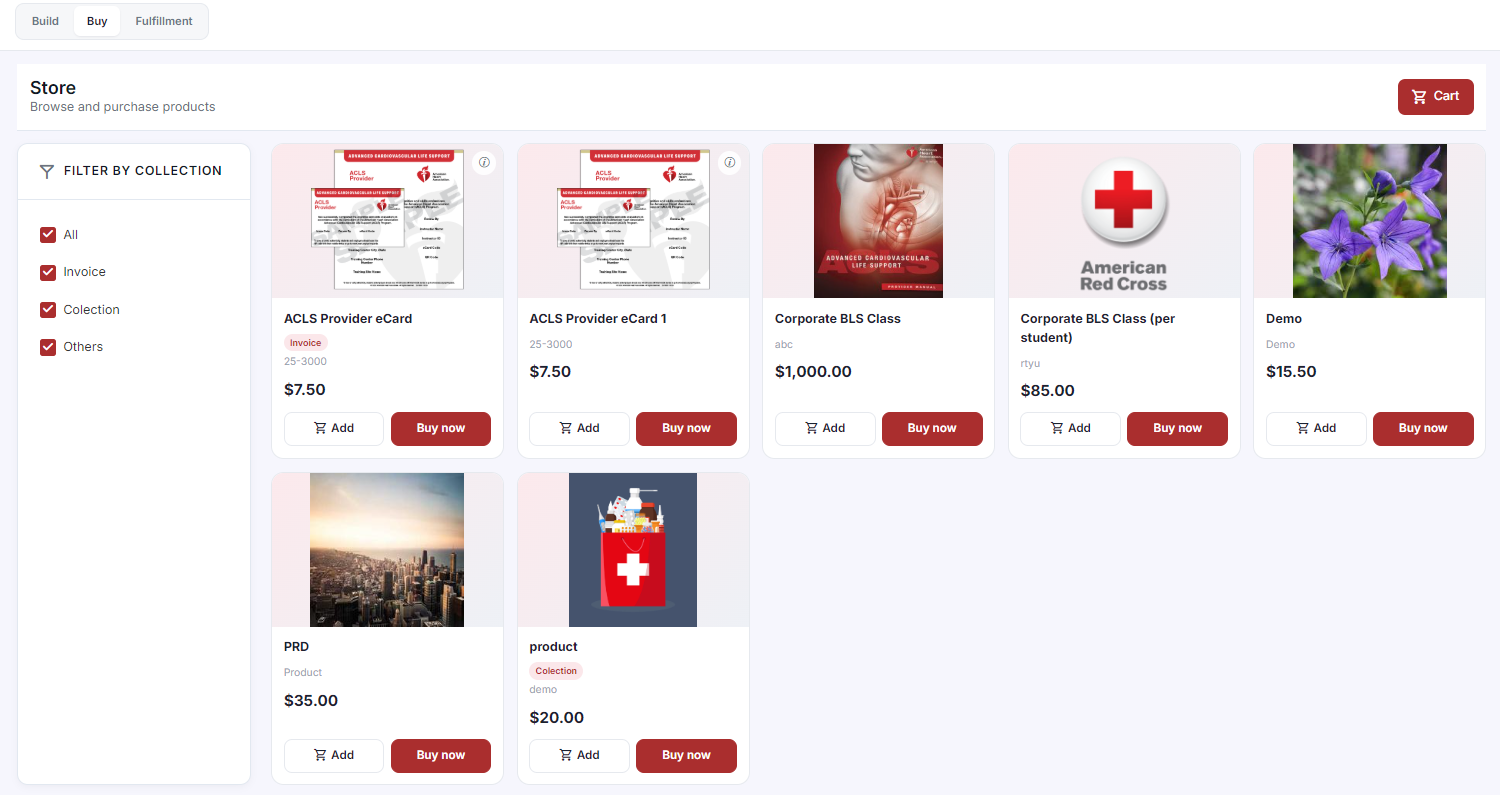
Open Store > Buy. Products appear as cards with their image, name, collection tag, code and price, with Add to put an item in the cart and Buy now to go straight to checkout. A Filter by collection panel runs down the left, and the Cart sits in the top right.
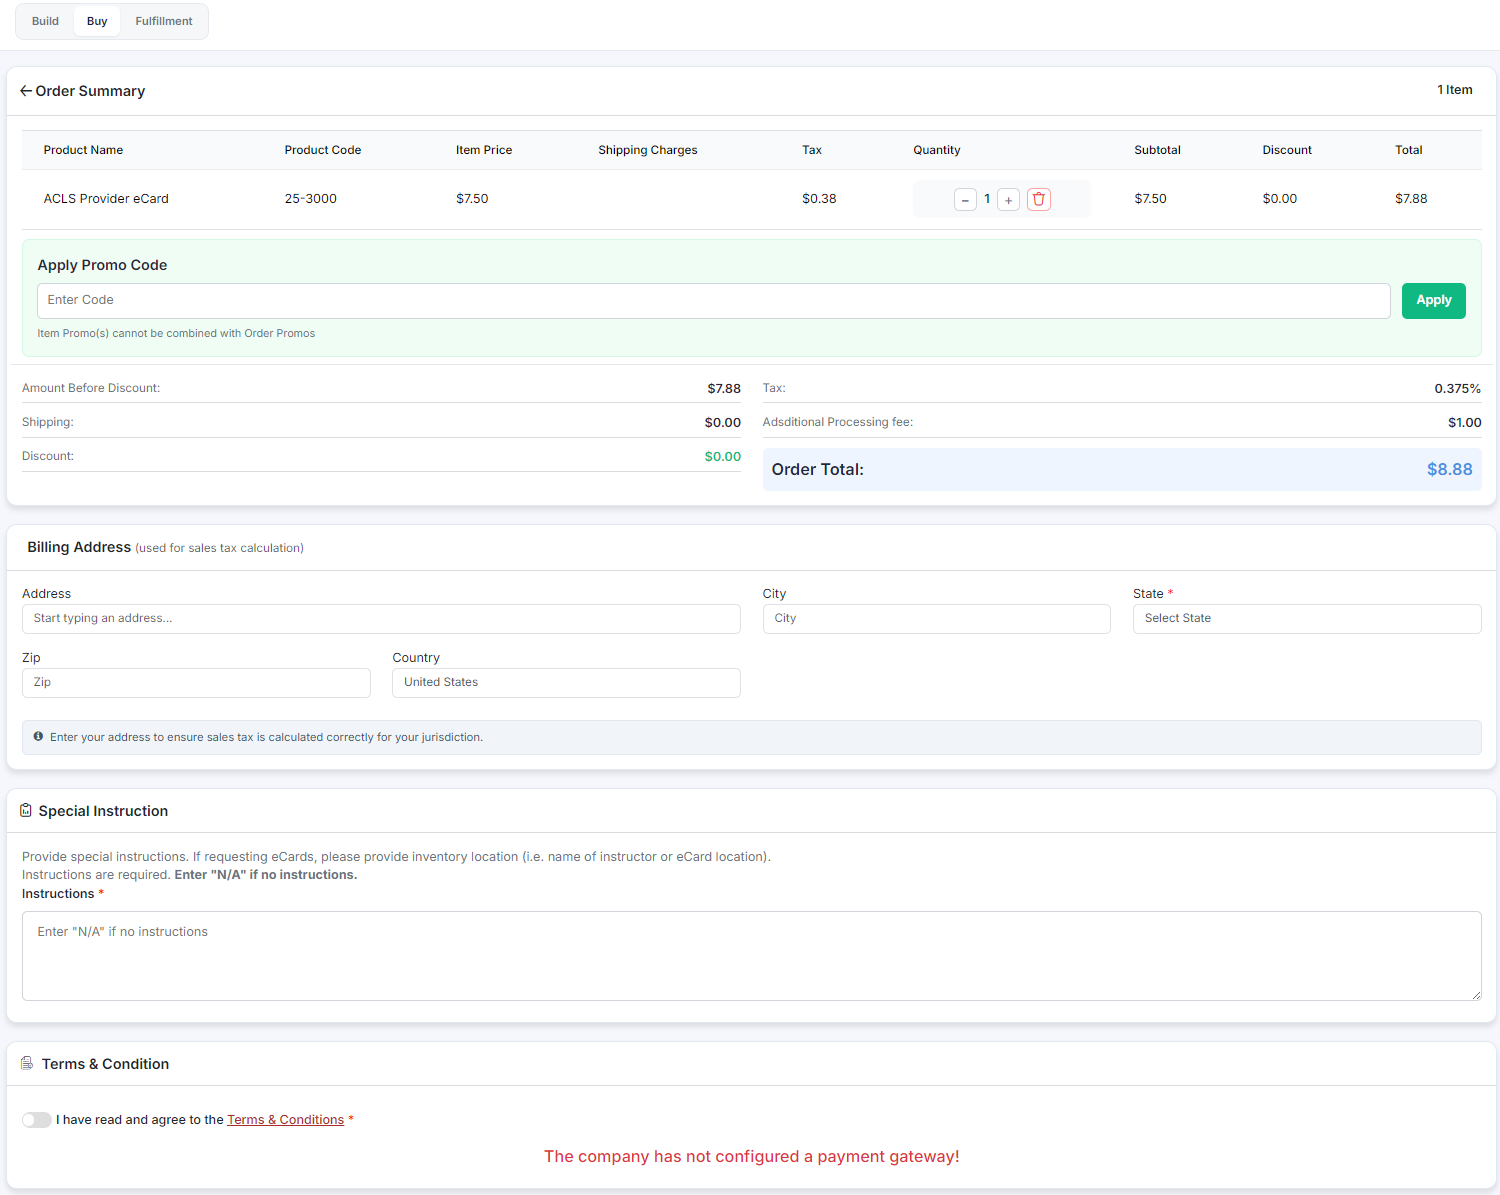
At checkout the buyer reviews an order summary before paying.
Step 3: Fulfill the Orders
Orders land on Store > Fulfillment and move through four stages — New, Under Review, Issued, Completed. See Managing Store Orders & Fulfillment for how to work that pipeline.
Store Products vs. Add-ons
Both sell things. The difference is when and where the buyer meets them.
| Store products | Add-ons | |
|---|---|---|
| Where students see it | A standalone Store page they can browse any time | During class registration checkout |
| Can be pre-selected | No | Yes |
| Volume pricing | No | Yes, through the pricing model |
| Types available | In store or invoice-only | Physical or Digital |
| Managed in | Payments > Catalog > Products | Course Builder > Add-ons |
Best Practices
- Give every product an image. The storefront is a grid of cards, and a card with no picture reads as unfinished.
- Use collections from the start. They are the only filter buyers get on the storefront.
- Keep Invoice-only products out of the storefront deliberately — that filter exists so corporate line items do not clutter what instructors browse.
- Set the fulfillment method honestly. It is what drives the pipeline once an order arrives.
- Match your product codes to whatever you use in your own inventory records so reconciliation is not a translation exercise.
Was this article helpful?
That’s Great!
Thank you for your feedback
Sorry! We couldn't be helpful
Thank you for your feedback
Feedback sent
We appreciate your effort and will try to fix the article