
The Site Branding settings let you customize how your public enrollment page looks to students — logos, brand color, page description, contact details, and social media links. Changes here appear on your classes.cprenroll.com registration page.
Opening Site Branding
From the Sidebar Menu go to Settings > Site Setup
The page has two tabs: Site Branding (where you could manage your landing page settings and branding) and Layout Style & Size (where you could choose how classes are displayed on your site). This article covers the Site Branding tab.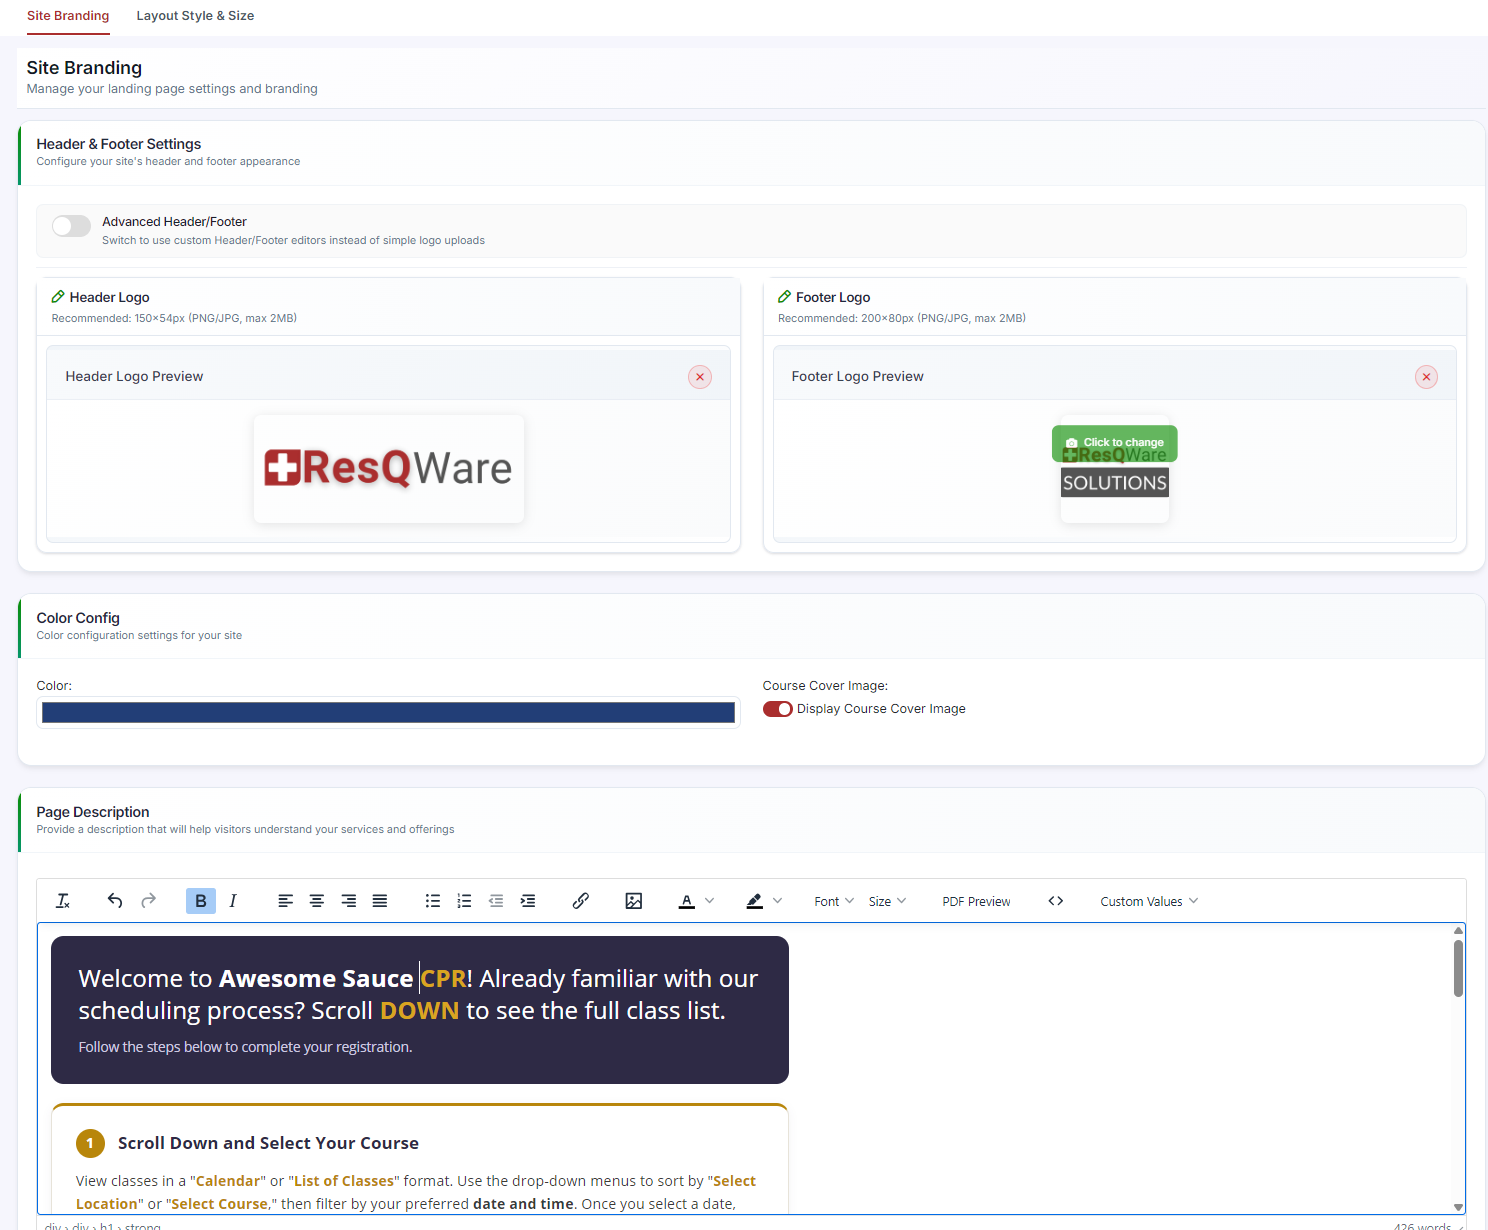
Header & Footer Settings
Upload images for your Header Logo and Footer Logo. Recommended sizes and file limits are shown next to each upload area (Header Logo: 150×54px, max 2MB; Footer Logo: 200×80px, max 2MB). Accepted formats are PNG and JPG.
Toggle Advanced Header/Footer if you want to use custom rich-text editors for your header and footer content instead of simple logo uploads.
Color Config
In the Color Config section, click the color swatch to choose your brand color. This color is applied to buttons and accents on your enrollment page. Toggle Display Course Cover Image to show or hide cover images on course listings.
Page Description
Use the Page Description rich text editor to write an introduction or welcome message for students visiting your enrollment page. Use the Font and Size controls in the toolbar to style your text.
Contact Detail
Use the Contact Detail rich text editor to add your business address, phone number, and email for students who need to reach you.
Social Media Links
Enter your profile links for each platform you use: Facebook, X, Instagram, Google Business Profile, LinkedIn, and YouTube. Add your Website Url here as well.
Classes Tab Name
The Classes Tab Name field controls the label of the main navigation tab on your enrollment page. Change it to match your own terminology — for example, “Our Classes” or “Schedule.”
Saving Your Changes
Scroll to the bottom of the page and click Save. Your changes appear on your public enrollment page immediately.
Was this article helpful?
That’s Great!
Thank you for your feedback
Sorry! We couldn't be helpful
Thank you for your feedback
Feedback sent
We appreciate your effort and will try to fix the article