Add-ons let you offer students optional extras alongside their class enrollment — things like manuals, equipment, certification cards, or digital resources. Add-ons can be physical (shipped or handed out in class) or digital (delivered via keycode, link, or file), giving you flexibility depending on what you're selling.
This article walks you through creating both physical and digital add-ons from start to finish.
Before You Begin
Before creating an add-on, decide:
- Whether it's a Physical or Digital add-on, since each type has different fulfillment/delivery options.
- Pricing and tax handling for the add-on.
- Whether it should be automatically pre-selected during registration, or limited to specific courses.
- For digital add-ons using Keycode delivery, make sure the relevant Keycode Bank is already set up.
Step-by-Step Instructions
Step 1: Open Your Setup Guide
- From the opening screen, click Settings on the left menu.
- Click Setup Guide.
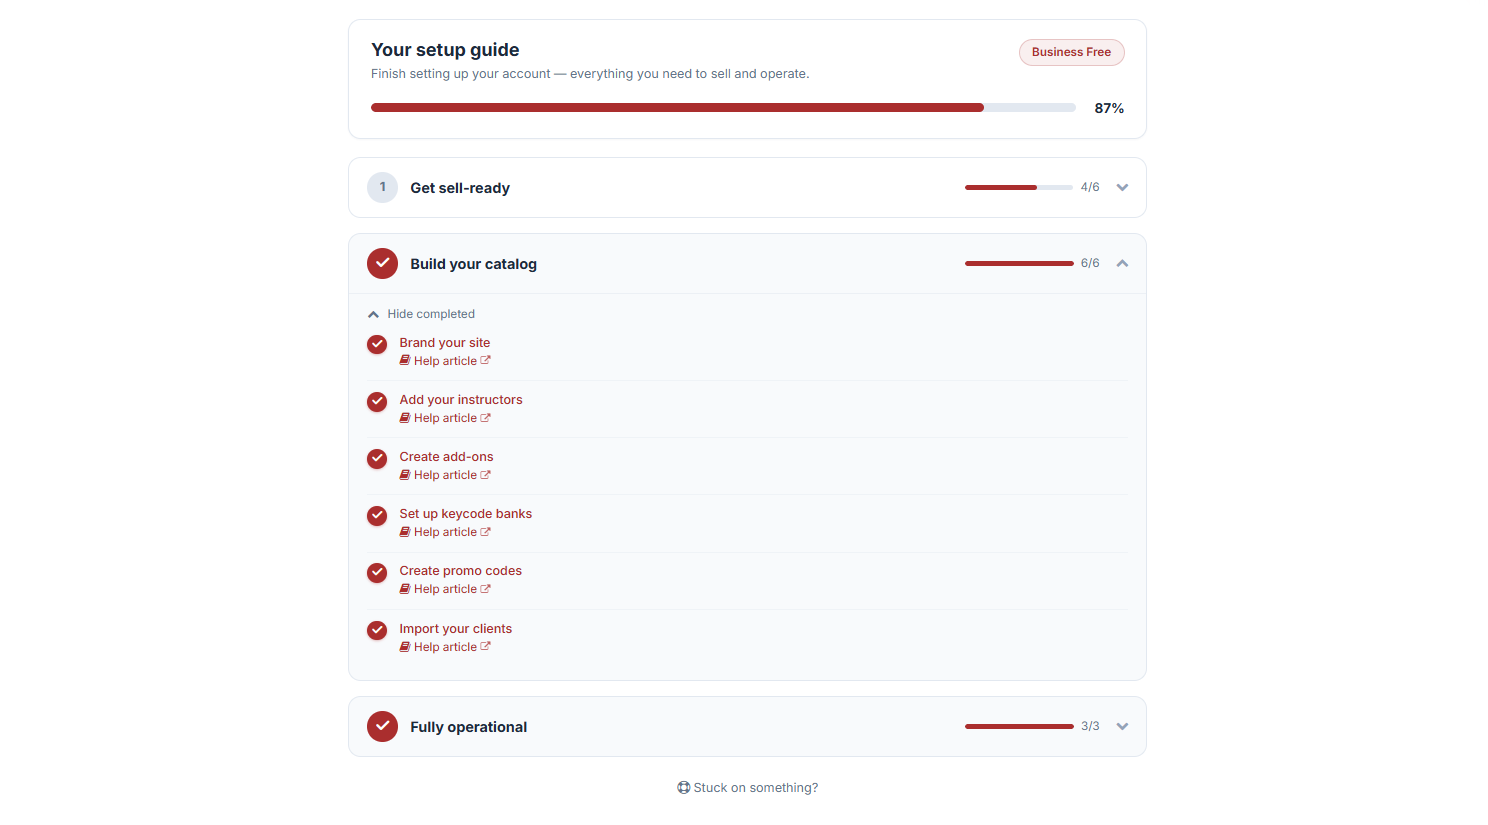
You'll land on Your Setup Guide, where you can finish setting up your account with everything you need to sell and operate.
Step 2: Navigate to Add-Ons
- Click Build Your Catalog. Here you'll find six different setups you can complete to build out your catalog.
- Select Create Add-Ons.
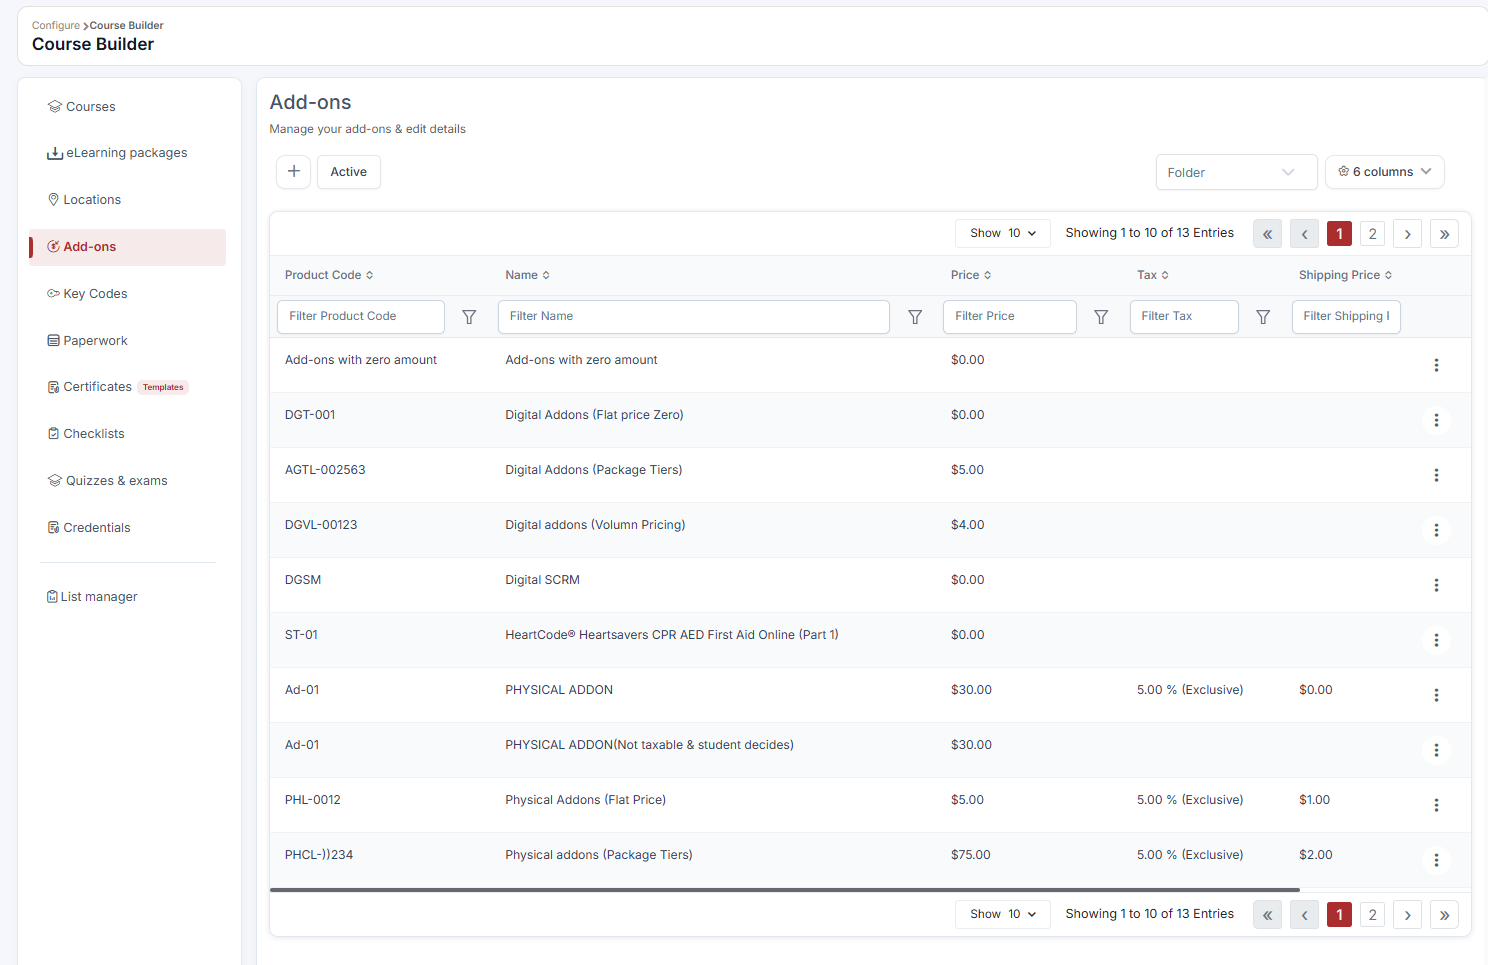
This directs you to the Add-Ons page in the Course Builder section, where you can manage your add-ons and edit their details.
Step 3: Create a New Add-On
Click + Add New. The Create Add-Ons window will pop up.
First, choose the add-on type: Physical or Digital.
Step 4: Complete Details for All Add-Ons
Regardless of type, fill out the following:
- Name
- Product Code (SKU)
- Description
- Product Image — upload an image for the add-on.
- Pricing Model — select a pricing model, then set the Price.
- Allow Students to Choose Quantity— toggle on or off.
- Off: Quantity is locked at 1.
- On: Students can choose quantity at checkout (volume pricing always allows this).
- Tax— choose how tax is handled:
- Legacy (Manual Rate) — pick a rate from your tax table.
- Dynamic (Stripe Tax) — calculated automatically based on the customer's address.
- Not Taxable — no tax is calculated or collected.
Step 5: Configure Fulfillment or Delivery
For Physical Add-Ons, select the Fulfillment Option:
- Delivered in Class — handed out in class (no shipping cost).
- Shipped — always ships (shipping method applies).
- Student Decided — student chooses between Delivered in Class or Shipped.
For Digital Add-Ons, select the Delivery Method:
- Keycode — issued from a keycode bank at purchase.
- Static Link — same URL provided to every purchaser.
- Downloadable File — file delivered directly at purchase.
If using Keycode delivery, select the Keycode Bank to draw from. One keycode is drawn from the bank and emailed to the student automatically at purchase.
Step 6: Set Additional Options
For both Physical and Digital Add-Ons, you can also toggle:
- Pre-select this add-on for all registrations
- Limit to selected courses only
Step 7: Save Your Add-On
Once everything looks good, click Create Add-On to finalize.
Best Practices
- Use consistent SKUs across your add-on catalog, so inventory and reporting stay organized.
- Reserve "Pre-select this add-on for all registrations" for essential items, since it changes the default checkout experience for every student.
- Confirm your Keycode Bank has enough codes before linking it to a high-demand add-on, to avoid students ending up in an awaiting-code status.
- Choose Dynamic (Stripe Tax) if you sell in multiple jurisdictions with varying tax rules, so tax is calculated automatically rather than manually maintained.
- Use Limit to Selected Courses Only to keep unrelated add-ons from appearing on courses where they don't apply.
Frequently Asked Questions
| Question | Answer |
|---|---|
| What's the difference between Physical and Digital add-ons? | Physical add-ons involve a tangible item that's either handed out in class or shipped, while Digital add-ons are delivered electronically via keycode, static link, or downloadable file. |
| Can I let students choose how many they want? | Yes. Toggle on Allow Students to Choose Quantity, otherwise quantity is locked at 1 per registration. |
| What happens if my linked Keycode Bank runs out of codes? | This depends on how the Keycode Bank itself is configured. If it allows codes to be sent later, students will still be able to purchase the add-on and receive their code once the bank is restocked. |
| Can an add-on be limited to only certain courses? | Yes. Enable Limit to Selected Courses Only and choose which courses the add-on should be available for. |
| Do I need to charge tax on add-ons? | It depends on your jurisdiction and the type of product. Choose Not Taxable, Legacy (Manual Rate), or Dynamic (Stripe Tax) based on your specific tax requirements. |
✔ You're all set. Your add-on is now live and ready to be offered to students during registration. You can return to the Add-Ons page anytime to edit details or add more.
Was this article helpful?
That’s Great!
Thank you for your feedback
Sorry! We couldn't be helpful
Thank you for your feedback
Feedback sent
We appreciate your effort and will try to fix the article