Keycode Banks let you store and distribute access codes or links for digital courses and add-ons — such as SCORM modules, third-party licenses, or downloadable resources — automatically at the time of purchase. Instead of manually emailing codes to each student, a Keycode Bank issues them for you, based on the rules you set.
This article walks you through creating and configuring a Keycode Bank from start to finish.
Before You Begin
Before creating a bank, decide:
- Which courses or classes will use this bank.
- How codes should be issued — through a general bank tied to a course/add-on, or a bank tied to one specific class.
- Where your codes are coming from — typed in manually, or available as a CSV file.
✔ Important: The issuing mode you choose cannot be changed after the bank is created. Review the options below carefully before proceeding.
Step-by-Step Instructions
Step 1: Open Your Setup Guide
- From the opening screen, click Settings on the left menu.
- Click Setup Guide.
You'll land on Your Setup Guide, where you can finish setting up your account with everything you need to sell and operate.
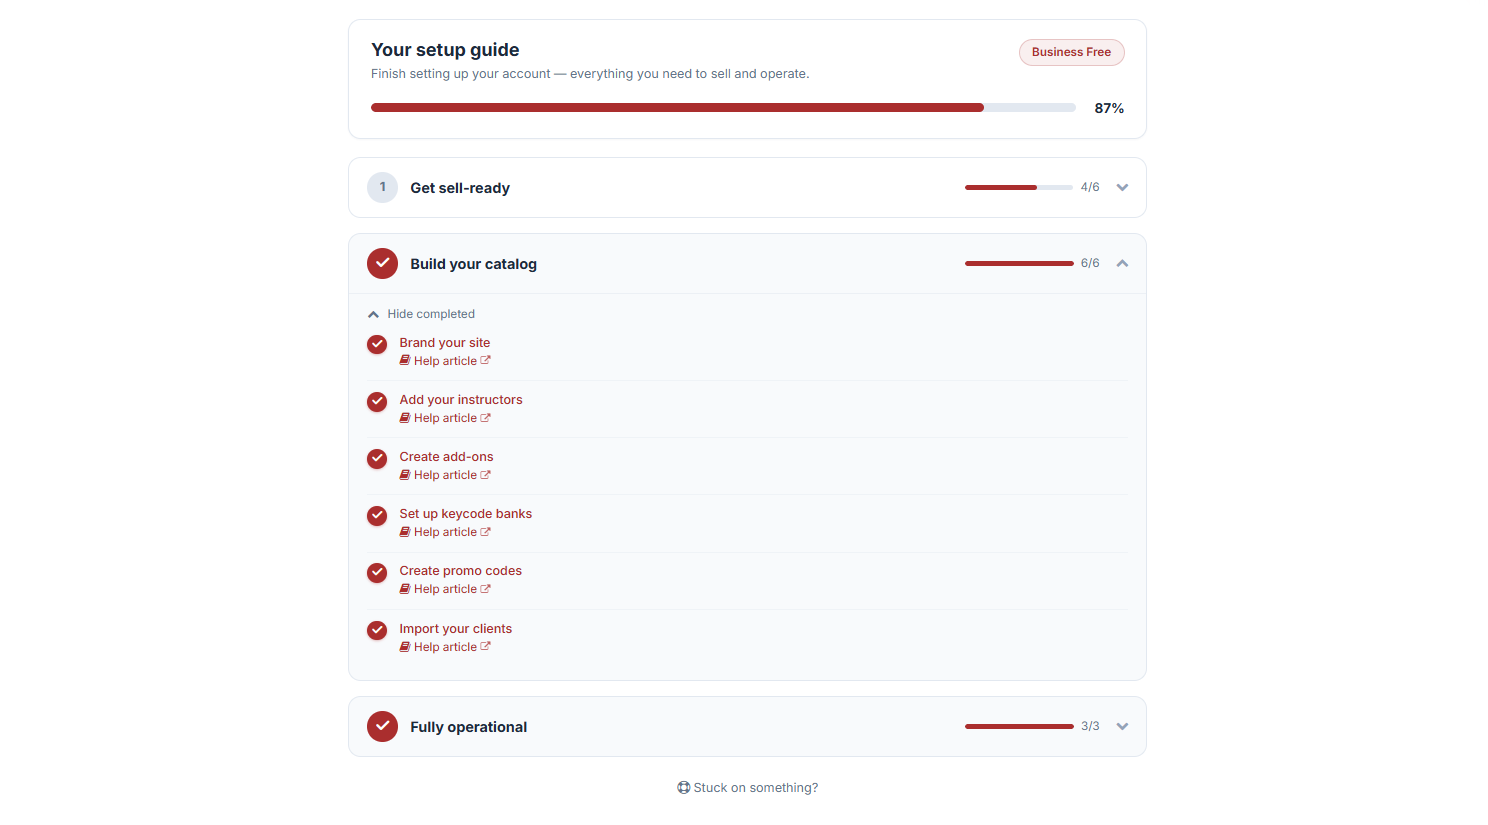
Step 2: Navigate to Key Codes
- Click Build Your Catalog. Here you'll find six different setups you can complete to build out your catalog.
- Select Set Up Keycode Banks.
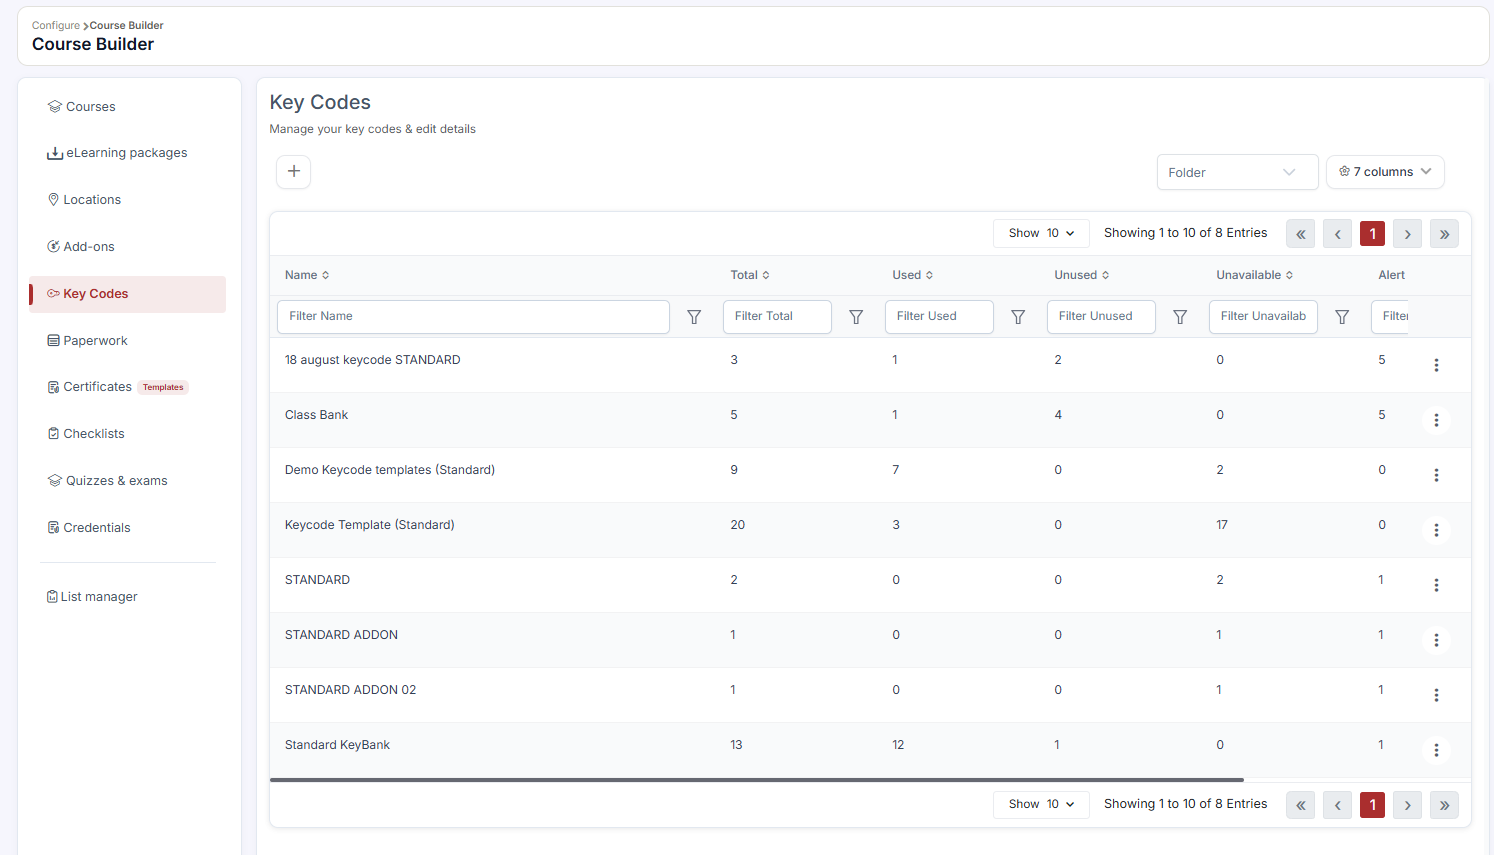
You'll be directed to the Key Codes section of the Course Builder page, where you can manage your key codes and edit their details.
Step 3: Create a New Bank
Click + Add New. The Create Bank Keycodes window will open.
Step 4: Name Your Bank
Enter a Name for the bank. Choose something descriptive so you can easily identify it later (e.g., "BLS Digital Module – 2026" or "Heartsaver Class Bank – Q1").
Step 5: Choose an Issuing Mode
Select one of the following:
| Mode | How It Works | Best For |
|---|---|---|
| A. Standard (FIFO) | The bank attaches to courses & add-ons. The next available code is automatically issued at the time of purchase. | Digital courses or add-ons sold on an ongoing basis, where any available code can go to any purchaser. |
| B. Class Bank | Codes attach to a specific class and are issued only to that class's students. One bank serves every session of that class. | Situations where codes must be reserved for a particular class or session. |
Choose carefully, since this setting is permanent once the bank is created.
Step 6: Write Delivery Instructions
Enter the Instructions that will accompany each code. These instructions appear in:
- The keycode delivery email.
- The confirmation page.
- The student portal.
Use this space to explain how to redeem the code or link — for example, which website to visit or how to activate a license.
Step 7: Add Your Keycodes
You have two options for loading codes into the bank:
- Add Keycodes Manually — enter one keycode per line in the text field.
- Upload CSV — upload a file with one code or link per line. Any duplicates already in the bank are automatically skipped, so it's safe to re-upload a file if you're unsure what's already been added.
Step 8: Set Low-Inventory Alerts
Set a threshold to alert admins when a chosen number of keycodes remain. This helps you restock the bank before it runs out.
Step 9: Configure Empty-Bank Behavior
Toggle Allow keycodes to be sent when no keycodes are available based on your preference:
- When enabled and the bank is empty: Students can still enroll. They'll receive a "your keycode will be sent separately" email and will appear as awaiting-code records. Once the bank is refilled, you can send their codes individually (per-row) or in bulk.
Step 10: Save Your Bank
Once everything looks correct, click Create to finalize your Keycode Bank.
Best Practices
- Name banks clearly so you can quickly tell them apart when assigning them to courses, add-ons, or classes.
- Restock proactively — set your low-inventory alert with enough buffer time to reorder or generate new codes before you run out.
- Double-check issuing mode before creating the bank, since this cannot be edited afterward. If you chose incorrectly, you'll need to create a new bank and migrate your codes.
- Use CSV upload for large batches of codes to save time and reduce manual entry errors.
Frequently Asked Questions
| Question | Answer |
|---|---|
| Can I change the issuing mode after creating a bank? | No. Issuing mode is permanent once a bank is created. If you need a different mode, create a new bank. |
| What happens if I upload a CSV with codes that are already in the bank? | Duplicate codes are automatically detected and skipped, so they won't be added twice. |
✔ You're all set. Your Keycode Bank is now live and ready to issue codes automatically as students purchase the courses, add-ons, or classes it's linked to. You can return to the Key Codes section anytime to restock, edit instructions, or review awaiting-code records.
Was this article helpful?
That’s Great!
Thank you for your feedback
Sorry! We couldn't be helpful
Thank you for your feedback
Feedback sent
We appreciate your effort and will try to fix the article