Jobs is the built-in staffing marketplace in CPR Enroll+. Training organizations post the instructor coverage they need; instructors browse those postings and apply, bid, or take an instant-hire slot. This article covers both sides — posting a job and applying to one.
Step 1: Open the Jobs Board
- From the sidebar, go to Grow > Jobs.
- The heading summarizes where things stand — how many jobs are open, how many applications are awaiting award, and how many have been awarded.
- Two tabs sit below it: Board, the postings themselves, and Payments, the money side of awarded jobs.
- Use the search box to find a job or an instructor by name, and the All / Open / Applied / Awarded filters to narrow the list.
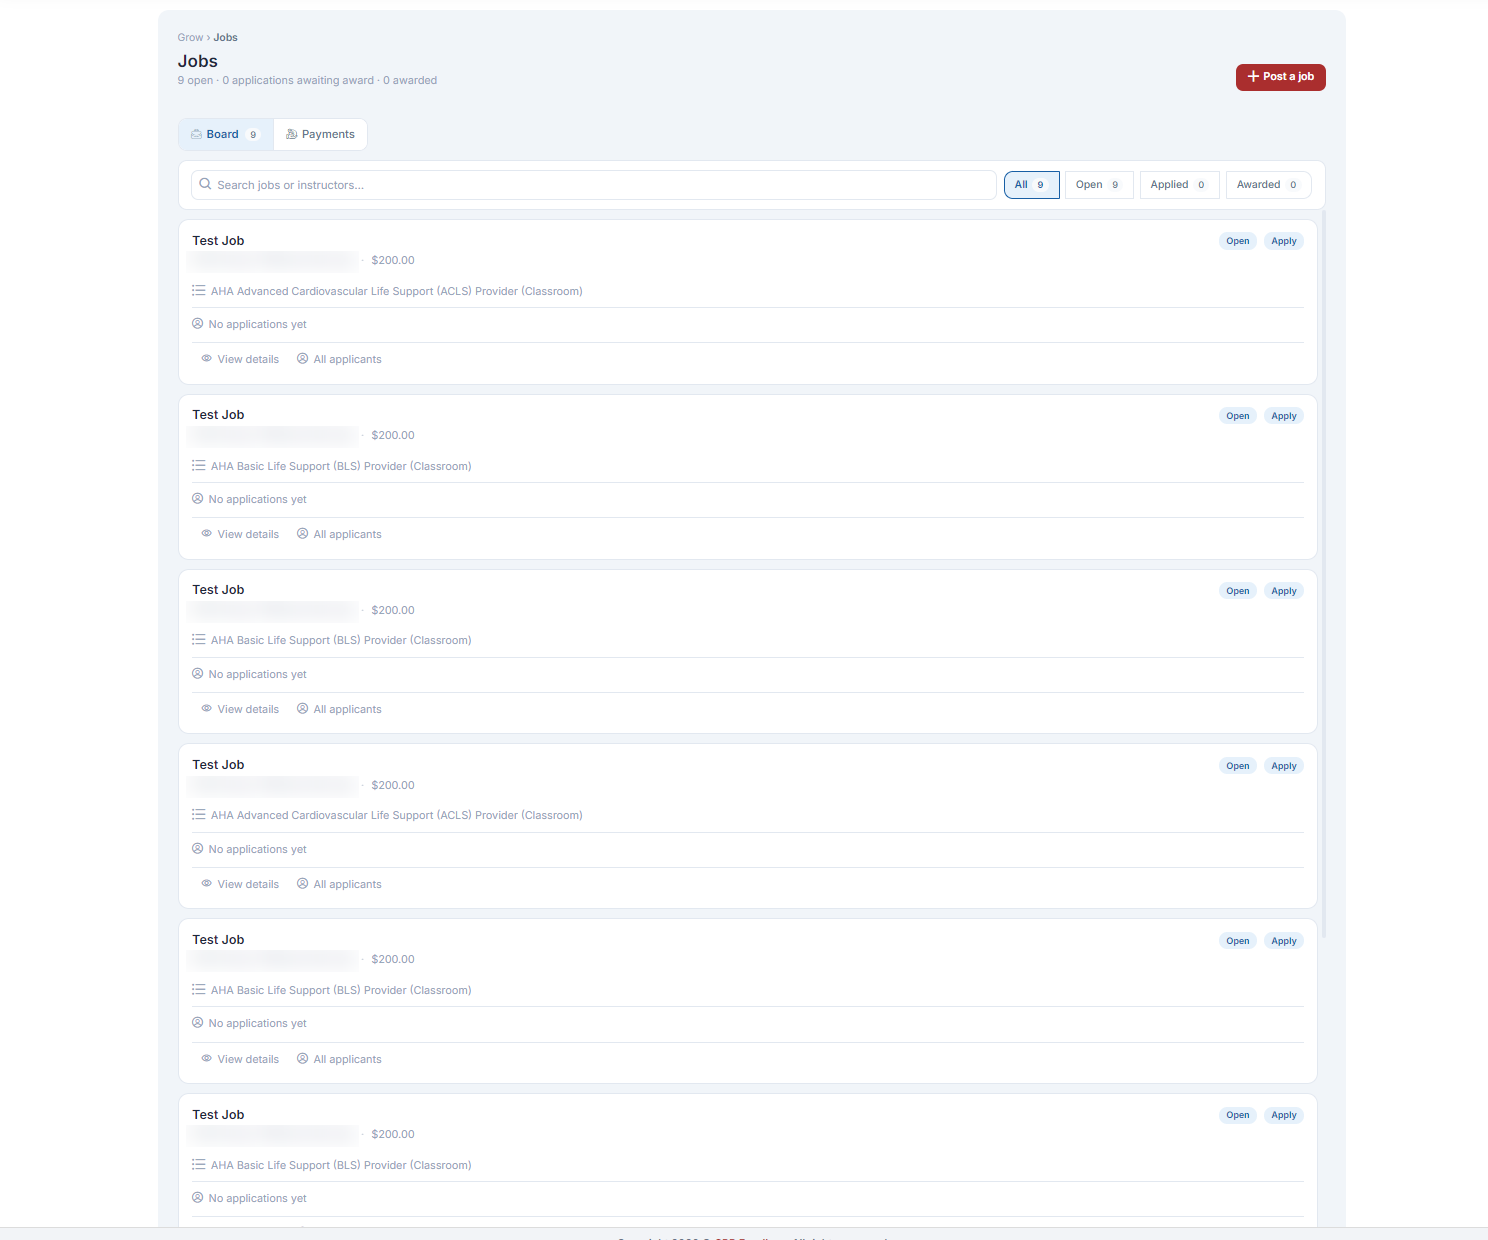
Each posting is a card showing the job name, the class it covers, the pay, and how many instructors have applied. View details opens the full posting; All applicants opens the list of people who have responded.
Step 2: Post a Job
Click + Post a job in the top right.
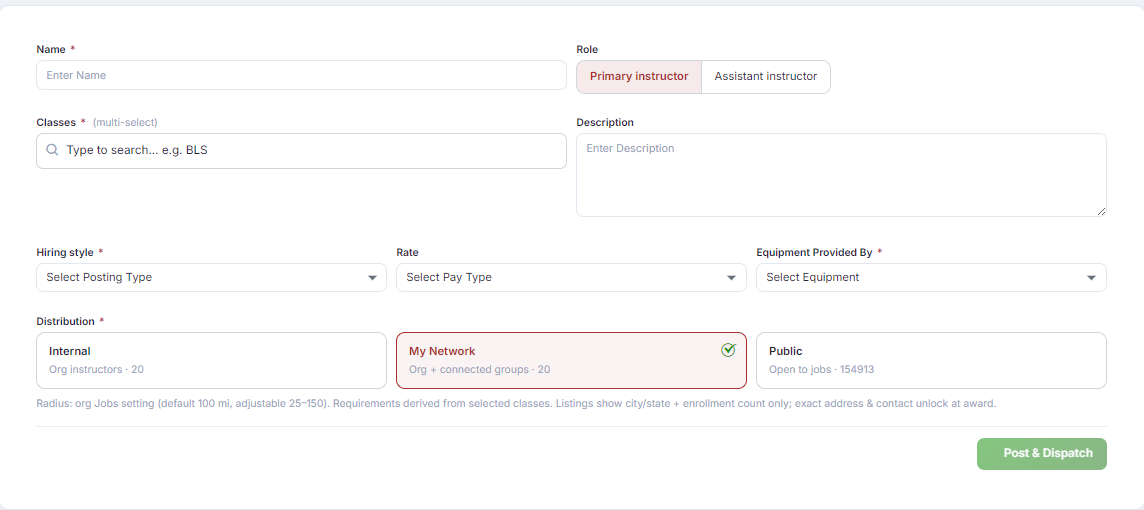
- Name (required) — a clear job title, for example BLS Instructor — Houston, TX — June 15.
- Role — Primary instructor or Assistant instructor.
- Classes (required) — a multi-select search field. Type a course name and pick every class this posting should cover.
- Description — role expectations, special requirements, anything an applicant should know up front.
- Hiring style (required) — how the job is filled: instructors bid, instructors apply, or the job is an instant hire that the first qualified instructor can take.
- Rate — the pay type: by class, by hour, or by student.
- Equipment Provided By (required) — who supplies the training equipment.
- Distribution (required) — who sees the posting. See below.
Choosing a Distribution Tier
Distribution is three cards, and each one shows the size of the audience it reaches:
- Internal — only instructors who belong to your own organization.
- My Network — your organization plus every group you are connected to.
- Public — open to the whole CPR Enroll+ jobs network.
When the form is complete, click Post & Dispatch. The posting goes live to the audience you chose.
Step 3: Review Applicants and Award the Job
- As instructors respond, the application count on the card goes up and the job appears under the Applied filter.
- Click All applicants on the card to review who has responded.
- Award the job to the instructor you want. The posting moves to Awarded, and the full class address and contact details are released to that instructor.
- Track the payout for the awarded job on the Payments tab.
Step 4: Apply to a Job (Instructor View)
- From the sidebar, go to Grow > Jobs.
- Browse the postings and use the search box and status filters to narrow them down.
- Click View details on a posting to see the full picture: job name, class, job type, job post type, who provides the equipment, the pay rate type, and the job price.
- Respond according to the posting type — Apply on an apply posting, Submit Bid on a bid posting, or take the slot directly on an instant-hire posting.
Best Practices
- Start with Internal. If your own instructors can cover it, you keep the class in-house and skip the vetting.
- Move to My Network before going Public — connected groups are people you already have a relationship with.
- Put the date, discipline and city in the job name. It is the first and sometimes only thing an instructor reads.
- Select every class the posting covers. Requirements are derived from those classes, so an incomplete selection can let under-qualified instructors apply.
- Award promptly. Instructors hold dates open while they wait, and the address does not reach them until you do.
Was this article helpful?
That’s Great!
Thank you for your feedback
Sorry! We couldn't be helpful
Thank you for your feedback
Feedback sent
We appreciate your effort and will try to fix the article