CPR Enroll+ gives you precise control over the visibility of every class you schedule. Understanding the three visibility states ensures the right students can find and register for your classes at the right time.
Before You Begin
Determine whether your class is open to the general public, restricted to a specific corporate group, or posted in advance before dates are set.
Know which class type you are setting up (note that Private and Post UnScheduled options are not available for the Online class type).
Visibility Overview
Step-by-Step Instructions
Step 1: Access Visibility Settings
Go to Classes in the sidebar.
Click + to create a new class, or click ⋮ > Edit on an existing class.
In the Listing Settings section of the class form, find the visibility options.
Step 2: Configure Public Classes
Public is the default state for new classes. A public class:
Appears on your Layout Based View, List View, and Calendar View registration pages.
Is included in embedded registration widgets on your website.
Displays available seat count (if Show Available Seats Publicly is ON).
Allows students to self-enroll and pay online at any time (subject to registration deadlines).
Step 3: Configure Private Classes
In the Listing Settings section, toggle Private Class to ON.
Click Save.
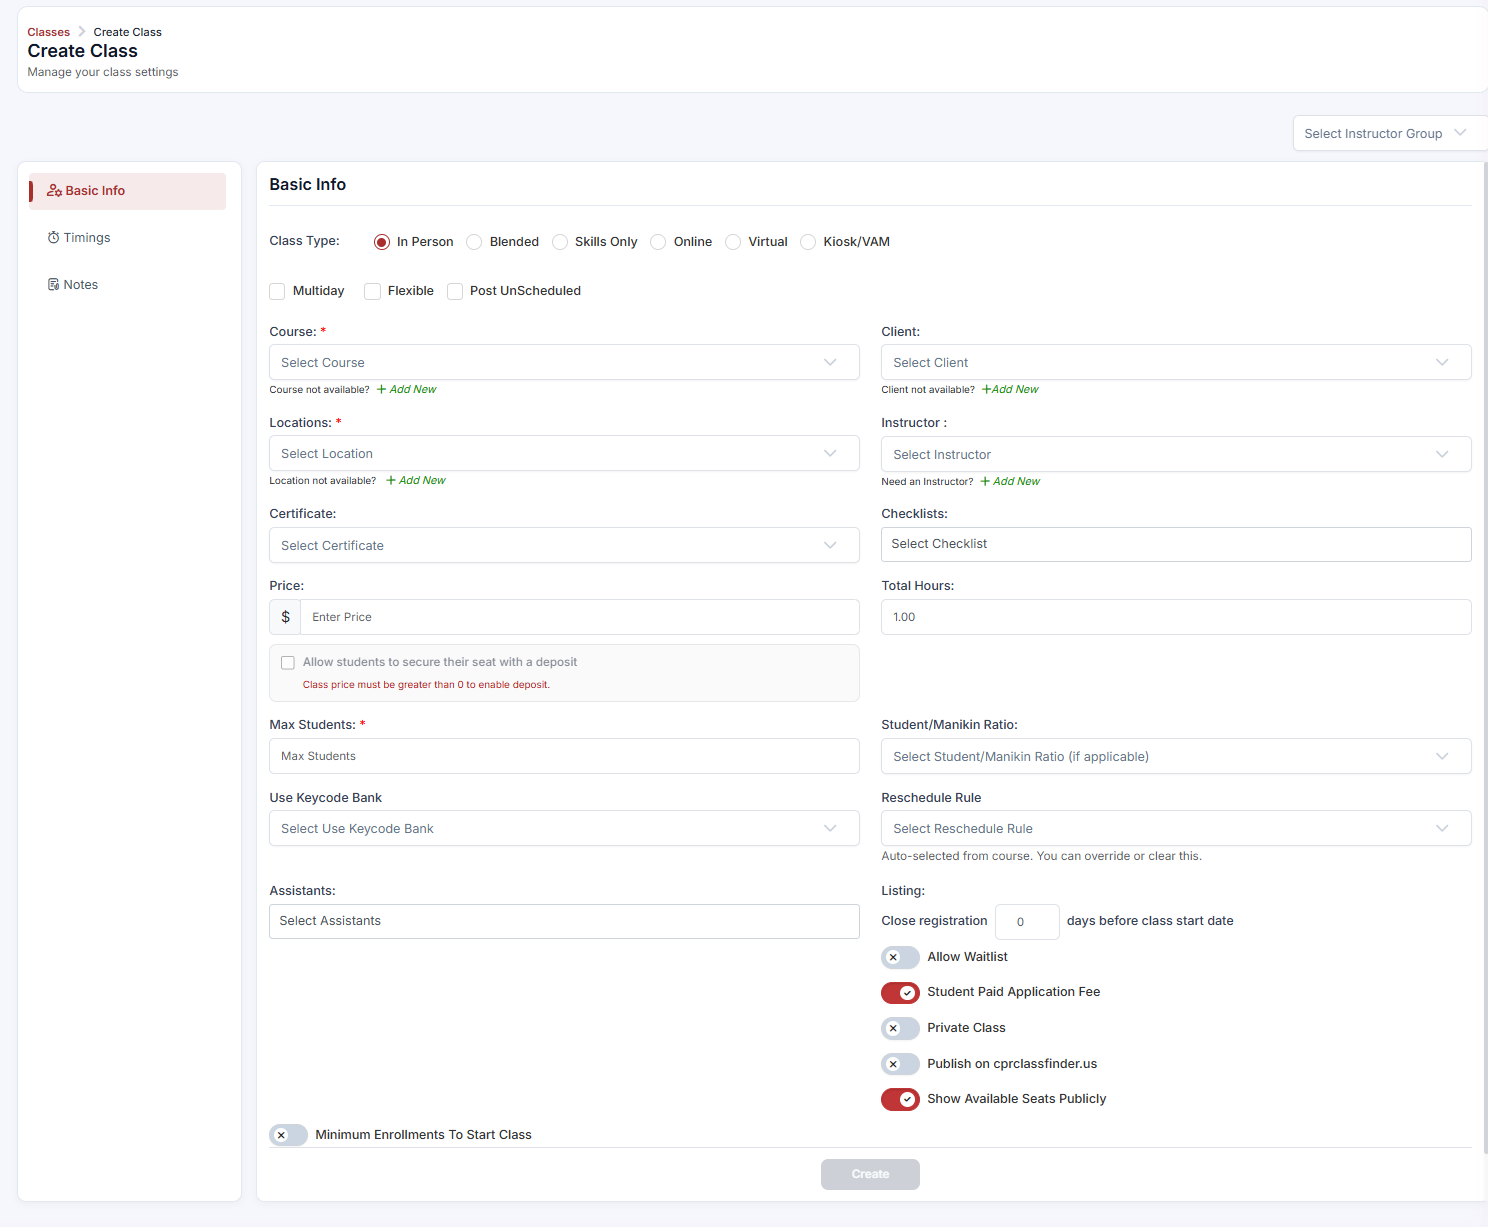
A private class does NOT appear on any public registration page. Enrolling students requires admin enrollment via Enrollments > Quick Add or Add Student, or sharing a direct registration link via Classes > ⋮ > Share Registration.
✔ Corporate group classes: Private classes are ideal for corporate on-site training. Enroll employees manually from a roster, or share the direct class link with the HR coordinator to distribute internally. No one else can find or register for the class.
Step 4: Configure Post UnScheduled Classes
In the class form, check the Post UnScheduled checkbox.
Click Save.
An unscheduled class appears publicly on your registration page with no specific date or time, allowing students to enroll and pay in advance. These generate records in your Enrollments > Unscheduled tab, ready to be assigned to specific class dates once scheduling is confirmed.
Best Practices
Use Private classes for client-specific corporate sessions so general public registrants cannot take reserved seats.
Use Post UnScheduled to capture customer demand and payments before committing to specific calendar dates.
Keep in mind that Private and Post UnScheduled settings cannot be applied to the Online class type.
Frequently Asked Questions
✔ You're all set. You now know how to configure public, private, and unscheduled visibility settings for all your class offerings.
Was this article helpful?
That’s Great!
Thank you for your feedback
Sorry! We couldn't be helpful
Thank you for your feedback
Feedback sent
We appreciate your effort and will try to fix the article