Overview
Promo codes let you offer discounts to your students across invoices, class registrations, and store checkout. You can create a single reusable code for general promotions, or generate a batch of unique, single-use vouchers for more controlled campaigns, such as employer partnerships or event giveaways.
This article walks you through creating both types of promo codes from start to finish.
Before You Begin
Before creating a promo code, decide the following:
- Which type of code you need: a single reusable code or a batch of unique vouchers.
- What the discount should apply to: the entire order or specific courses and products.
- Whether the promotion should have an expiration date.
- Whether the discount should also apply to add-ons and shipping charges.
Step-by-Step Instructions
Step 1: Open Your Setup Guide
From the main navigation menu:
- Click Settings.
- Select Setup Guide.
You will arrive at Your Setup Guide, where you can complete the essential configuration tasks needed to operate your CPR Enroll account.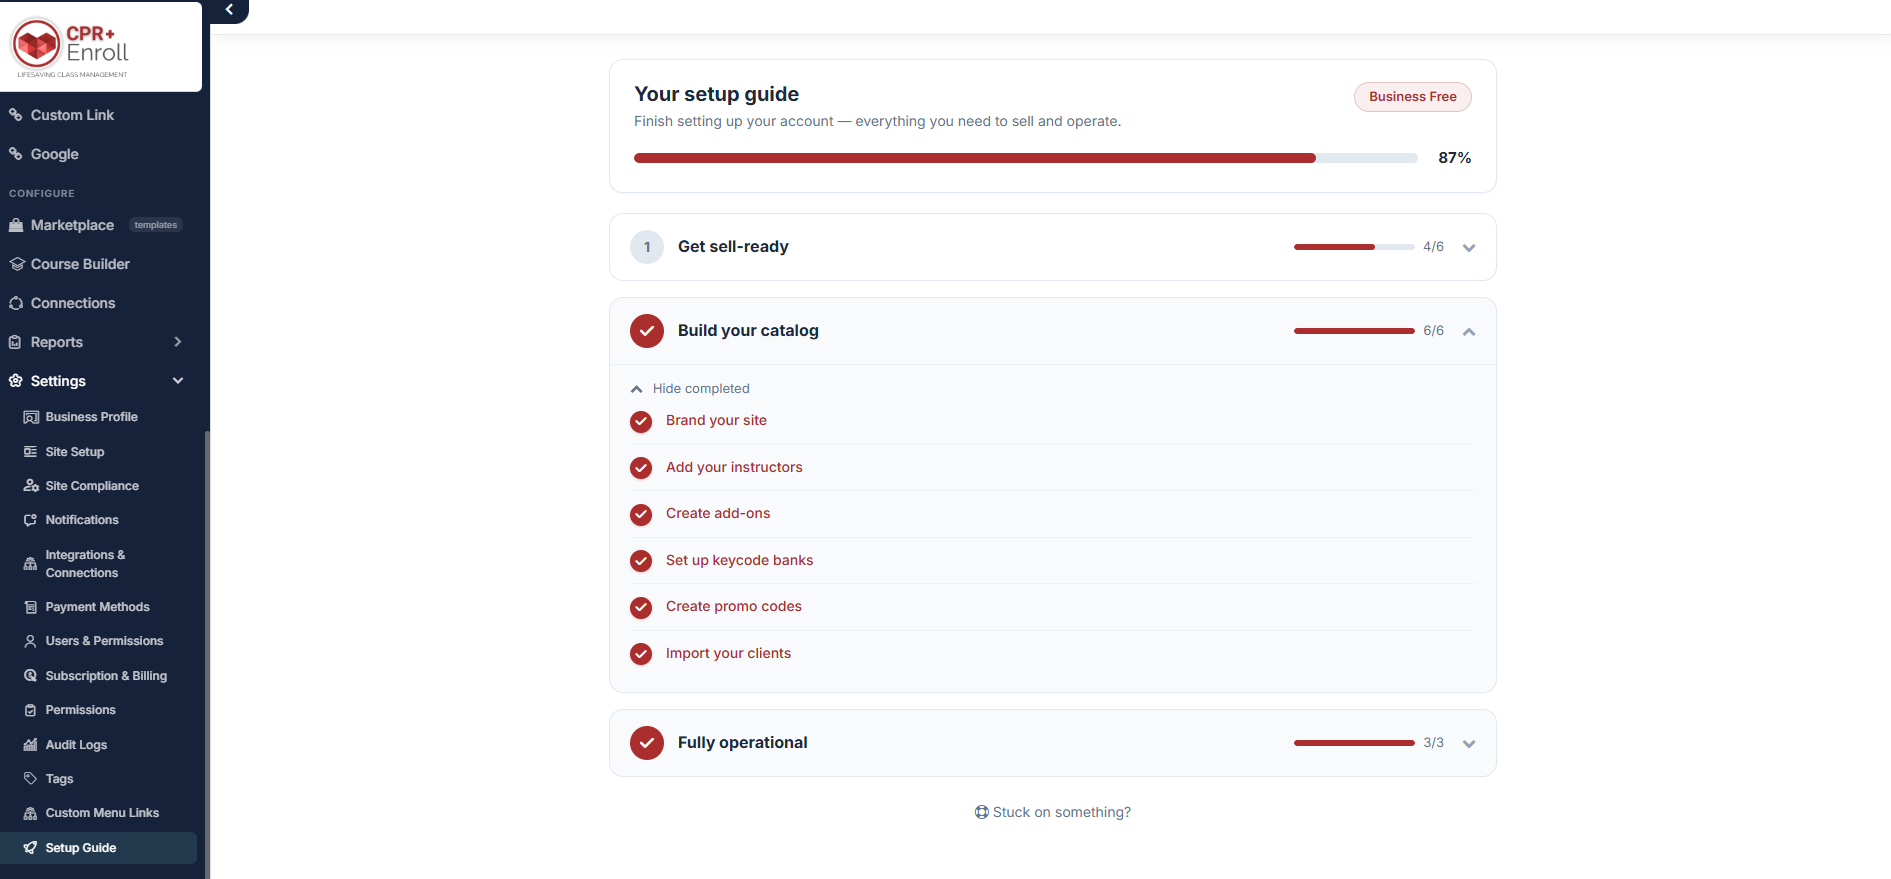
Step 2: Navigate to Promo Codes
Within Your Setup Guide:
- Click Build Your Catalog.
- Under the catalog setup options, select Create Promo Codes.
You will be taken to the Payments window, where all coupons and voucher batches are managed.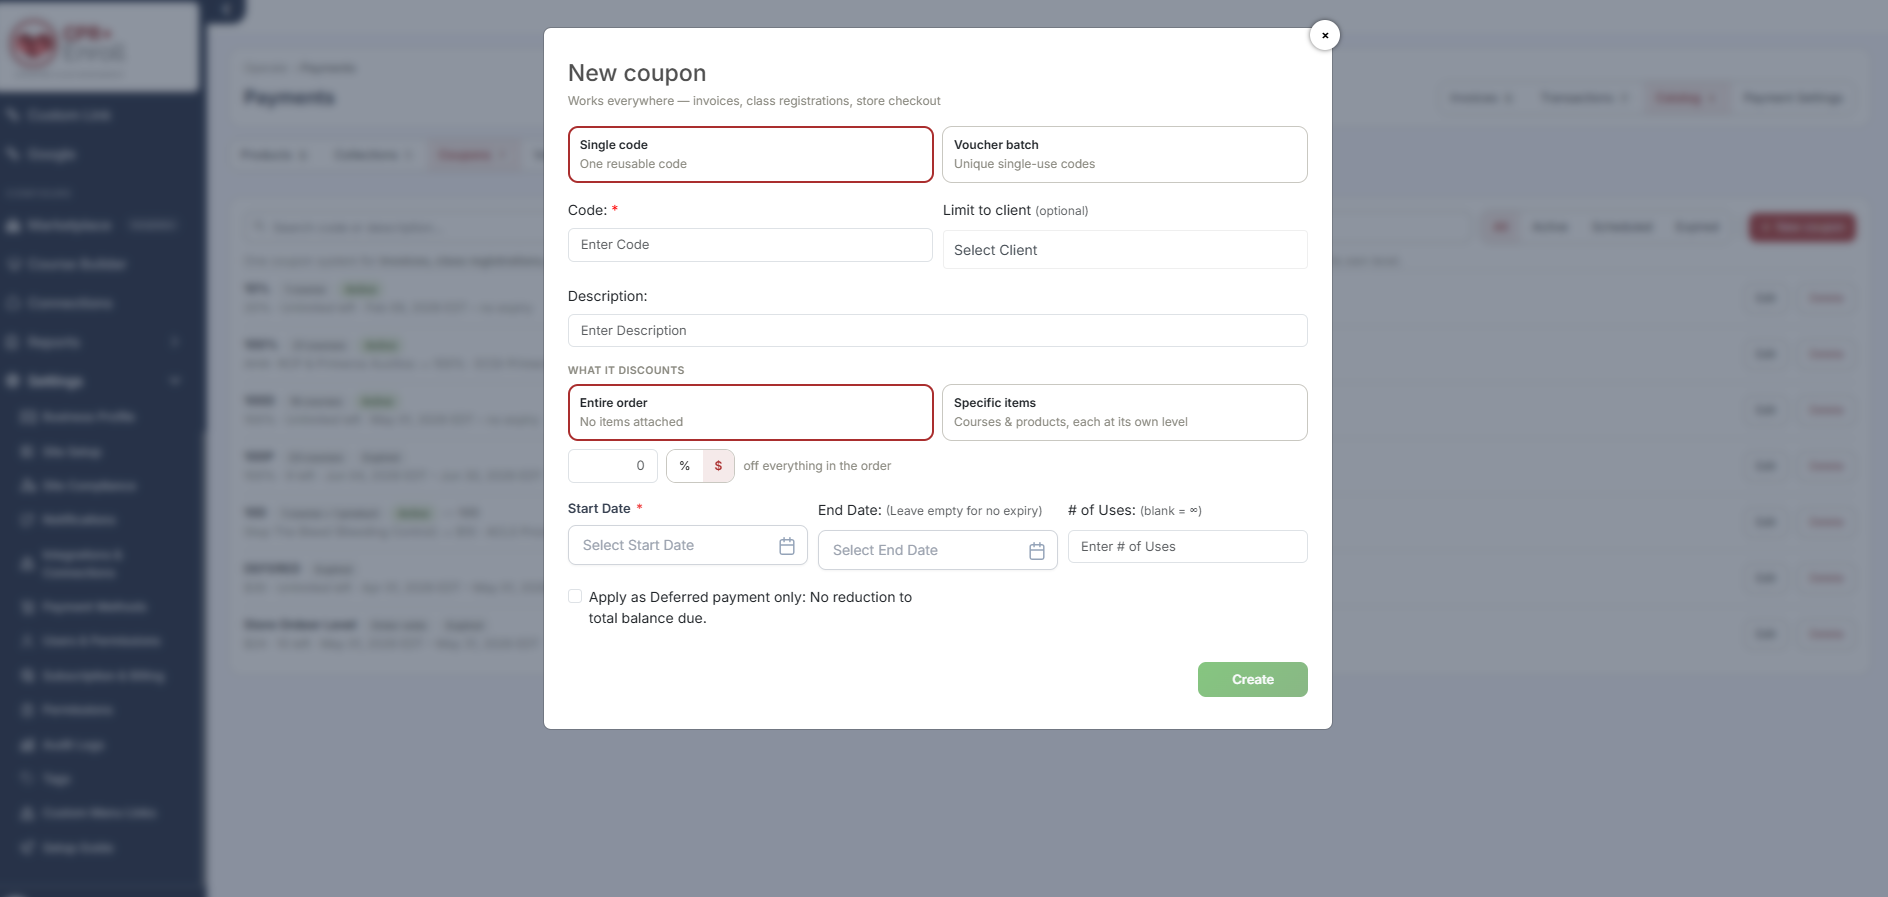
Step 3: Create a New Coupon
Click + New Coupon.
The New Coupon window opens. Coupons created here can be used throughout CPR Enroll, including:
- Class registrations
- Invoices
- Store checkout
Choose one of the available coupon types:
- Single Code – One reusable promotional code
- Voucher Batch – Multiple unique, single-use voucher codes
Option A: Creating a Single Code
Use a Single Code when you want multiple users to share the same promotional code.
Examples include:
- SAVE10
- EARLYBIRD
- SUMMER25
1. Enter the Coupon Code
Type the code your students will enter during checkout.
2. Select a Client (Optional)
If the promotion is intended for a specific client or corporate account, select the client from the dropdown list.
Leave this blank if the code is available to everyone.
3. Enter a Description
Provide an internal description to help identify the purpose of the coupon.
Example:
- Summer Promotion
- Corporate Discount
- Staff Appreciation Campaign
This description is for internal reference only and is not visible to students.
4. Choose What the Coupon Discounts
You have two options.
Entire Order
Select this option if the coupon should discount the entire purchase.
No items need to be attached.
Specific Items
Select this option if the coupon should apply only to selected courses or products.
Click + Add All Courses or manually choose the items you want included.
Each attached item can have its own individual discount amount.
For example:
- CPR Course – 10% off
- Student Manual – 5% off
Items that are not attached to the coupon will not receive a discount.
5. Set the Promotion Dates
Choose the Start Date.
Optionally set an End Date.
Leave the end date blank if you want the coupon to remain active indefinitely.
6. Set the Usage Limit
Enter the maximum number of times the coupon can be redeemed.
Leave the field blank if you want unlimited use.
7. Configure Optional Settings
You may enable either or both of the following options:
Apply Discount to Add-ons & Shipping
Enable this if the discount should also reduce the price of add-ons or shipping charges.
Apply as Deferred Payment Only
Enable this when the coupon should defer part of the payment rather than immediately reducing the amount due.
8. Create the Coupon
Review your settings and click Create.
Your Single Code is now ready to use.
Option B: Creating a Voucher Batch
Choose Voucher Batch when you need multiple unique, one-time-use voucher codes.
This option is commonly used for:
- Employer partnerships
- Group purchases
- Conference giveaways
- Corporate training programs
1. Enter a Voucher Description
Provide an internal description for the batch.
Example:
- ABC Company Employee Vouchers
- Health Fair Giveaway
- Summer Promotion Batch
2. Set the Validity Period
Select the Start Date.
Optionally specify an End Date.
Leave the end date blank if the vouchers should not expire.
3. Configure the Discount
Choose the discount type:
- Dollars Off
- Percentage Off
Then enter the discount amount or percentage.
4. Choose the Number of Voucher Codes
Specify how many unique voucher codes should be generated.
You can generate between 1 and 1,000 codes in a single batch.
Each voucher generated can be redeemed only once.
5. Link the Voucher Batch
Choose the class that the vouchers apply to.
Optionally link the batch to a specific client if the vouchers are intended for a particular organization.
6. Configure Optional Settings
You may enable:
Apply Discount to Add-ons & Shipping
Allows the voucher to discount shipping charges and add-ons.
Apply as Deferred Payment Only
Defers part of the payment instead of immediately reducing the amount due.
7. Generate the Voucher Batch
Click Generate Codes.
CPR Enroll creates the requested number of unique voucher codes, ready for distribution.
Step 4: Finalise
Depending on the coupon type:
- Click Create to save a Single Code.
- Click Generate Codes to create a Voucher Batch.
Your promotion is immediately available according to the start date you configured.
Best Practices
- Use short, memorable codes for public promotions, such as SAVE10 or SUMMER25, so students can easily remember and enter them.
- Add expiration dates for seasonal or limited-time offers to prevent promotions from remaining active longer than intended.
- Use Voucher Batches when distributing discounts to a controlled audience, since each voucher can only be redeemed once.
- When using Specific Items, verify that every intended course or product has been attached to the coupon. Items that are not linked will not receive a discount.
Frequently Asked Questions
What's the difference between a Single Code and a Voucher Batch?
A Single Code is one reusable coupon that can be redeemed multiple times, depending on the usage limit you configure.
A Voucher Batch generates multiple unique voucher codes, with each voucher redeemable only once.
Can I limit a promo code to specific courses?
Yes.
For a Single Code, choose Specific Items and attach the courses or products you want discounted.
For a Voucher Batch, select the appropriate Linked Class during setup.
What does "Apply as Deferred Payment Only" mean?
This option applies the promotion without immediately reducing the amount due.
Instead, part of the payment is deferred for collection later according to your payment workflow.
Can a promo code apply to shipping and add-ons?
Yes.
Enable Apply Discount to Add-ons & Shipping during setup if you want the promotion to include shipping charges and add-on items.
You're All Set
Your promo code or voucher batch is now ready to use.
You can return to the Payments window at any time to:
- Review existing coupons
- Generate additional voucher batches
- Edit or deactivate promotions
- Monitor your available discount campaigns
If you experience any issues while creating or managing promo codes, our support team is always happy to help.
Was this article helpful?
That’s Great!
Thank you for your feedback
Sorry! We couldn't be helpful
Thank you for your feedback
Feedback sent
We appreciate your effort and will try to fix the article