
Locations define where your classes take place. Every class that has a physical or virtual meeting place must be linked to a Location record in CPR Enroll+. You can create as many locations as you need — training rooms, partner venues, and virtual meeting links. CPR Enroll+ also includes three special built-in default locations (Client Location, Student Location, and Mobile Location) designed for flexible and on-site training arrangements. See Understanding Client, Student, and Mobile Locations for details on those.
Location Types at a Glance
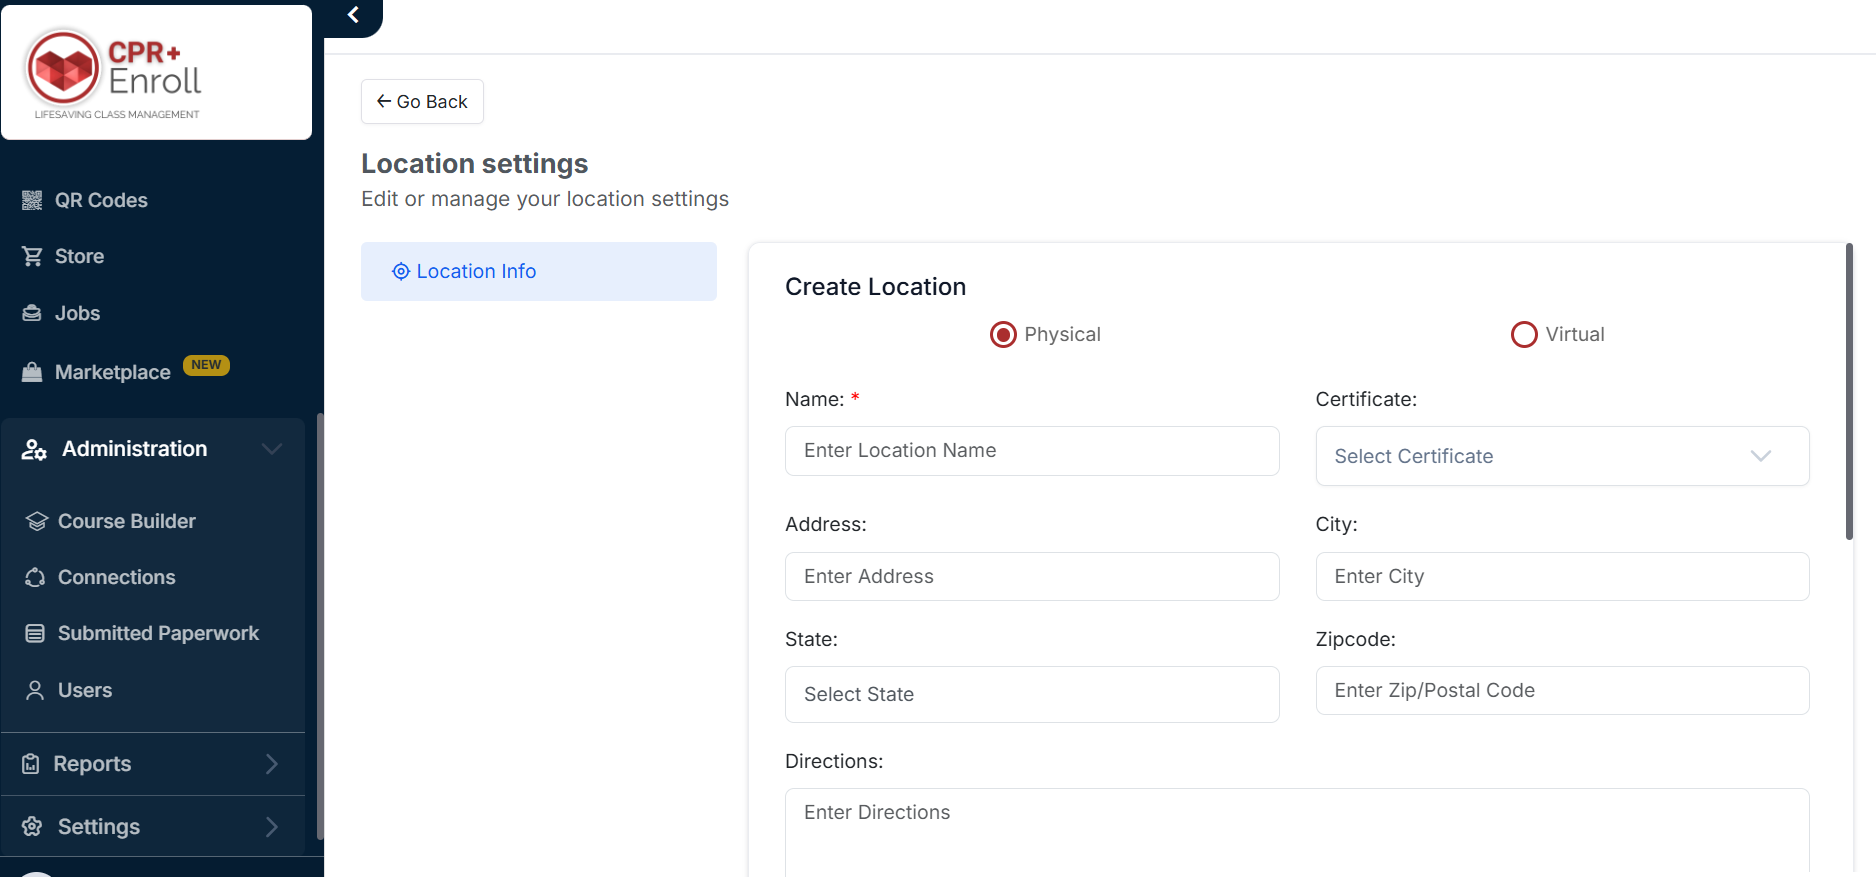
Creating a Physical Location
From the sidebar, go to Administration > Course Builder > Locations (or Launchpad > Locations > Manage).
Click + Create.
Select Physical as the location type.
Enter the Location Name (required).
In the Address field, begin typing the address. Google Maps autocomplete will suggest matching addresses as you type — select one to auto-fill the full validated address with a green checkmark.
If no match is found, toggle to manual entry and fill in Address, City, State (dropdown with all 50 states, DC, territories), and Zip Code separately.
Add Directions using the plain text field — driving directions, parking notes, or entry instructions for students.
Set the Primary Timezone and optionally a Secondary Timezone (useful for locations near a timezone border).
Upload a Location Image (322 × 220 px recommended) to display on your registration page.
Click Save.
Setting Schedule Availability
Define when each location is available for scheduling to prevent accidentally booking classes when the venue is closed.
Click ⋮ > Edit on a location.
Click the Schedule Availability tab in the left sidebar of the edit view.
Check the boxes for each available day of the week.
Set the available time range for each day (default: 8:00 AM – 5:00 PM).
Click + Add Time on any day to add multiple time blocks (e.g., a morning and an evening session).
Click Save.
ℹ Certificate — a dropdown on the Create Location form (currently undocumented). Add a one-line mention.
ℹ Allow for Group Training — a checkbox: “Toggle this ON if you want this location to appear as an option in the Group Training inquiry form.” Add this to the form description.
Was this article helpful?
That’s Great!
Thank you for your feedback
Sorry! We couldn't be helpful
Thank you for your feedback
Feedback sent
We appreciate your effort and will try to fix the article