Users in CPR Enroll+ are the people who have login access to your admin dashboard. This includes administrators, managers, and instructors who need to access and manage your account. This guide covers creating users, assigning roles, and managing access.
Before You Begin
- Decide which role each new user needs — common roles are Admin and Instructor.
- Have the person's email address and any contact details ready.
Step-by-Step Instructions
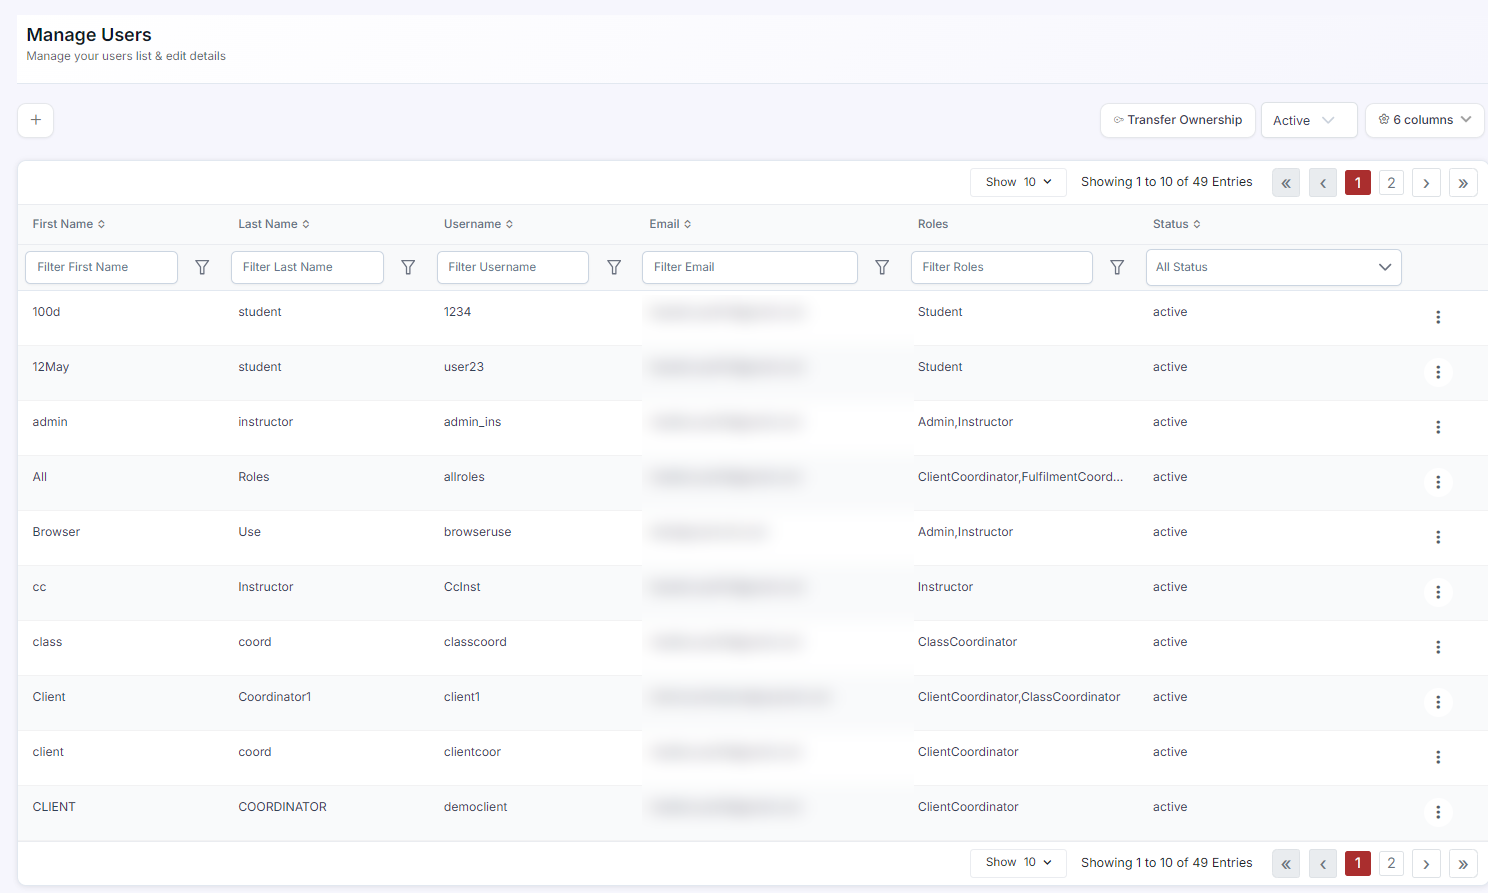
Step 1: View Your Current Users
- From the sidebar, go to Settings> Users & Permissions.
- The Users list shows all accounts with columns for name, email, role, status, and actions.
- Use the Search field to find a specific user by name or email.
Step 2: Create a New User
- Click + Add New.
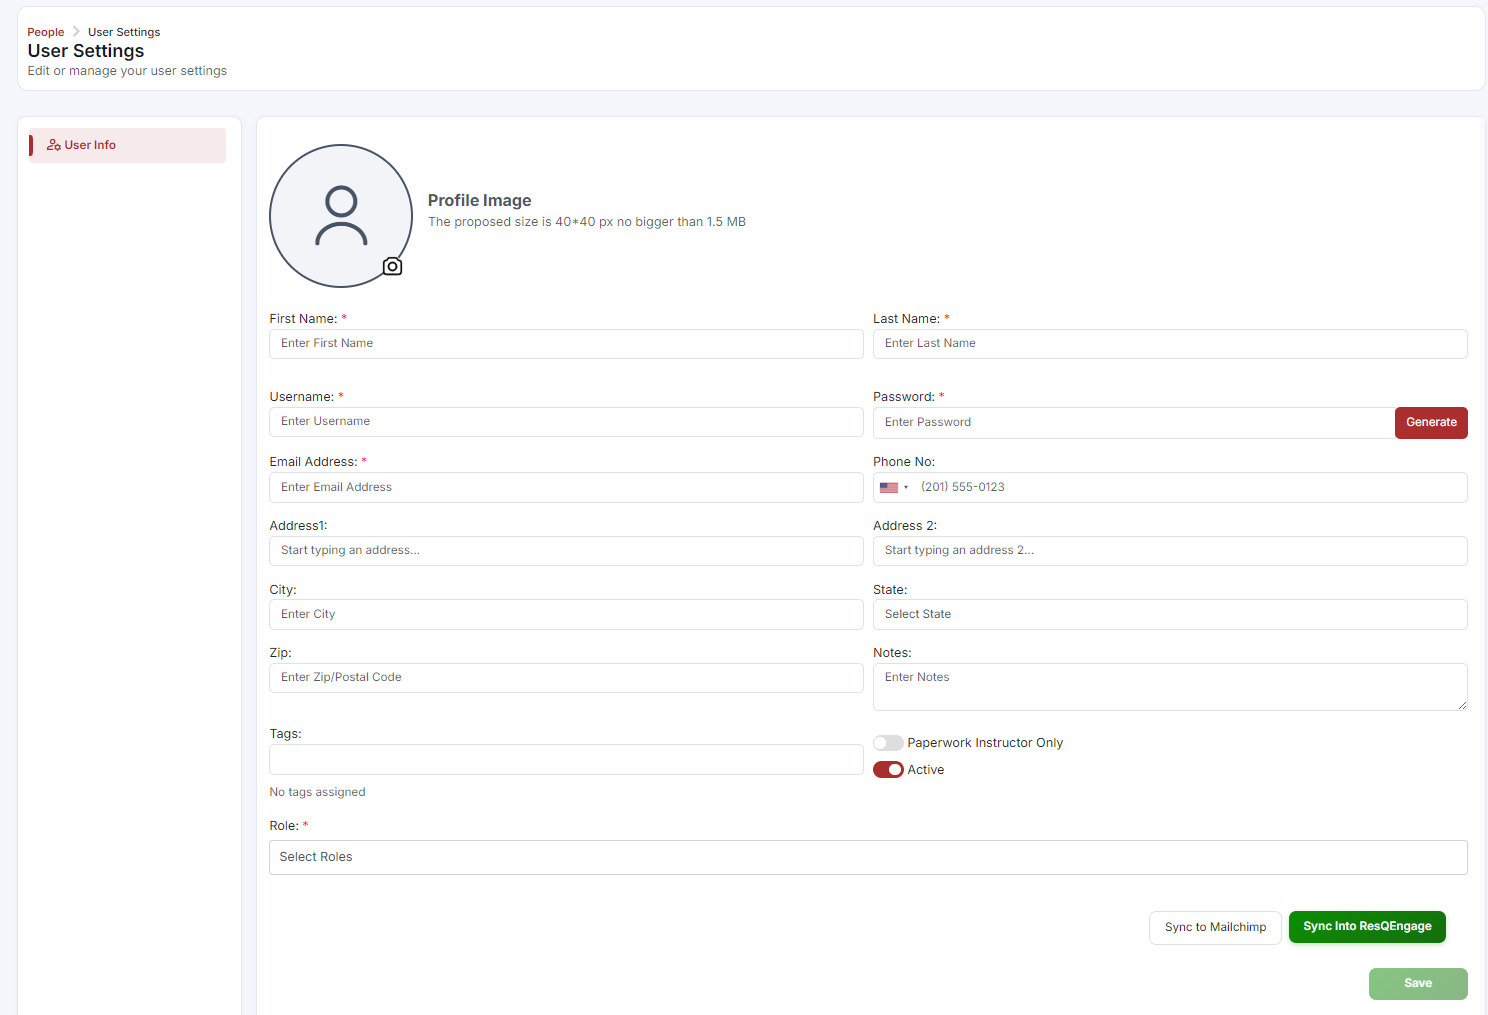
- Fill in the required fields: First Name, Last Name, Username, Password, and Email.
- Add optional fields: Phone, Address, City, State, Zip, Notes, and Tags.
- Select one or more Roles from the Role dropdown — common roles are Admin and Instructor.
- Toggle Active ON (default) to activate the account immediately.
- Toggle any additional settings as needed (Paperwork Instructor Only, etc.).
- Click Save.
Step 3: Send a Confirmation Email to a New User
- After creating the user, find them in the Users list.
- Click ⋮ > Resend Confirmation Email to send them their account confirmation.
- For instructors, use ⋮ > Account Create Email to send them their login credentials.
Step 4: Edit a User's Role
- Click ⋮ > Edit on the user row.
- In the Role field, add or remove roles as needed.
- Click Save.
Step 5: Reset a User's Password
- Click ⋮ > Reset Password on the user row.
- The system sends a password reset link to the user's registered email address.
Step 6: Deactivate a User
- Click ⋮ > Edit on the user row.
- Toggle the Active switch to OFF.
- Click Save. The user can no longer log in, but their records are preserved.
✔ Instructors as users. Instructors can have two types of access: records-only (they appear in dropdowns but have no login) or portal access (they can log in to the dashboard). To give an instructor portal access, toggle Create Portal Access in their instructor profile under People > Instructors.
Best Practices
- Assign the minimum role needed for each user's job — not everyone needs Admin access.
- Deactivate accounts instead of deleting them so historical records stay intact.
- Use Account Create Email for instructors and Resend Confirmation Email for other staff, so each gets the right onboarding flow.
- Only grant Create Portal Access to instructors who genuinely need to log in to the dashboard.
Frequently Asked Questions
| Question | Answer |
|---|---|
| What's the difference between a records-only instructor and one with portal access? | A records-only instructor appears in dropdowns but has no login; toggling Create Portal Access lets them log in to the dashboard. |
| Does deactivating a user delete their data? | No. Deactivating toggles Active to OFF so the user can no longer log in, but their records are preserved. |
| How do I send an instructor their login credentials? | Use ⋮ > Account Create Email on their row in People > Instructors. |
✔ You're all set. Your users are created, roles are assigned, and everyone has the access they need to manage your account.
Was this article helpful?
That’s Great!
Thank you for your feedback
Sorry! We couldn't be helpful
Thank you for your feedback
Feedback sent
We appreciate your effort and will try to fix the article