If you issue invoices regularly for the same services — class seat pricing, instructor fees, equipment charges — creating reusable line items in CPR Enroll+ saves significant time. Instead of typing the same descriptions and rates on every invoice, you select them from a dropdown. This article explains how to create and manage reusable items.
Creating a Reusable Line Item
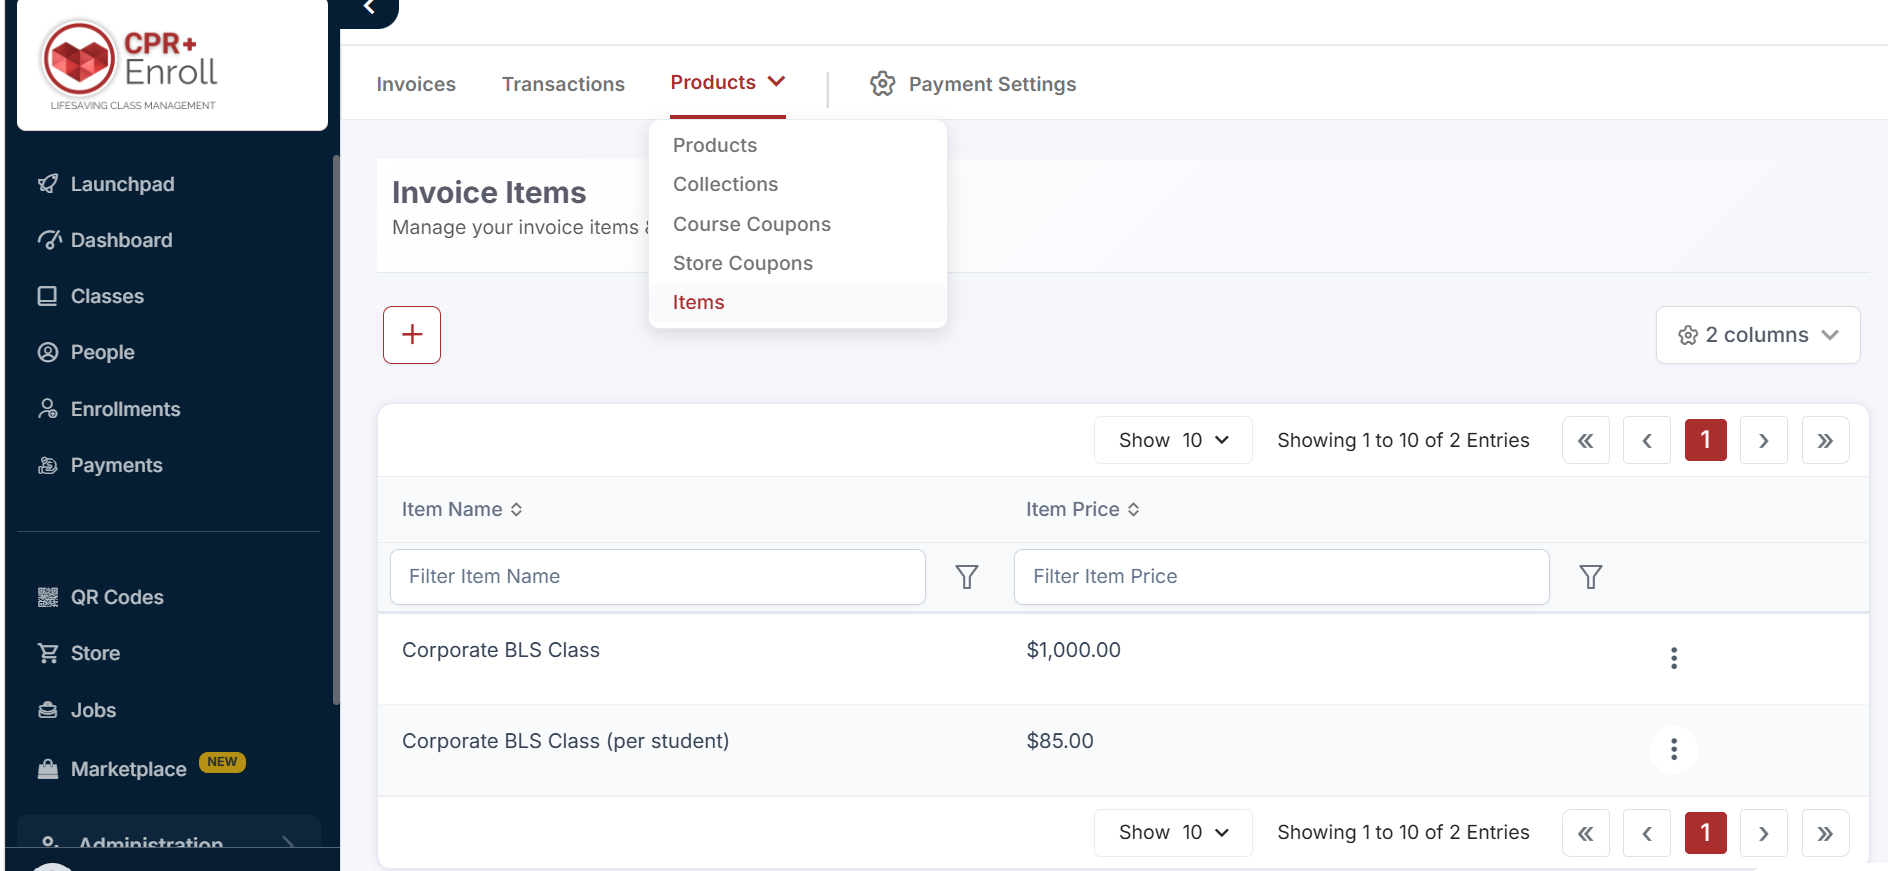
From the sidebar, go to Payments > Products and select Items from the dropdown.
Click + Create.
Enter the Item Name (e.g., "BLS Provider — Per Seat").
Enter the Default Rate (e.g., 60.00 for $60.00).
Click Save.
Using Reusable Items on an Invoice
When creating or editing an invoice (Payments > Invoices > + Create), scroll to the Items section.
Click the Items dropdown — your saved items appear in the list.
Select an item. The name and default rate auto-fill into the line item.
Adjust the Quantity or Rate for this specific invoice if needed — the saved default is not changed.
Add additional items or custom line items as needed.
Was this article helpful?
That’s Great!
Thank you for your feedback
Sorry! We couldn't be helpful
Thank you for your feedback
Feedback sent
We appreciate your effort and will try to fix the article