Instructors are the people who bring your classes to life. Adding them to your roster lets you assign them to scheduled classes, keep their contact information organized, and optionally sync their details to your marketing or communication tools.
This article walks you through adding an instructor from start to finish.
Before You Begin
Before adding an instructor, have the following ready:
- Instructor's full name and email address.
- A profile photo, sized according to the recommendation below.
- Contact and address details, if you plan to keep detailed records for scheduling or payroll purposes.
- A decision on whether this instructor should have a login account to access the platform.
- A decision on whether the instructor is paperwork-only (used for certification records but not actively scheduled to teach).
Step-by-Step Instructions
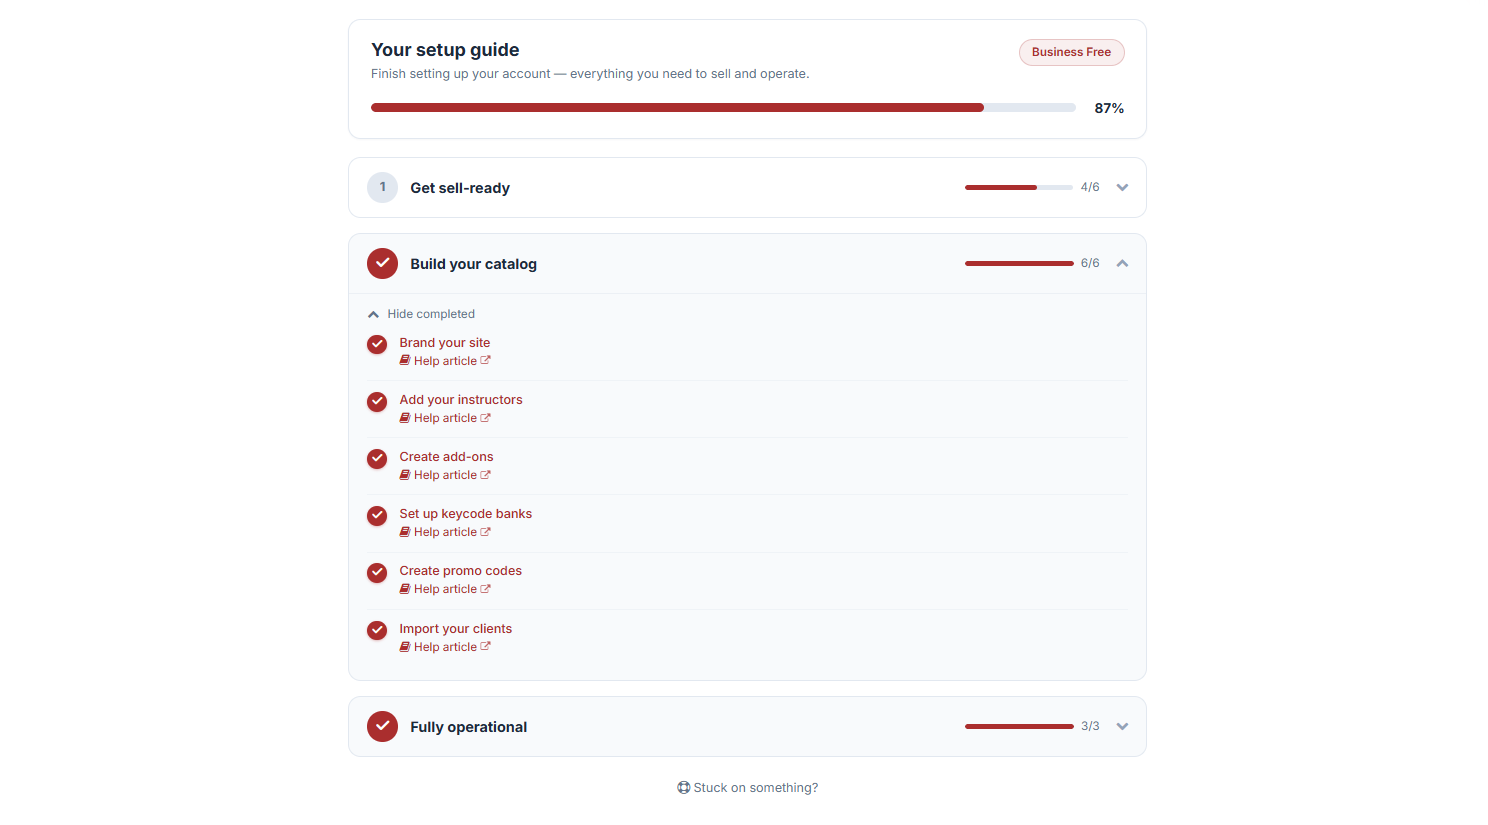
Step 1: Open Your Setup Guide
- From the opening screen, click Settings on the left menu.
- Click Setup Guide.
You'll land on Your Setup Guide, where you can finish setting up your account with everything you need to sell and operate.
Step 2: Navigate to Instructors
- Click Build Your Catalog. Here you'll find six different setups you can complete to build out your catalog.
- Select Add Your Instructors.
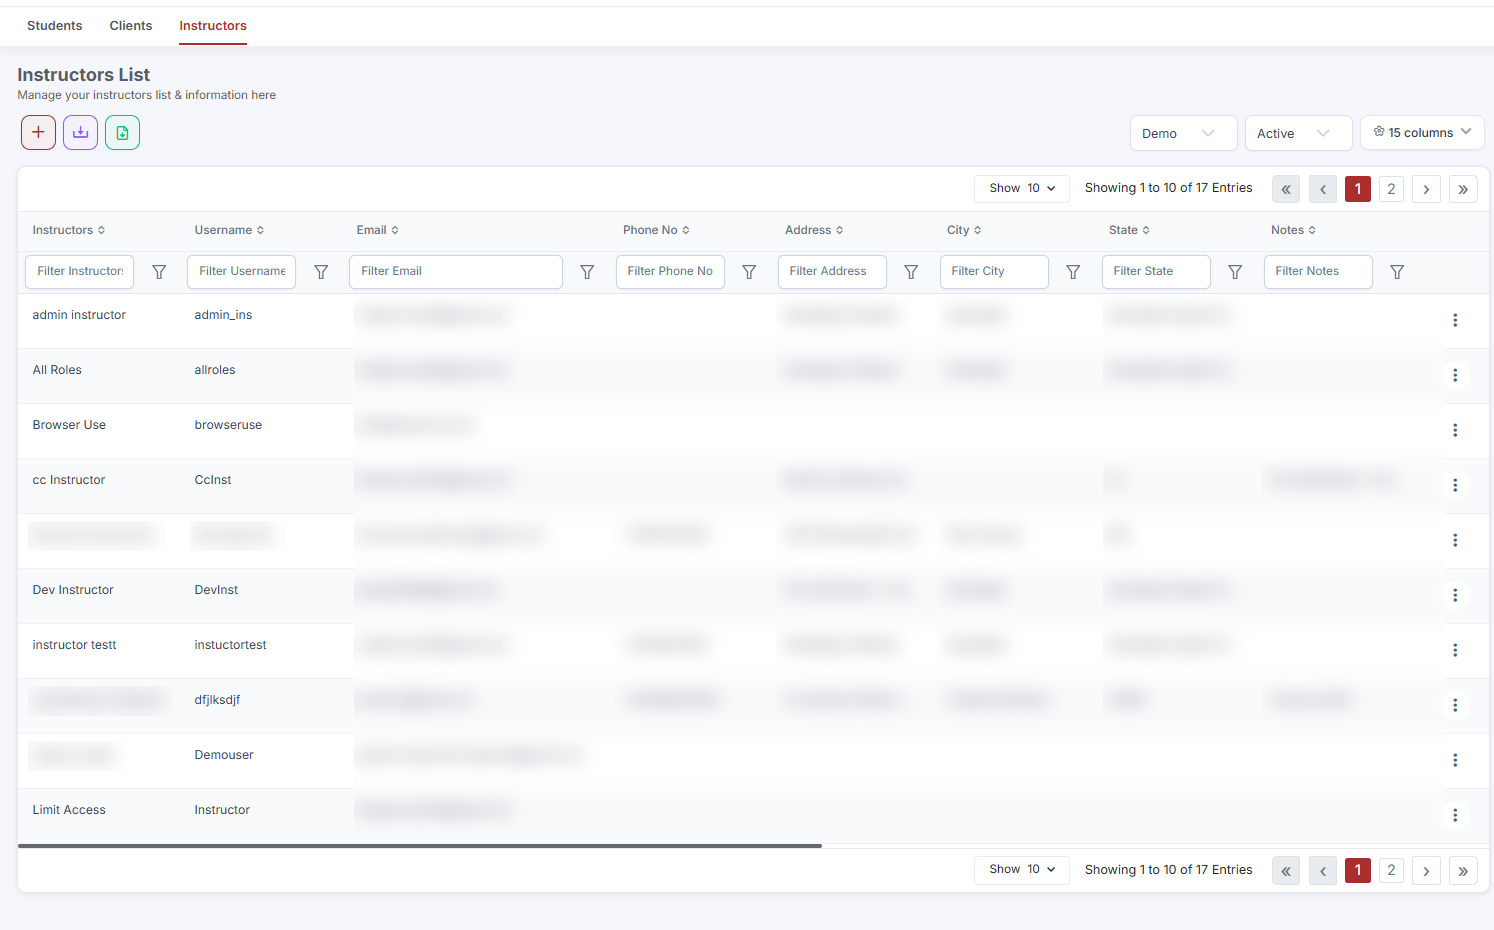
This directs you to the Instructors List page, where you can manage your instructors and their information.
Step 3: Add a New Instructor
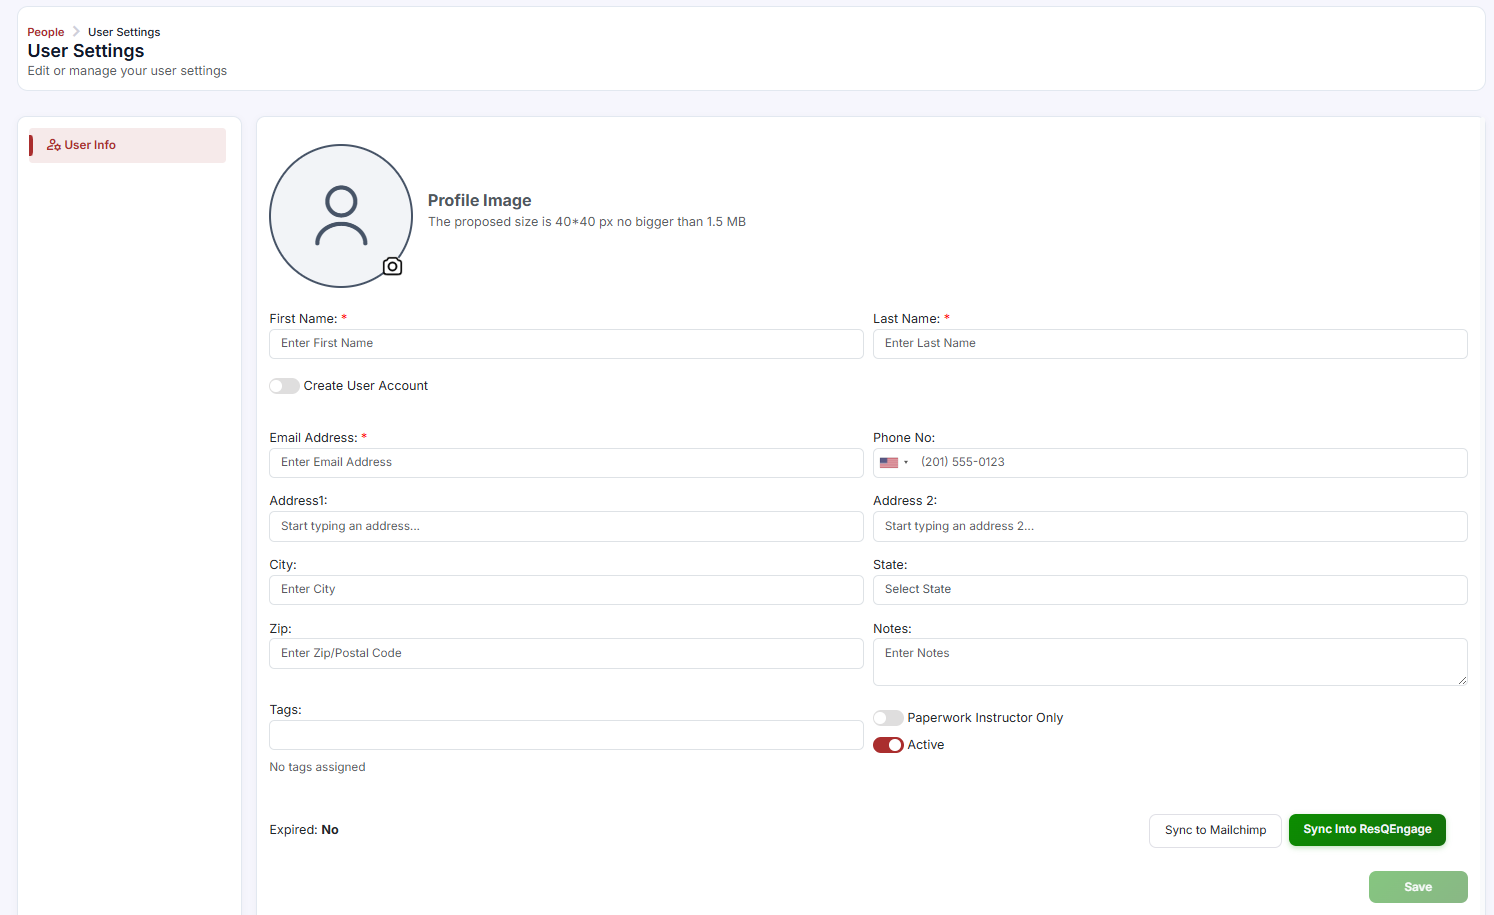
Click + Add Instructor. You'll be directed to the User Settings page, where you can edit or manage the instructor's user settings.
Step 4: Fill Out Instructor Details
- Profile Image — recommended size: 40 × 40px, no larger than 1.5MB.
- First Name (required)
- Last Name (required)
- Create User Account — toggle on to create a login for this instructor.
- Email Address (required)
- Phone Number
- Address Line 1
- Address Line 2
- City
- State
- Zip Code
- Notes
- Tags
Step 5: Configure Optional Settings
- Paperwork Instructor Only — toggle this on if the instructor will only be used for paperwork/certification purposes, not scheduled to teach classes.
- Sync to Mailchimp or ResQEngage — optionally sync this instructor's data to either platform.
Step 6: Save the Instructor
Once everything looks good, click Save to finalize.
Best Practices
- Use consistent tagging across your instructor roster (e.g., by discipline or region) to make filtering and assignment easier as your team grows.
- Only enable Create User Account for instructors who need platform access, since this grants them a login to the system.
- Keep instructor contact details current, especially phone and email, since these may be used for scheduling communications or emergency contact during classes.
- Use Paperwork Instructor Only for retired or non-teaching staff whose certification history still needs to be tracked, without cluttering your active scheduling list.
Frequently Asked Questions
| Question | Answer |
|---|---|
| Does every instructor need a login account? | No. Only enable Create User Account for instructors who need to log into the platform directly. Others can remain as records without login access. |
| What does Paperwork Instructor Only mean? | This designates an instructor who is tracked in the system for certification or documentation purposes but is not intended to be scheduled for live classes. |
| Can I sync instructor data to my email marketing tool? | Yes. You can optionally sync instructor data to Mailchimp or ResQEngage during setup. |
| Can I edit an instructor's details later? | Yes. Return to the Instructors List anytime to update contact information, tags, notes, or account settings. |
✔ You're all set. Your instructor is now added to your roster and ready to be assigned to classes. You can return to the Instructors List anytime to edit their details.
Was this article helpful?
That’s Great!
Thank you for your feedback
Sorry! We couldn't be helpful
Thank you for your feedback
Feedback sent
We appreciate your effort and will try to fix the article