Locations tell students exactly where their class will take place. Whether you operate out of a single training center or run classes across multiple sites, setting up your locations accurately ensures students can find you without confusion — and gives you the option to offer group training inquiries at any location you choose.
This article walks you through creating and configuring a location from start to finish.
Before You Begin
Before adding a location, have the following ready:
- Full address details, including street address, city, state, and zip/postal code.
- Directions or parking notes that would help a student unfamiliar with the area.
- The correct time zone for that location, especially important if you operate across multiple time zones.
- A location image, if you'd like to visually help students recognize the site.
- A decision on whether this location should be available for Group Training inquiries.
Step-by-Step Instructions
Step 1: Open Your Setup Guide
- From the opening screen, click Settings on the left menu.
- Click Setup Guide.
You'll land on Your Setup Guide, where you can finish setting up your account with everything you need to sell and operate.
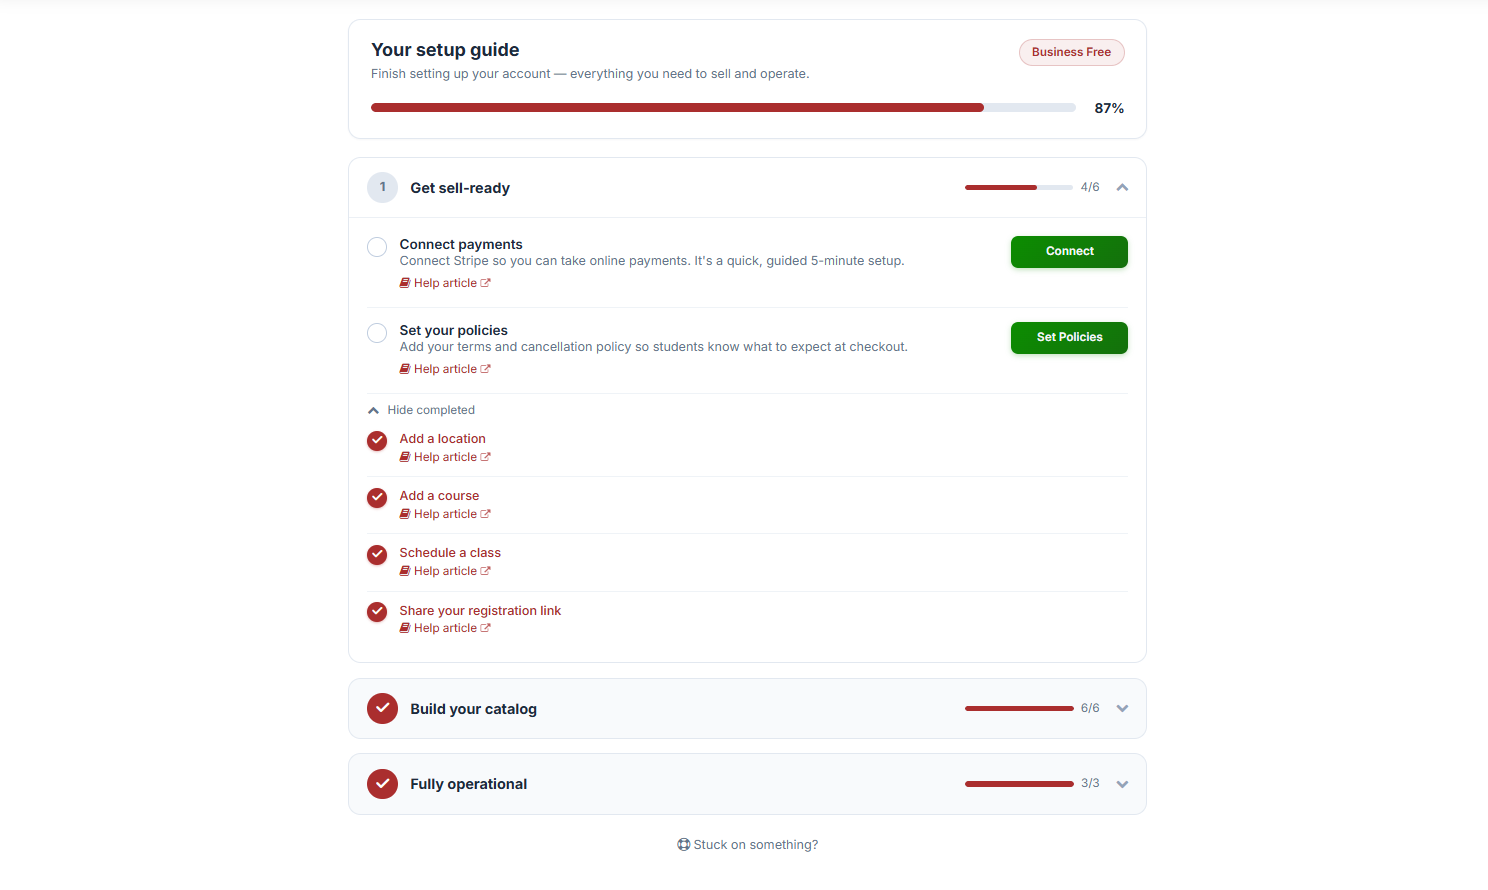
Step 2: Add a Location
Under 1. Get Sell-Ready, click Add a Location.
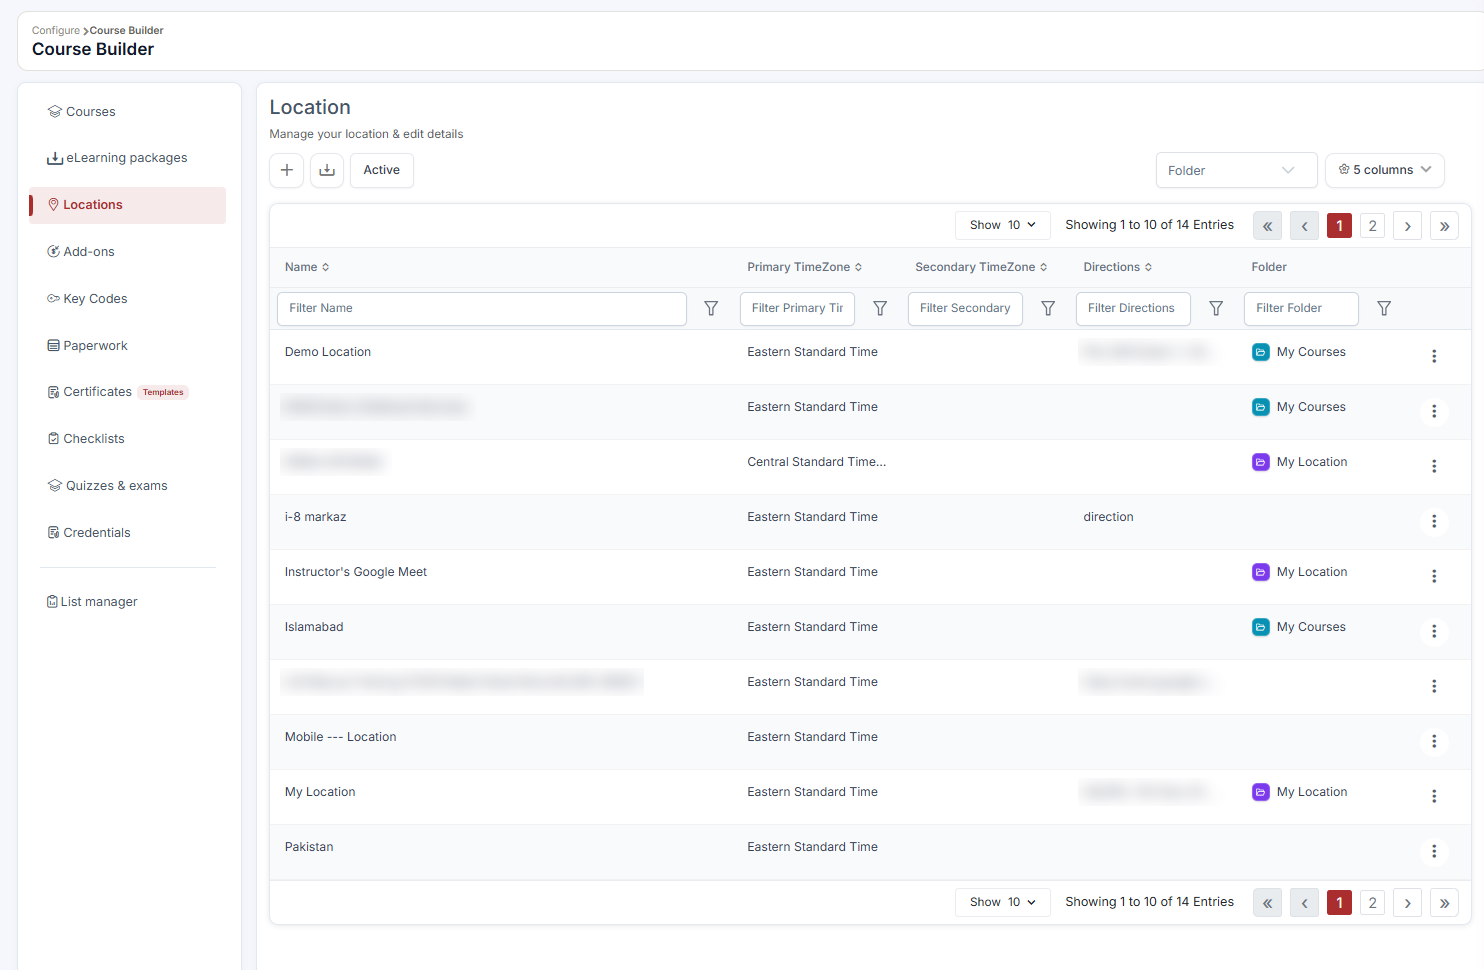
This opens the Location screen, where you can manage your locations and edit their details.
Click the + (Add New) button to create a location.
Step 3: Enter Location Details
Fill in the following fields:
- Name — enter the location name.
- Address — enter the street address.
- City — enter the city.
- State — select the state.
- Zip Code — enter the zip / postal code.
- Directions — enter directions to help students find the location.
- Primary Timezone — select the timezone for this location.
Step 4: Configure Optional Settings
- Allow for Group Training — enable this toggle if you'd like this location to appear in the Group Training inquiry form.
- Location Image — upload an image to help students recognize the location.
Step 5: Save Your Location
Once everything looks good, click Create.
Best Practices
- Write clear, specific directions, especially for locations with tricky parking, multiple entrances, or shared buildings. This reduces day-of confusion and late arrivals.
- Double-check your time zone selection, particularly if you operate locations across different time zones, since this affects how class times display to students.
- Use a real photo of the location rather than a stock image, so students can recognize the building when they arrive.
- Only enable Group Training for locations that can accommodate it, since this determines whether the location appears in inquiry forms for group bookings.
Frequently Asked Questions
| Question | Answer |
|---|---|
| Can I add multiple locations? | Yes. You can add as many locations as you need, and each can be independently configured and assigned to classes. |
| Can I edit a location after it's created? | Yes. Return to the Location screen anytime to update address details, directions, images, or Group Training settings. |
| What happens if I enable Allow for Group Training? | The location becomes available for selection when prospective students or organizations submit a Group Training inquiry. |
| Does the Primary Timezone affect existing scheduled classes? | The timezone setting is tied to the location itself, so it's best to confirm this is correct before scheduling classes at that location. |
✔ You're all set. Your new location is now live and ready to be assigned to classes. You can add as many locations as you need, and edit their details anytime from the same screen.
Was this article helpful?
That’s Great!
Thank you for your feedback
Sorry! We couldn't be helpful
Thank you for your feedback
Feedback sent
We appreciate your effort and will try to fix the article