
Your registration site is often the first thing a prospective student sees, so making it look professional and on-brand matters. The Site Branding tool lets you customize your header and footer, colors, contact details, social links, and more — giving your enrollment page a polished, consistent look that reflects your business.
This article walks you through every section of the Site Branding page, from logos through social media links.
Before You Begin
Before starting, gather the following:
- Your logo files, sized according to the recommendations below.
- Your brand colors, if you have established brand guidelines.
- A short business description to help visitors understand your services.
- Business contact information, including address, phone, and email.
- Links to your social media profiles and website.
Step-by-Step Instructions
Step 1: Open Your Setup Guide
- From the opening screen, click Settings on the left menu.
- Click Setup Guide.
You'll land on Your Setup Guide, where you can finish setting up your account with everything you need to sell and operate.
Step 2: Navigate to Site Branding
- Click Build Your Catalog. Here you'll find six different setups you can complete to build out your catalog.
- Select Brand Your Site.
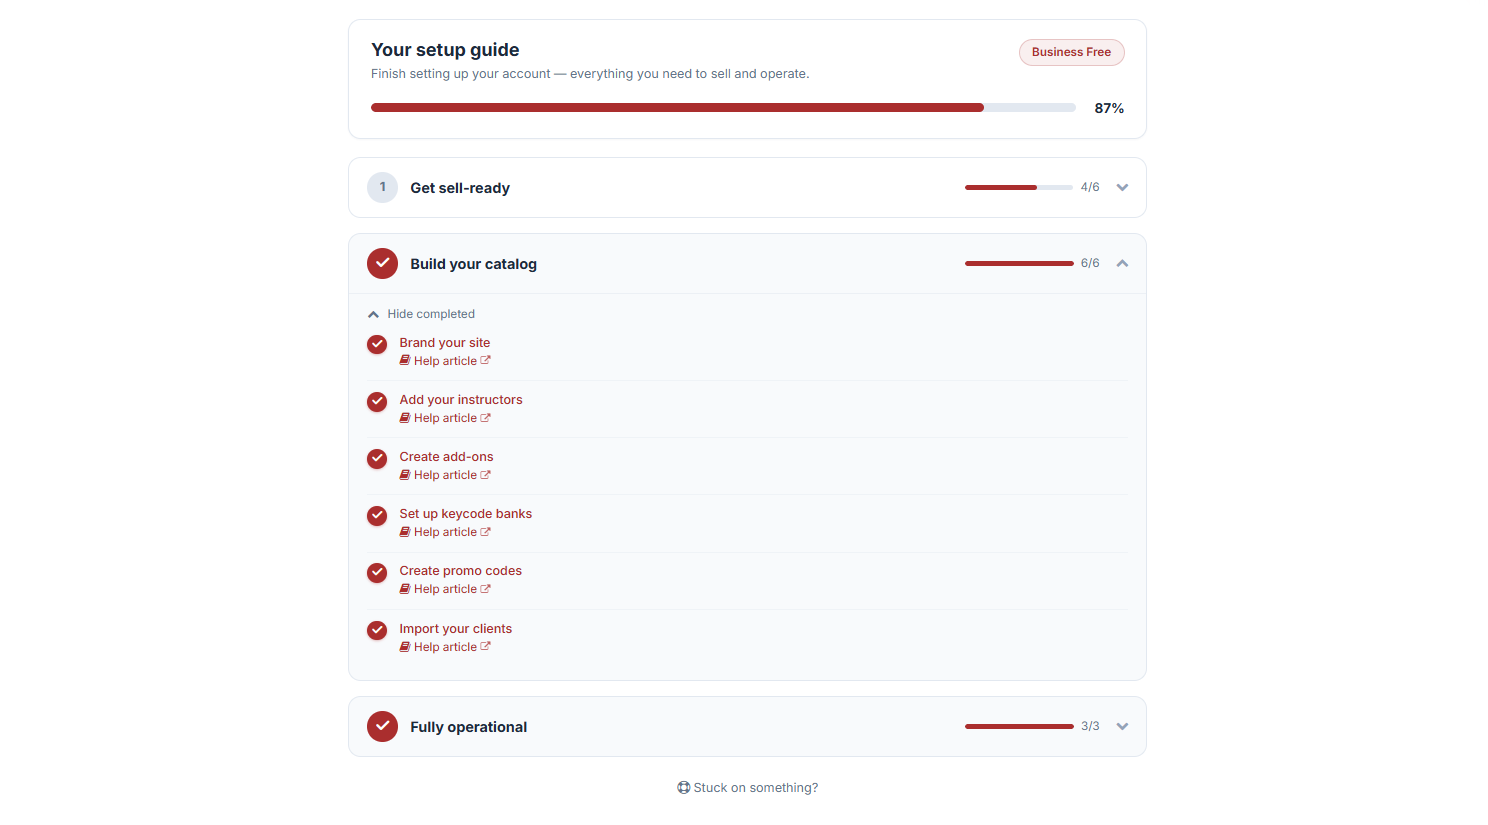
This directs you to the Site Branding page, where you can manage your landing page settings and branding.
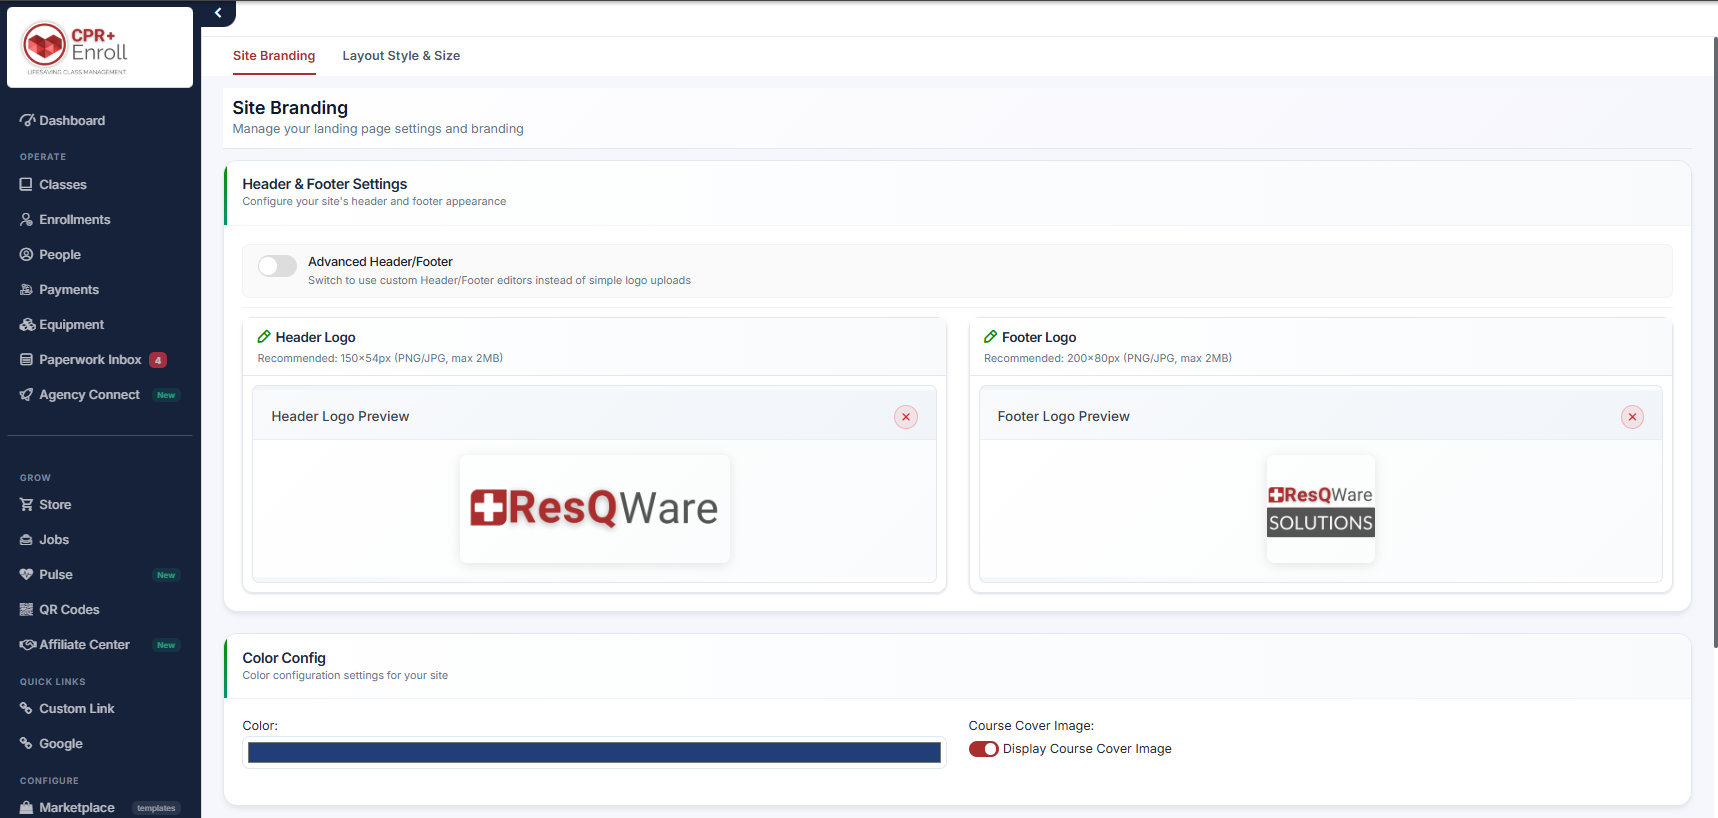
Step 3: Configure Header & Footer Settings
Configure how your site's header and footer appear.
- Advanced Header/Footer — toggle this on to switch to custom Header/Footer editors instead of simple logo uploads.
- Header Logo — recommended size: 150 × 54px (PNG/JPG, max 2MB).
- Footer Logo — recommended size: 200 × 80px (PNG/JPG, max 2MB).
Click each logo preview to change the image.
Step 4: Set Your Color Configuration
Set the color configuration for your site, and choose whether to display a Course Cover Image.
Step 5: Add Your Page Description
Add a description to help visitors understand your services and offerings.
Step 6: Add Contact Details
Add your business contact information, including your address, phone number, and email.
Step 7: Connect Your Social Media Links
Connect your profiles and website:
- X
- Google Business Profile
- YouTube
- Classes Tab Name — customize the label for your classes tab.
- Website URL — enter a valid URL (e.g.,
https://yourbusiness.com).
Step 8: Save Your Changes
Once everything looks good, click Save to finalize your site branding.
Best Practices
- Use high-resolution logo files at the recommended dimensions to avoid blurry or stretched images on your live site.
- Keep your Page Description concise but informative — a few sentences that clearly explain what you offer is often more effective than a lengthy paragraph.
- Keep contact details current, since students may rely on this information to reach you with questions before registering.
- Link all active social profiles, even if some are used less frequently, to give visitors more ways to learn about your business and build trust.
- Preview your site after saving to confirm your branding displays as expected across both desktop and mobile.
Frequently Asked Questions
| Question | Answer |
|---|---|
| What's the difference between the simple logo upload and Advanced Header/Footer? | The simple upload lets you quickly add header and footer logos. Advanced Header/Footer gives you access to custom editors for more control over your header and footer appearance beyond just logos. |
| Do I need to fill out every social media field? | No. Only add the links for platforms your business actively uses — leaving others blank won't affect your site's functionality. |
| Can I update my branding after saving? | Yes. Return to the Site Branding page anytime to update logos, colors, descriptions, contact details, or social links. |
| What happens if I enter an invalid Website URL? | Make sure to enter a properly formatted URL (e.g., starting with https://), since an invalid format may prevent the link from working correctly on your site. |
✔ You're all set. Your site now reflects your brand, giving students a polished, professional experience from the moment they land on your page.
Was this article helpful?
That’s Great!
Thank you for your feedback
Sorry! We couldn't be helpful
Thank you for your feedback
Feedback sent
We appreciate your effort and will try to fix the article