Clear policies build trust with your students and protect your business. By setting up your privacy policy, refund policy, terms, and disclaimers upfront, students know exactly what to expect before they check out — reducing confusion, disputes, and support requests down the line.
This article walks you through setting up your site's compliance policies from start to finish.
Before You Begin
Before starting this setup, have the following ready:
- Links to your existing policy documents, if you already have a Privacy Policy, Refund Policy, Terms Policy, or Disclaimer published elsewhere (such as on your main business website).
- Your cancellation and rescheduling terms, if you haven't already documented them, since these will inform your Class and Store Terms & Conditions.
- If you don't yet have formal policy documents, consider drafting them (or consulting legal guidance) before completing this step, since these policies carry real legal and business implications.
Step-by-Step Instructions
Step 1: Open Your Setup Guide
- From the opening screen, click Settings on the left menu.
- Click Setup Guide.
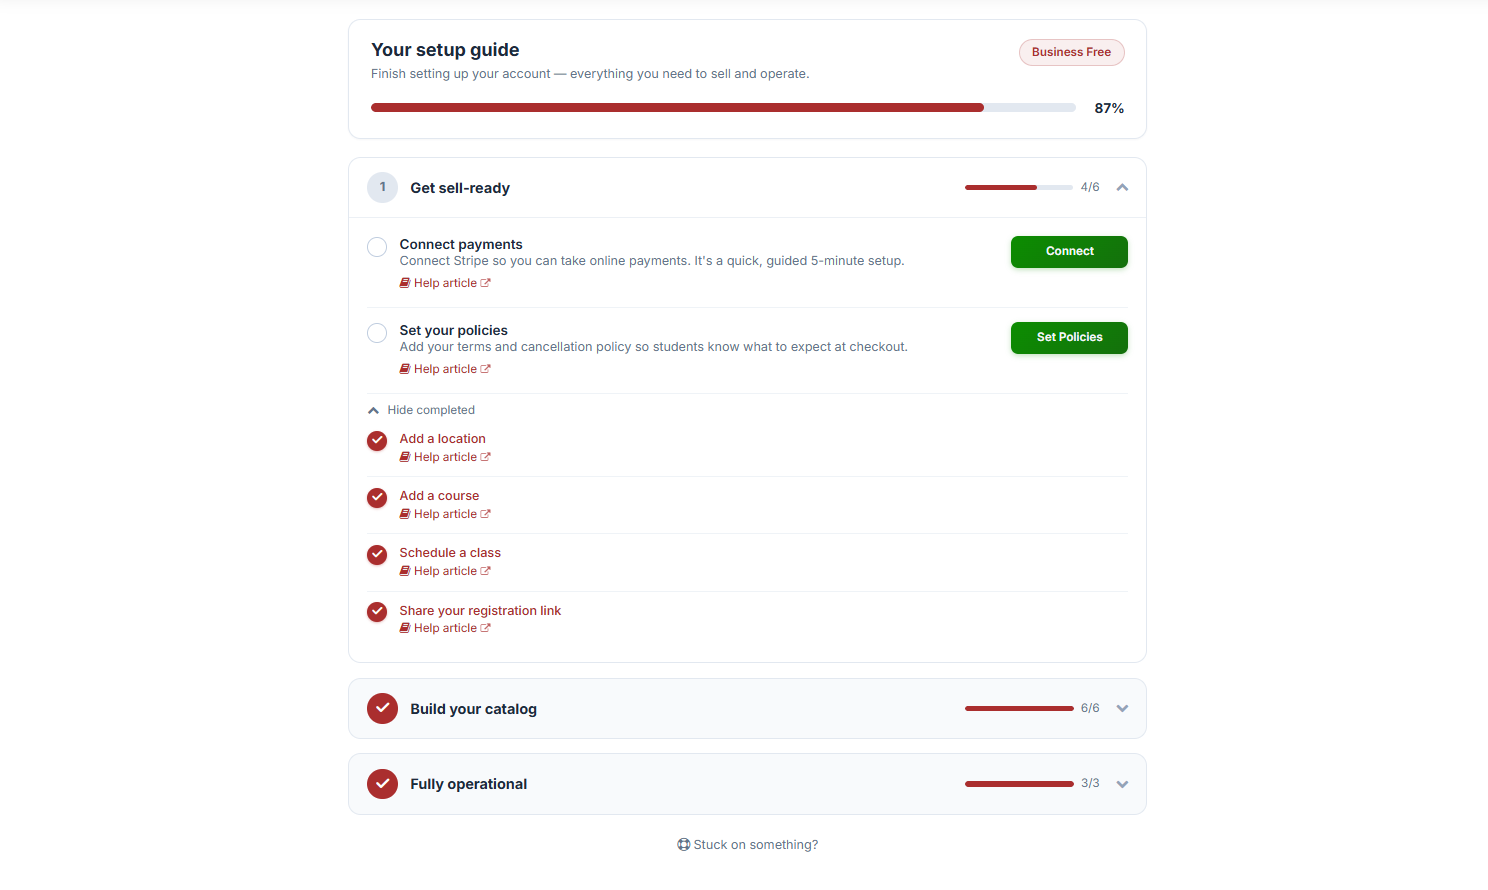
You'll land on Your Setup Guide, where you can finish setting up your account with everything you need to sell and operate.
Step 2: Locate Set Your Policies
Under 1. Get Sell-Ready, find Set Your Policies and click Set Policies.
This opens the Set Your Policies screen, where you'll add your terms and cancellation policy so students know what to expect at checkout.
Step 3: Manage Site Compliance
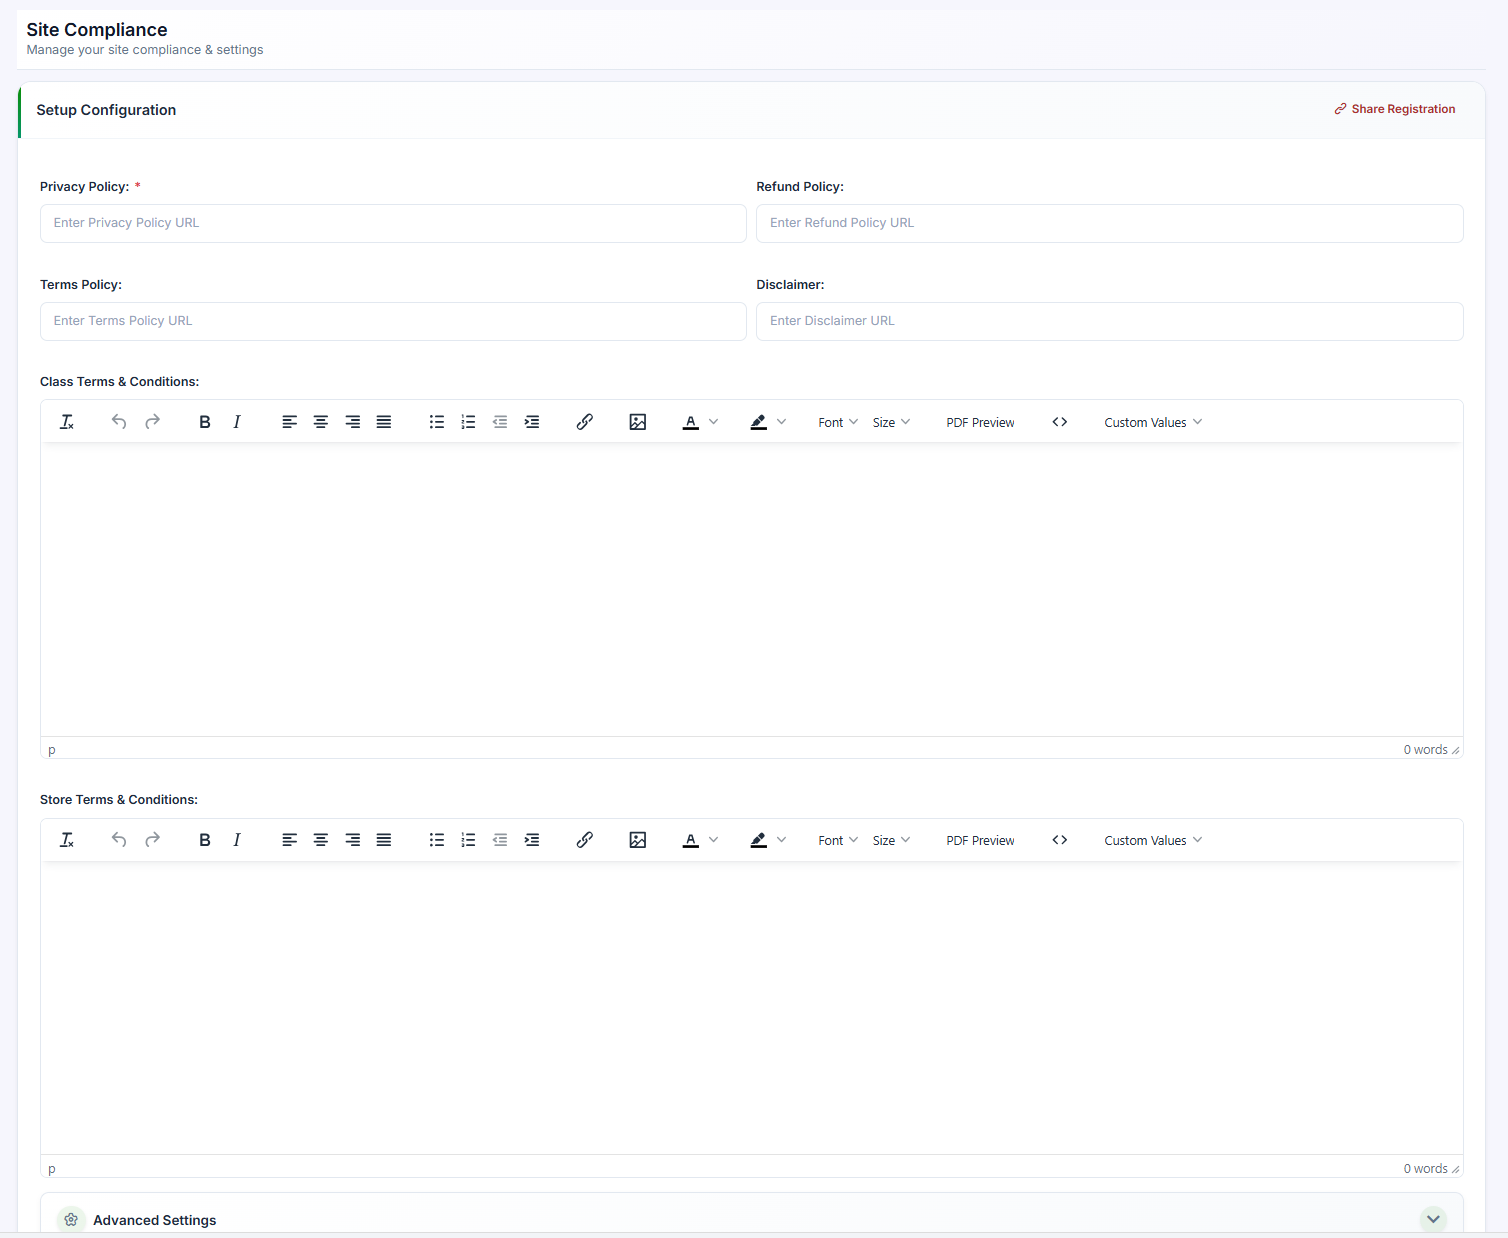
Under Site Compliance, add links to the following:
| Policy | What It Covers |
|---|---|
| Privacy Policy | How you collect, use, and protect student data. |
| Refund Policy | Under what conditions students can receive a refund. |
| Terms Policy | The general terms governing use of your site and services. |
| Disclaimer | Any limitations of liability or important legal disclosures. |
Enter the URL for each policy document. These links will be made accessible to students during checkout and elsewhere on your site.
Step 4: Set Your Terms & Conditions
In addition to the compliance links above, set:
- Class Terms & Conditions — specific terms that apply to class registrations, such as cancellation and rescheduling rules.
- Store Terms & Conditions — terms that apply to any store purchases, such as add-ons or merchandise.
Step 5: Save Your Changes
Once you've entered your policy links and terms, click Save.
Best Practices
- Keep policy documents up to date. If your refund or cancellation terms change, update the linked document promptly so students always see accurate information.
- Host policies on a stable URL. Avoid linking to documents that may move or be deleted, since broken links can create confusion or compliance issues.
- Align Class and Store Terms with your actual practices. Make sure the terms you publish match how your business actually handles refunds, rescheduling, and cancellations, to avoid disputes.
- Review policies periodically, especially if your business practices, pricing, or applicable regulations change.
Frequently Asked Questions
| Question | Answer |
|---|---|
| Do I need separate policies for classes and store purchases? | Yes. Class Terms & Conditions apply specifically to class registrations, while Store Terms & Conditions apply to any add-on or merchandise purchases, since these often carry different rules (e.g., refund eligibility, shipping terms). |
| What if I don't have a Privacy Policy or Refund Policy yet? | It's strongly recommended to have these documents in place before accepting payments, since they set clear expectations with students and may be required for compliance depending on your location. Consider drafting these with the help of a legal professional if you don't already have them. |
| Can I update these links later? | Yes. You can return to the Set Your Policies screen anytime to update any of your policy links or terms. |
| Where will students see these policies? | These policies are typically displayed at checkout and may be linked elsewhere on your site, giving students a clear reference before they complete a purchase. |
✔ You're all set. Your site's policies are now in place, giving your students clear expectations and keeping your business compliant from the moment they check out.
Was this article helpful?
That’s Great!
Thank you for your feedback
Sorry! We couldn't be helpful
Thank you for your feedback
Feedback sent
We appreciate your effort and will try to fix the article