CPRClassFinder is a marketplace where prospective students can search for certification classes by association, discipline, and location. Getting your associations approved and listed there extends your visibility beyond your own registration page, helping new students discover your classes.
This article walks you through managing your association list and submitting a request to have an association listed publicly on CPRClassFinder.
Before You Begin
Before starting this setup, have the following ready:
- The name of the association(s) your courses are certified under (e.g., AHA, ARC, ECSI).
- Contact information for your organization, including a website, contact email, contact person, or contact phone number — you'll need at least one of these if requesting public approval.
- A justification statement, if you plan to request that an association be listed publicly, explaining why it should appear on CPRClassFinder.
Step-by-Step Instructions
Step 1: Open Your Setup Guide
- From the opening screen, click Settings on the left menu.
- Click Setup Guide.
You'll land on Your Setup Guide, where you can finish setting up your account with everything you need to sell and operate.
Step 2: Navigate to Fully Operational
- Click Fully Operational. Here you'll find three different setups you can complete to make sure you're fully operational and optimizing your use of CPR Enroll.
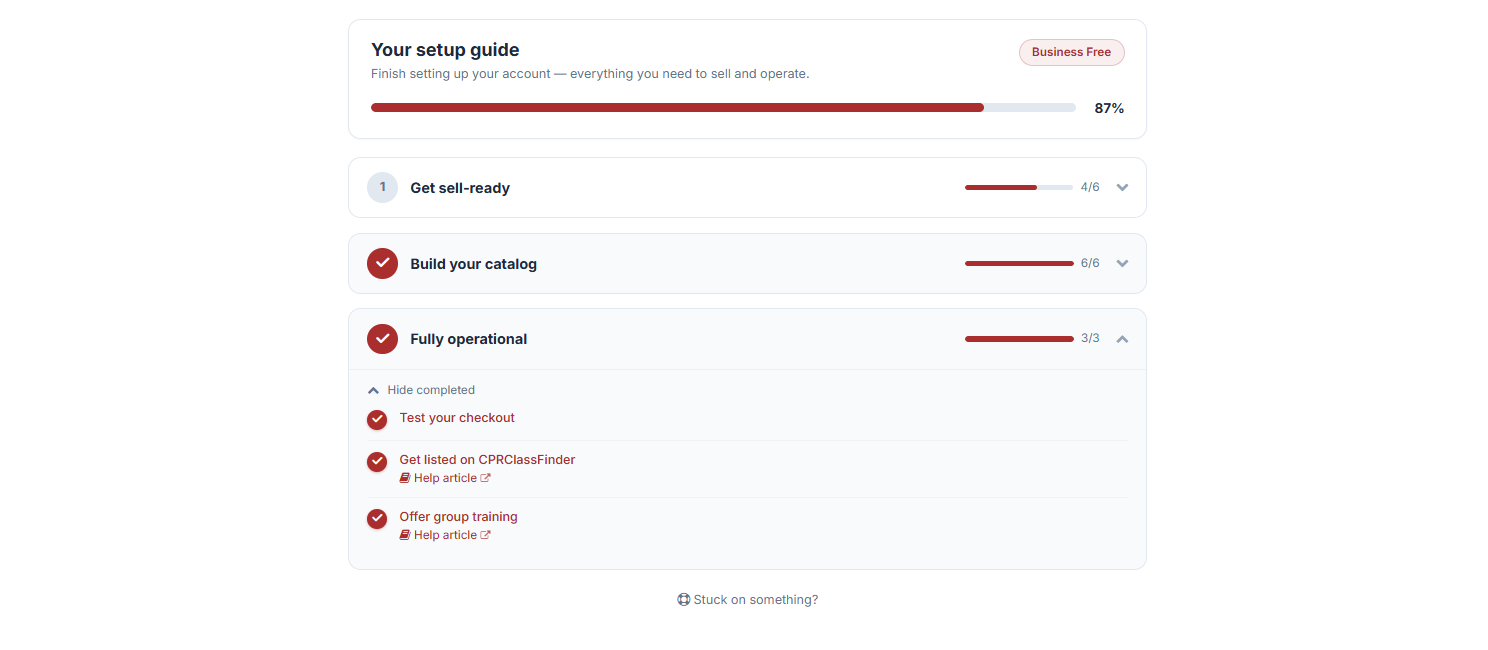
2. Select Get Listed on CPRClassFinder.
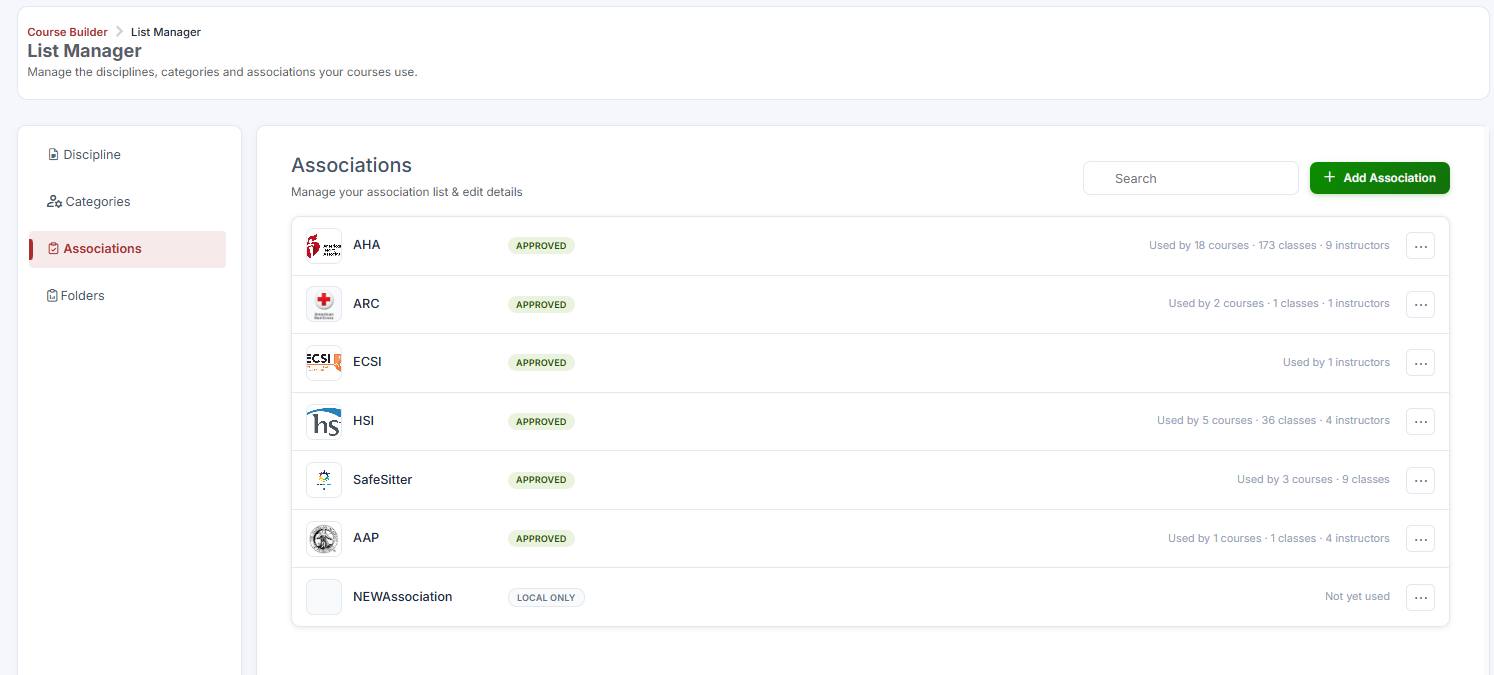
You'll be directed to the Associations section of the List Manager, where you can manage the disciplines, categories, and associations your courses use.
Step 3: Add an Association
Click + Add Associations.
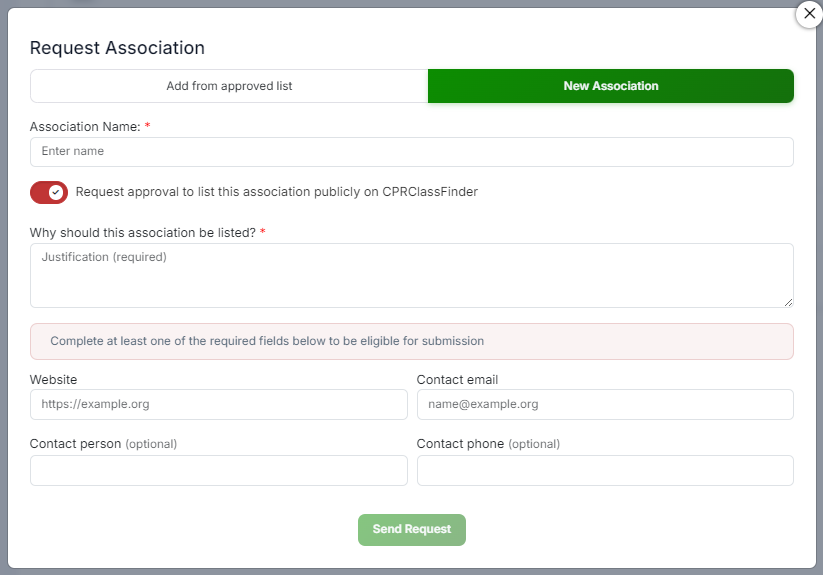
The Request Association window will pop up. You have two options:
- Select from the Approved List — approved associations are already listed in marketplace filters and on CPRClassFinder. Simply select the association(s) you want to add, then click Add Selected to finalize.
- Add a New Association — if your association isn't on the approved list, enter the association's name to create a new entry.
Step 4: Request Public Listing (Optional)
If you'd like this association to be listed publicly on CPRClassFinder, toggle Request Approval.
✔ Note: When this toggle is enabled, you must enter a justification explaining why this association should be listed publicly. This field is required.
Step 5: Complete Contact Information
To be eligible for submission, complete at least one of the following fields:
- Website
- Contact Email
- Contact Person (optional)
- Contact Phone (optional)
Step 6: Submit Your Request
Click Send Request to finalize your submission.
Best Practices
- Check the approved list first before creating a new association, since selecting an existing approved association is faster and doesn't require an approval request.
- Write a clear, specific justification when requesting public approval — explain what the association is, why it's relevant to your courses, and any credentials that support the listing.
- Keep your contact information current, since this may be used to verify your request or follow up if additional information is needed.
- Submit requests early if you're planning a marketing push around a new certification offering, since approval isn't instant.
Frequently Asked Questions
| Question | Answer |
|---|---|
| What's the difference between selecting an approved association and adding a new one? | Approved associations are already vetted and listed in marketplace filters and on CPRClassFinder, so selecting one requires no additional approval. Adding a new association means submitting it for review before it can be listed publicly. |
| Is the justification field always required? | No. It's only required if you enable the Request Approval toggle to list the association publicly on CPRClassFinder. |
| How many contact fields do I need to fill out? | At minimum, you need to complete one of the following: Website, Contact Email, Contact Person, or Contact Phone. |
| How long does approval take? | Approval timing can vary depending on the review process. Once submitted, your request will be evaluated based on the justification and contact information provided. |
| Can I add multiple associations at once? | Yes. You can select multiple associations from the approved list and click Add Selected to add them all at once. |
✔ You're all set. Your association request has been submitted. Once approved, your courses will be more discoverable to prospective students browsing CPRClassFinder.
Was this article helpful?
That’s Great!
Thank you for your feedback
Sorry! We couldn't be helpful
Thank you for your feedback
Feedback sent
We appreciate your effort and will try to fix the article