The Document Builder is a full design canvas. This article covers opening it, the tools down the left rail, merge fields, page setup and the settings that decide how a credential is delivered.
Before You Begin
- Decide whether you are designing a certificate, a badge or paperwork before you open the builder — the choice is made on the way in.
- Have your logo or artwork ready if you intend to upload one.
- Know which certifying body the template belongs to; it is set in Settings.
Step-by-Step Instructions
Step 1: Open the Builder
- Go to Course Builder > Credentials.
- Click + Create.
- Choose Create Certificate or Create Badge.
Step 2: Pick a Starting Template
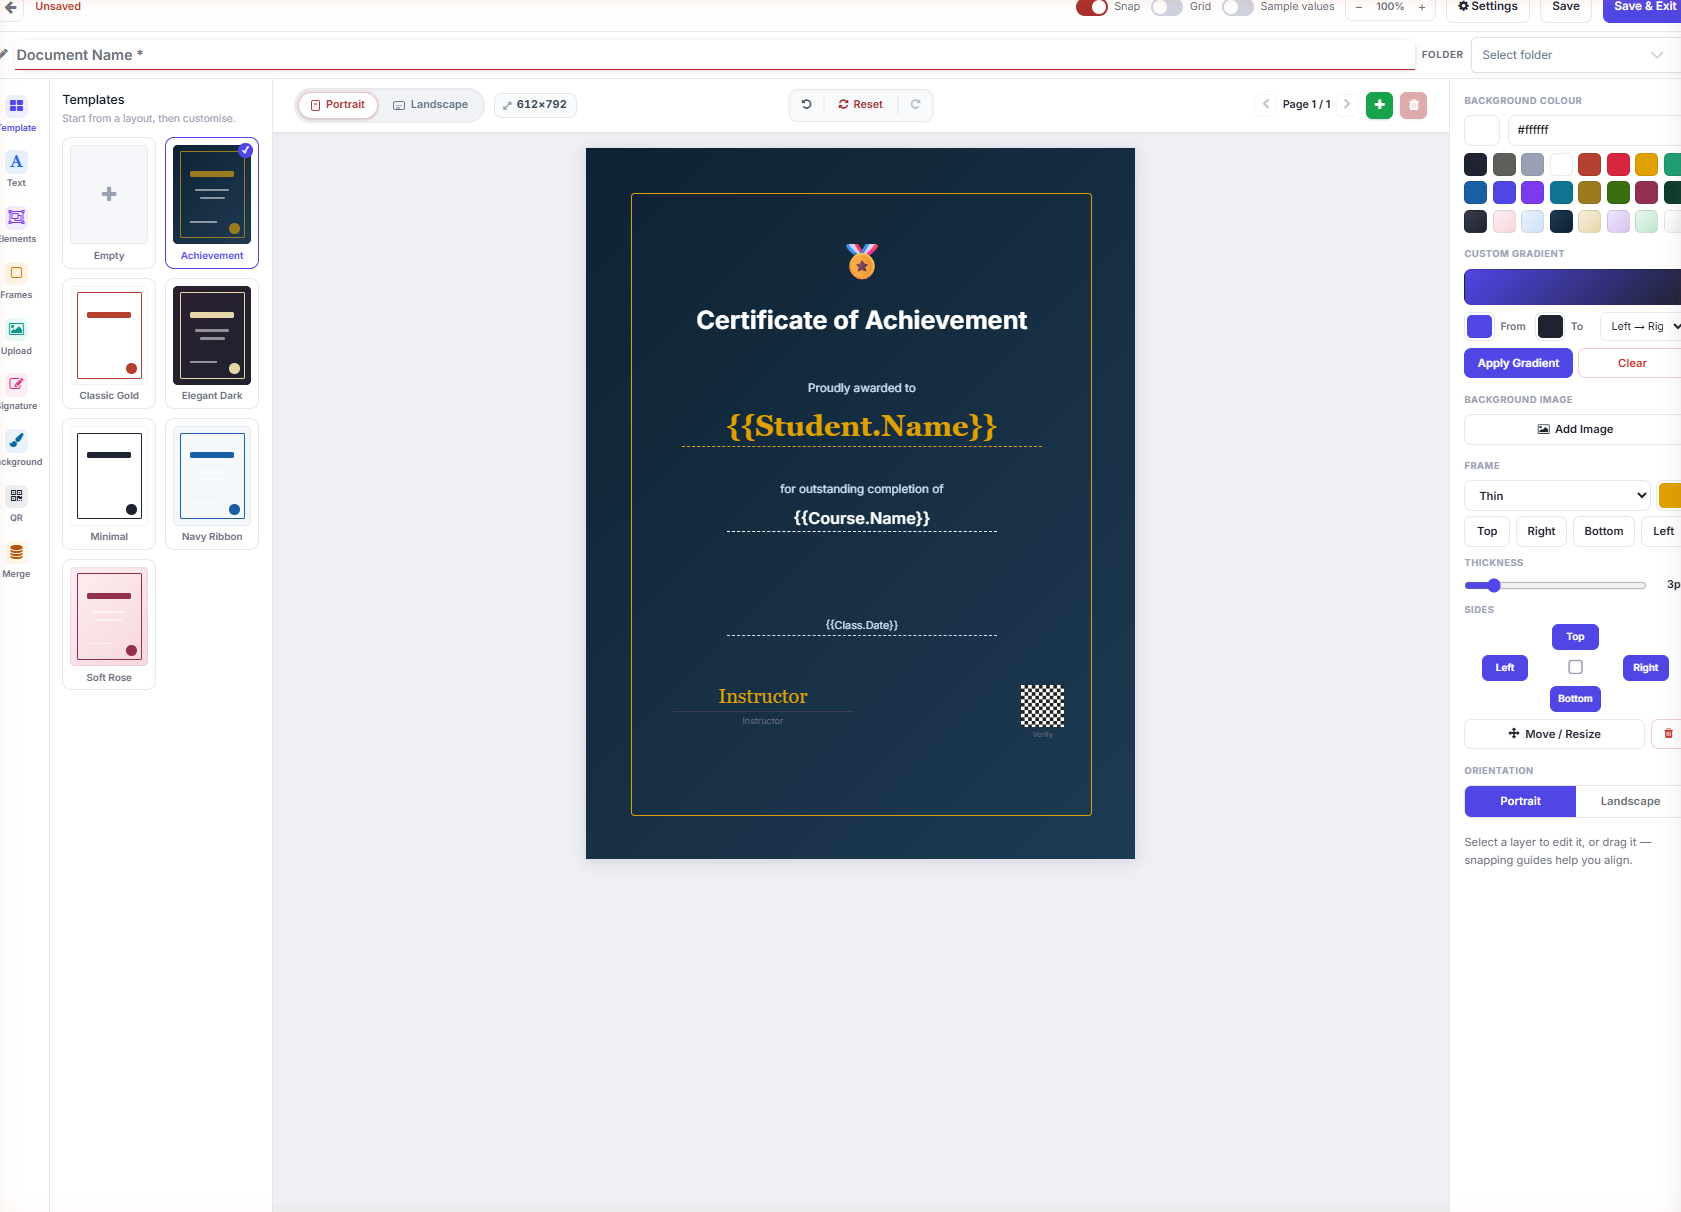
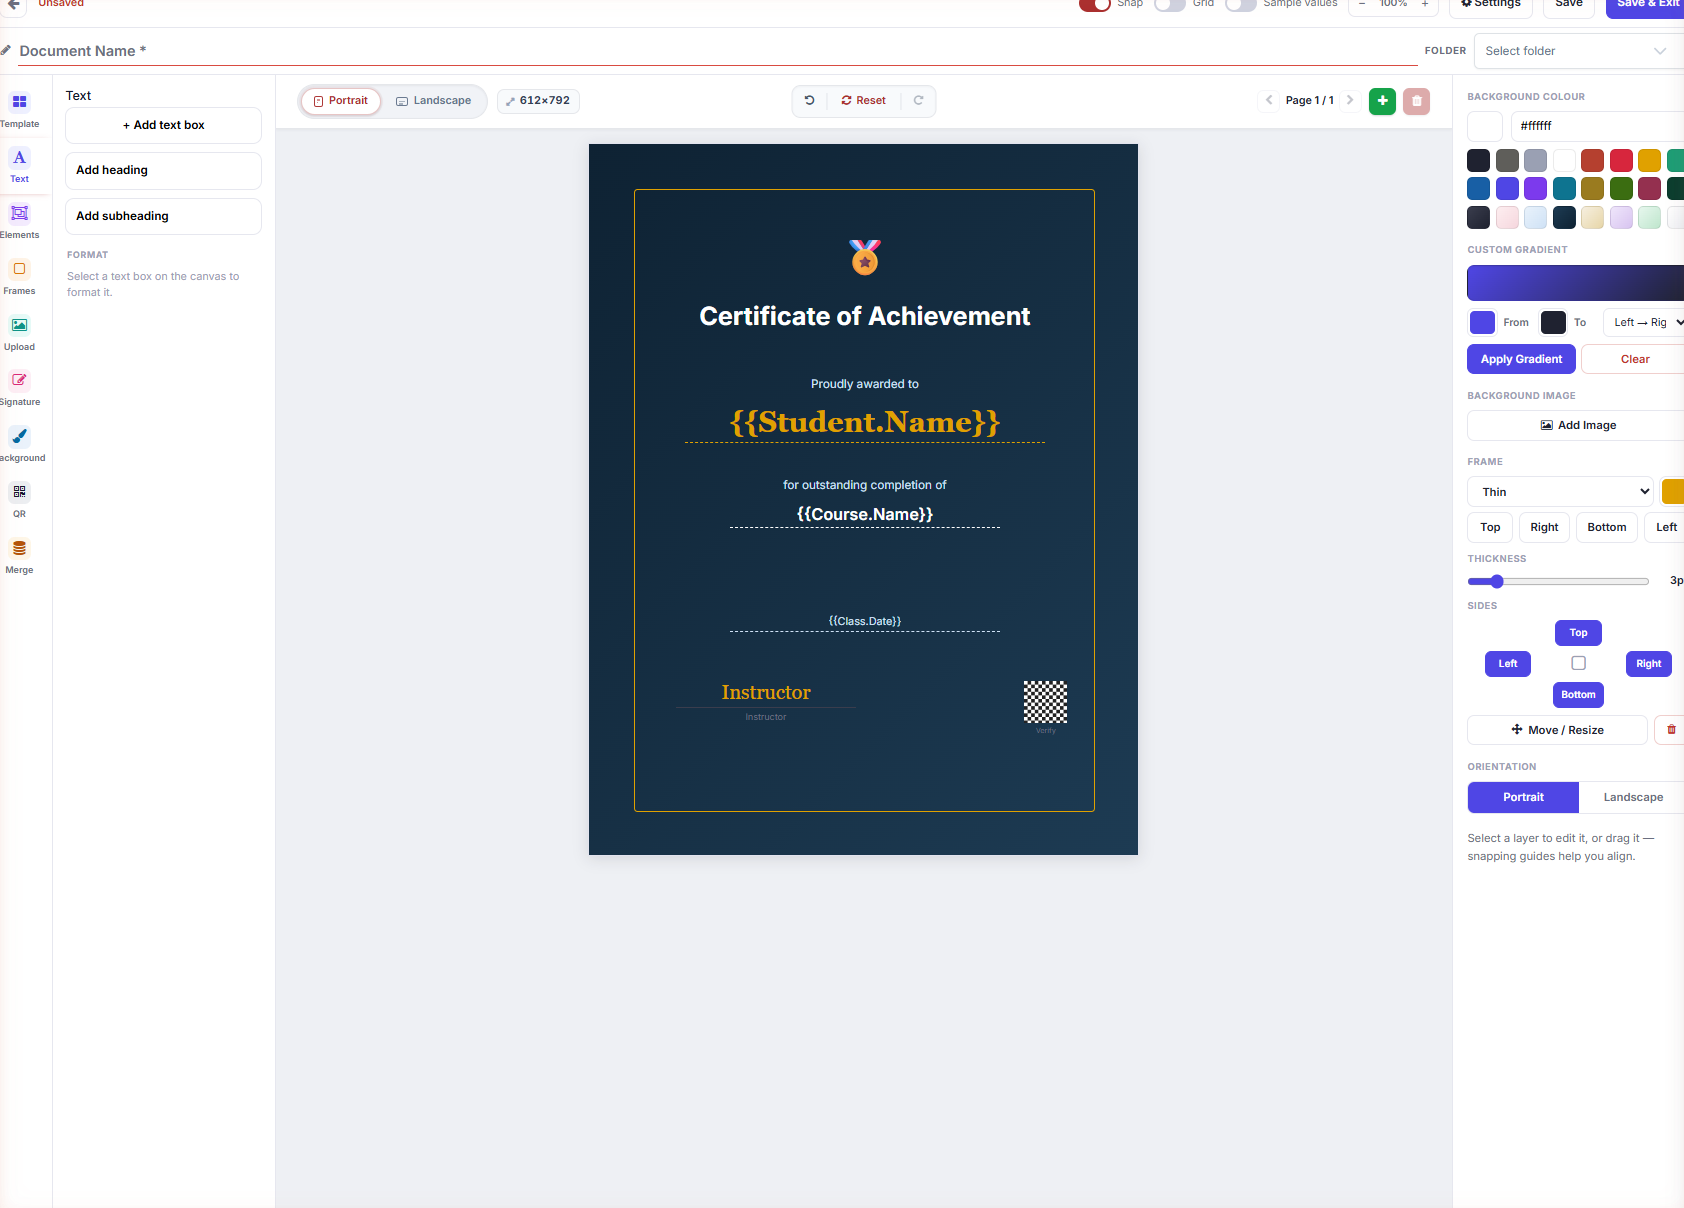
The builder opens with a template gallery on the left and a live canvas in the middle. Starter templates include Empty, Achievement, Classic Gold, Elegant Dark, Minimal, Navy Ribbon and Soft Rose. Pick one and customize, or start from Empty.
The Tool Rail
| Tool | Use |
|---|---|
| Template | Swap the starting layout. |
| Text | Add and style text layers. |
| Elements | Shapes and decorative elements. |
| Frames | Image frames. |
| Upload | Bring in your own logo or artwork. |
| Signature | Place a signature mark. |
| Background | Color, gradient or image background. |
| QR | Add a QR code layer linking to the credential’s public verification page. |
| Merge | Insert merge fields. |
Merge Fields
Merge fields are double-brace tokens — {{Student.Name}}, {{Course.Name}}, {{Class.Date}} — and can be dragged in as layers or typed inline.
✔ Turn on Sample values before you judge the layout. It previews the design with realistic data instead of raw tokens, which is the only way to see whether a long student name or course title breaks your spacing.
Page Setup and Alignment
The toolbar above the canvas sets Portrait or Landscape, shows the page size (for example 612×792), and gives you undo, Reset and redo. Use + and the trash button to add or remove pages. Snap and Grid toggles help with alignment, and smart guides appear as you drag.
The right-hand panel changes with your selection. With nothing selected it controls the page: Background color, Custom gradient (From / To and direction, then Apply Gradient), Background image, Frame (style, color, sides, thickness) and Orientation.
Certificate Settings
Click Settings in the top bar to open the settings drawer:
| Setting | What it does |
|---|---|
| Association | The certifying body this template belongs to. |
| Email Settings | Automatic sends the credential to the recipient on issue; Manual does not. |
| Date Format | For example US (MM/DD/YYYY), with a live preview beneath. |
✔ Email Settings is the one to get right. Set to Automatic, issuing a credential emails the recipient immediately. If you are testing, or issuing a backdated batch, set it to Manual first.
Saving
- Name the document in the Document Name field.
- Optionally assign a Folder in the top-right selector.
- Click Save or Save & Exit.
Leaving with unsaved changes prompts “Leave without saving?”
Best Practices
- Start from a supplied template rather than Empty unless you have a specific design to reproduce. The starters already handle margins and safe areas for printing.
- Preview with Sample values at every stage, not just at the end.
- Add the QR layer to anything a third party might need to verify — it points at the live page, so it stays accurate after revocation.
- Set Email Settings to Manual while designing, then switch to Automatic when the template goes live.
Frequently Asked Questions
| Question | Answer |
|---|---|
| How do I preview with real-looking data? | Turn on Sample values at the top of the screen. |
| What do merge fields look like? | Double-brace tokens such as {{Student.Name}}. |
| Where do I set which certifying body a template belongs to? | Settings > Association. |
| Does issuing always email the recipient? | Only if Email Settings is Automatic. Manual issues the credential without sending it. |
| Can I make a landscape certificate? | Yes. Orientation is on the canvas toolbar and in the right-hand panel. |
✔ Your template is ready. Next, read Issuing, Verifying, and Revoking Credentials.
Was this article helpful?
That’s Great!
Thank you for your feedback
Sorry! We couldn't be helpful
Thank you for your feedback
Feedback sent
We appreciate your effort and will try to fix the article