
The Registration Form Builder gives you full control over what students see when they enroll — which fields appear, what you ask, and how the whole thing looks. Custom questions now go directly into the form, so the old separate “additional information” sections are no longer needed.
Before You Begin
- Find it at Enrollments → Enrollment Settings → Registration Forms.
- Required fields for every enrollment are set separately at Enrollments → Enrollment Settings → Enrollment Details → Enrollment Required Fields (Phone No, Address, City, State, Zip).
- If you have questions you ask on more than one form, create them first under Enrollment Settings → Registration Questions so you can reuse them.
Step 1: Read the Forms List
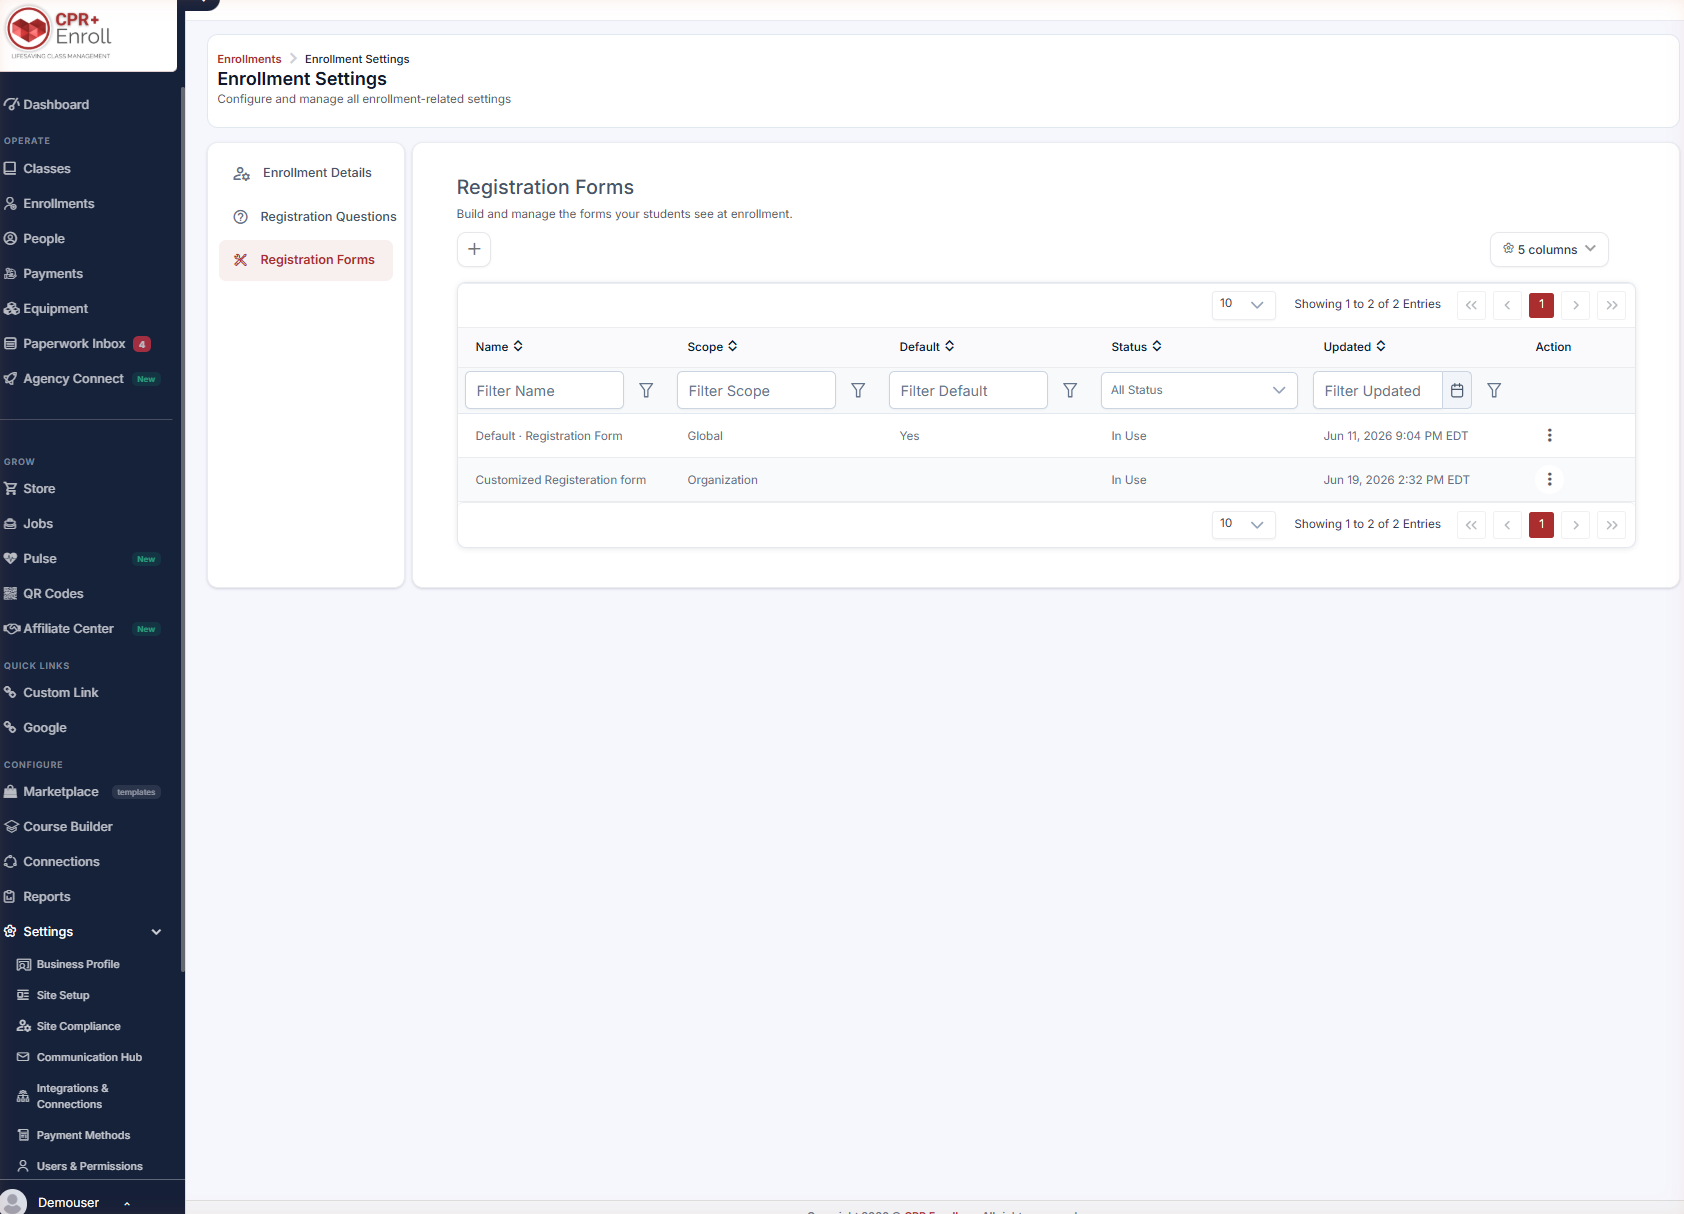
Columns are Name, Scope, Default, Status, Updated and Action.
| Column | What it tells you |
|---|---|
| Scope | Global is the shipped default, based on your current enrollment form. Organization is one you built. |
| Status | Shows In Use when a course points at the form. |
Step 2: Create a Form
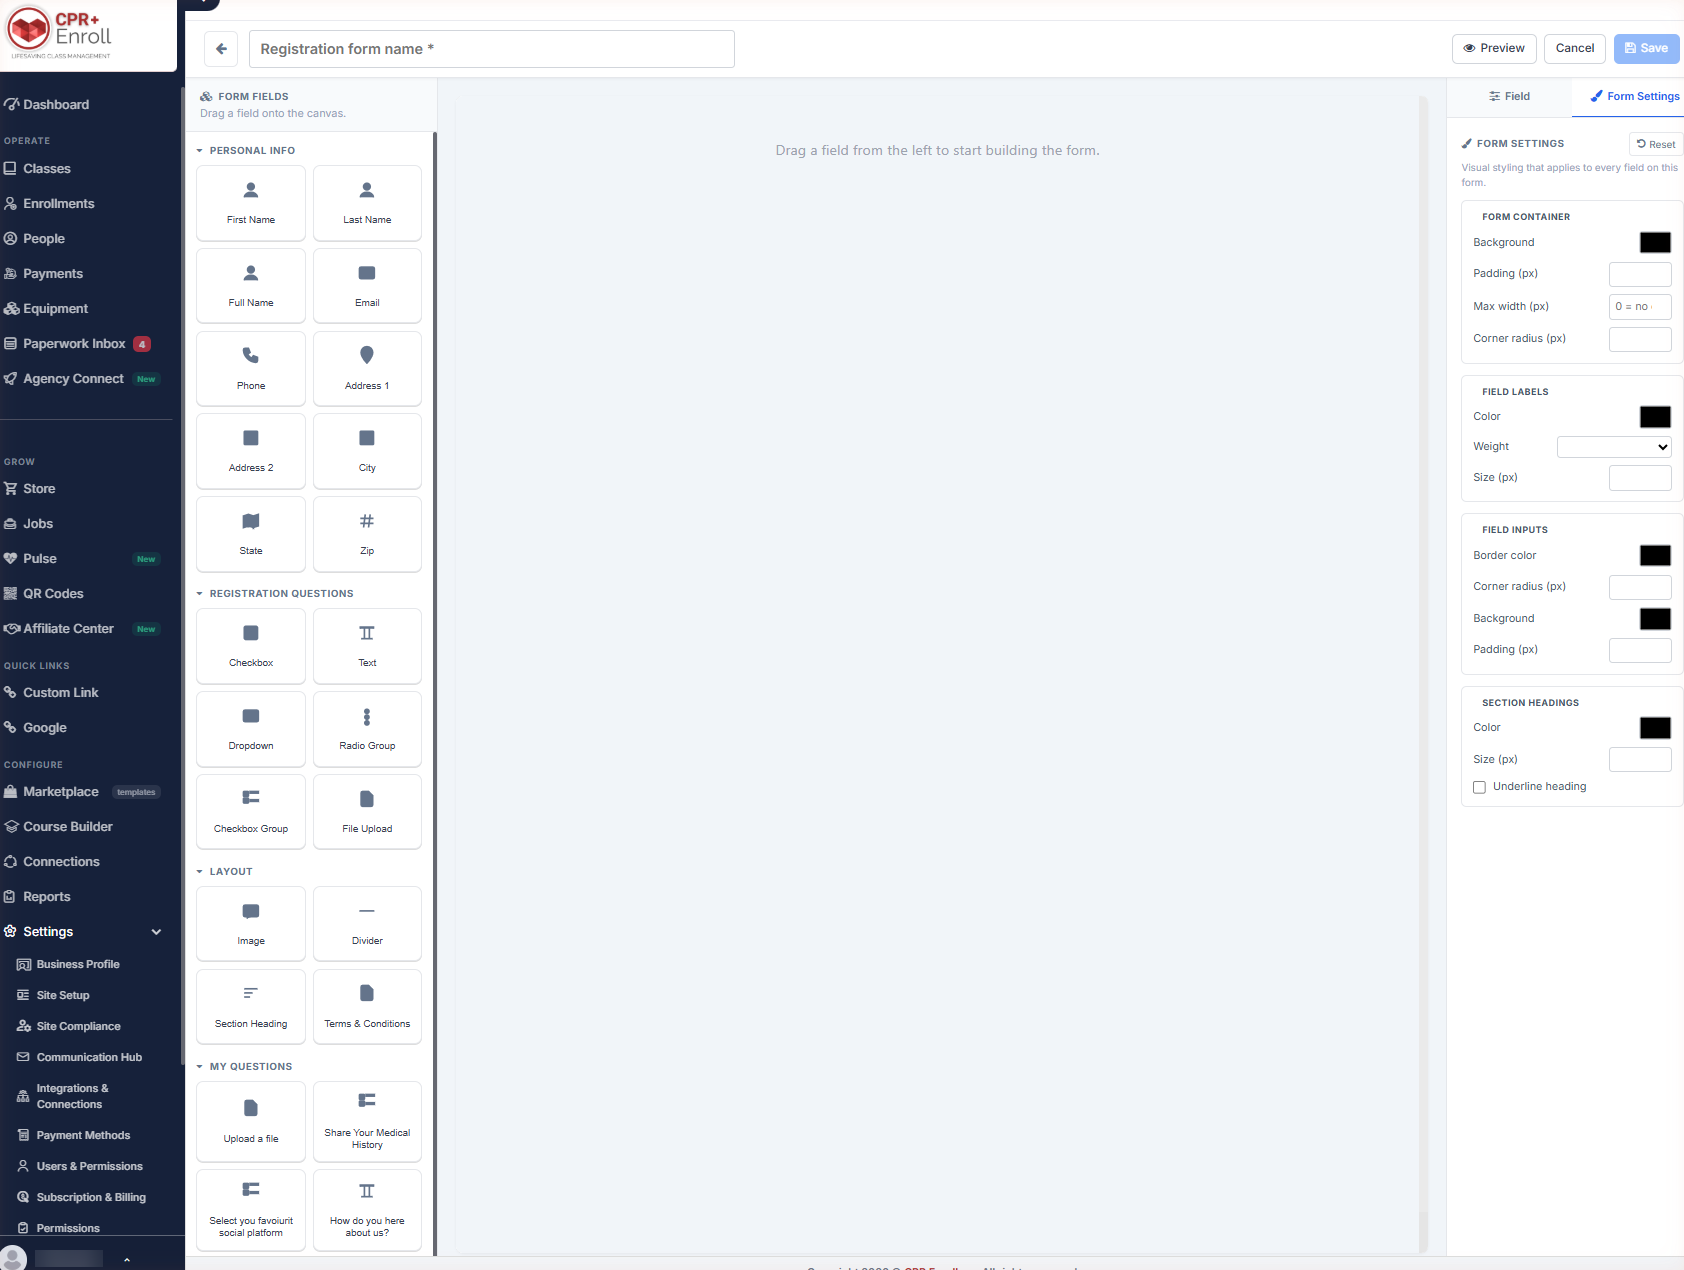
Click + to open the builder. Fields are dragged from the left panel onto the canvas, in four groups:
| Group | Fields |
|---|---|
| Personal Info | First Name, Last Name, Full Name, Email, Phone, Address 1, Address 2, City, State, Zip |
| Registration Questions | Checkbox, Text, Dropdown, Radio Group, Checkbox Group, File Upload |
| Layout | Image, Divider, Section Heading, Terms & Conditions |
| My Questions | Your existing saved Registration Questions, ready to reuse |
✔ Reuse from My Questions where you can. A reused question stays centrally managed — edit the original under Enrollment Settings → Registration Questions and every form using it updates.
Step 3: Style the Form
The right panel has two tabs. Field styles the selected element. Form Settings applies visual styling to every field on the form:
- Form Container — Background, Padding, Max width (0 = no limit), Corner radius
- Field Labels — Color, Weight, Size
- Field Inputs — Border color, Corner radius, Background, Padding
- Section Headings — Color, Size, Underline heading
Reset returns styling to defaults.
Step 4: Save and Assign It
- Name the form in Registration form name.
- Click Preview to check it.
- Click Save.
- Assign the form to a course: Course Builder → Courses → Edit → Registration Form.
✔ Saving a form does not put it to work. A form only takes effect once a course points at it. The Status column reads In Use when it does.
Step 5: Heed the Validation Warning
If a form has no Terms & Conditions acknowledgment field, CPR Enroll warns you. Add the Terms & Conditions layout element unless you have a specific reason not to.
Best Practices
- Ask for the minimum. Every extra field costs you completed registrations.
- Build shared questions once in Registration Questions and pull them in from My Questions — then one edit updates every form.
- Preview on a phone-width window before saving. Most students enroll on a phone.
- Set Max width deliberately. 0 means no limit, which looks stretched on a wide monitor.
- Always include Terms & Conditions. The warning exists because the omission is usually accidental.
Frequently Asked Questions
| Question | Answer |
|---|---|
| What is the difference between Global and Organization scope? | Global is the shipped default, based on your current enrollment form. Organization is a form you built. |
| How do I know a form is live? | Its Status reads In Use, meaning a course points at it. |
| Do I still need a separate “additional information” section? | No. Custom questions go directly into the form. |
| If I edit a reused question, what happens to other forms? | They all update. Reused questions stay centrally managed under Registration Questions. |
| What does Max width = 0 mean? | No limit. |
| Where do I assign the form to a course? | Course Builder → Courses → Edit → Registration Form. |
| Why am I being warned about Terms & Conditions? | The form has no Terms & Conditions acknowledgment field. Add the layout element unless you have a reason not to. |
✔ You’re all set. Next, read Using the Share Registration Window to get the finished form in front of students.
Was this article helpful?
That’s Great!
Thank you for your feedback
Sorry! We couldn't be helpful
Thank you for your feedback
Feedback sent
We appreciate your effort and will try to fix the article