Flexible classes: several locations and instructors
An in-person flexible class can run at several locations with several instructors. You set it up once: the locations, who teaches at each one, and the price and deposit there. When students book, they choose a location, then an instructor or anyone available, then a time. This guide follows that path in two parts: Set up the class and Booking.
Part 1: Set up the class (once)
Go to Classes › Create Class, or open an existing class and go to Class Info › Basic Info. Choose the class type In Person and the schedule Flexible.
1. Add the locations and instructors
Choose the main location in Locations and the main instructor in Instructor. Then add the others in Additional locations and Additional instructors. Each list has Select all at the top.
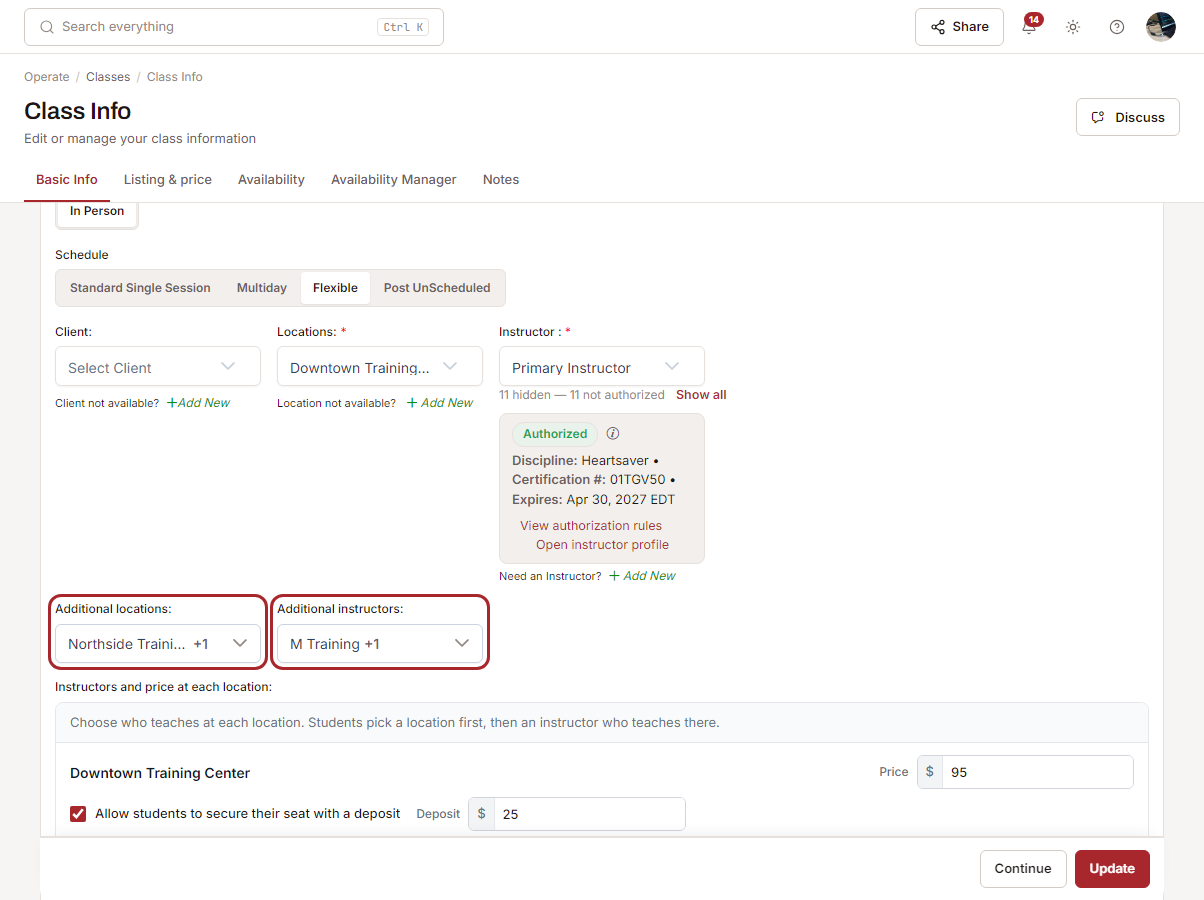
2. Choose who teaches at each location
Below those fields, Instructors and price at each location has one row per location. Click an instructor's name in a row to say they teach there, or use All and None. The main instructor starts ticked at the main location.
A location with nobody ticked shows "No instructor yet. Students won't see this location." We keep it off the booking page until you add someone.
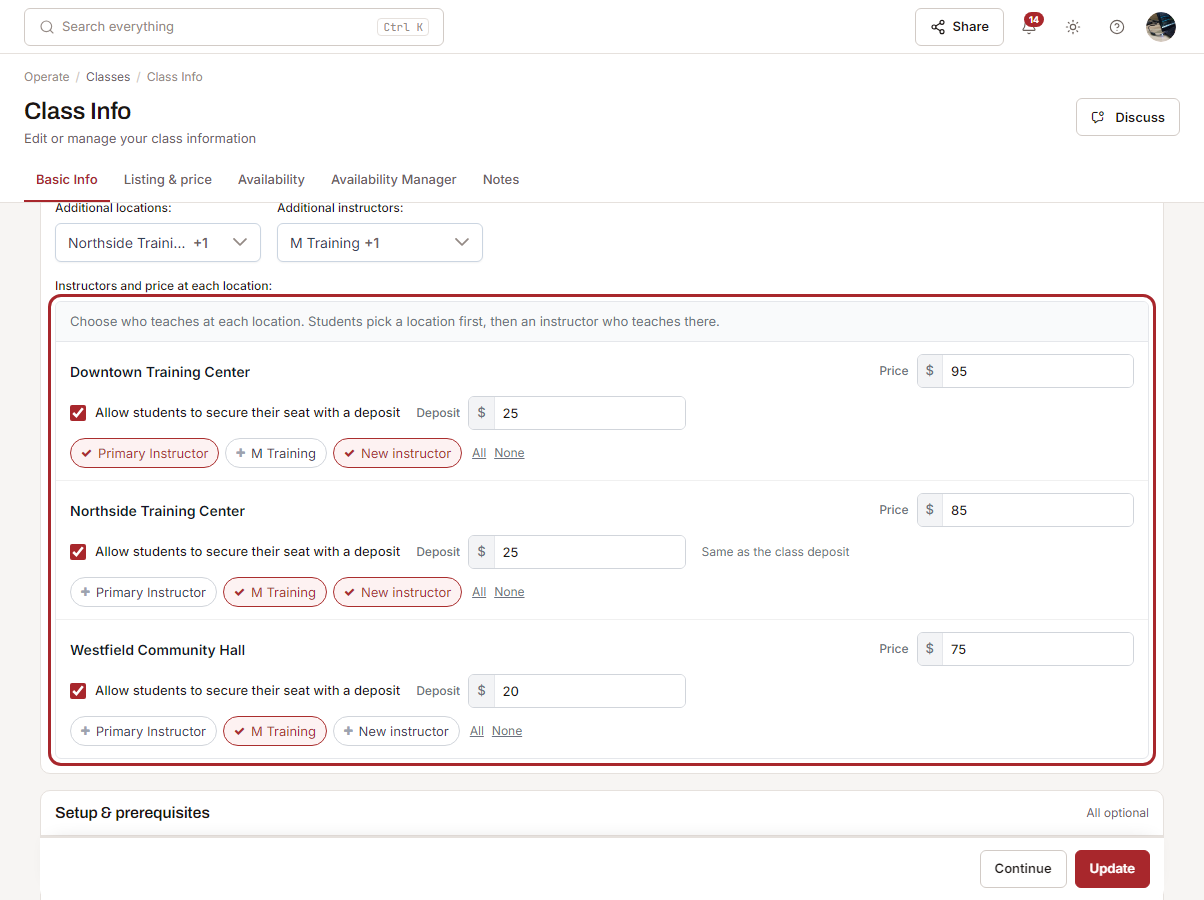
3. Set a price and deposit for each location
The main location's row holds the class price and deposit, the same values as on the Listing & price tab. Change one and the other follows.
For the other locations:
- Price: enter the price at that location, or leave it empty to use the class price.
- Deposit: tick Allow students to secure their seat with a deposit. With no amount, the location uses the class deposit and shows "Same as the class deposit". Enter an amount to use a different deposit there. It must be more than 0 and less than that location's price.
- No deposit: untick the box and students pay in full at that location, even when the class takes a deposit.
Students see each location's price in the location list when they book, so they can choose the one that suits them.
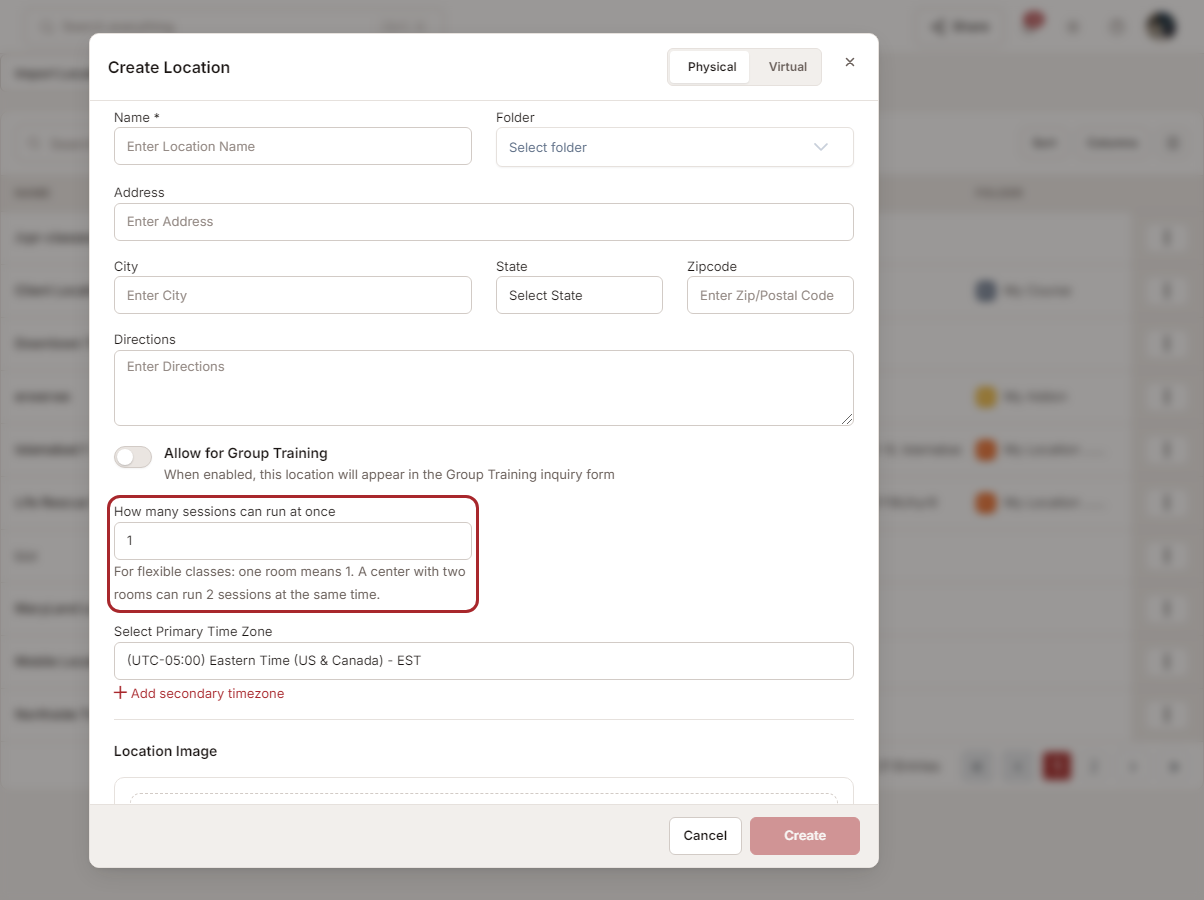
4. Say how many sessions a location can run at once
Go to Course Builder › Locations and click Add location, or edit a location. Set How many sessions can run at once: 1 for one room, 2 for a center with two rooms, and so on. When a location is full at a given time, we stop offering that time there, whichever class is using the room.
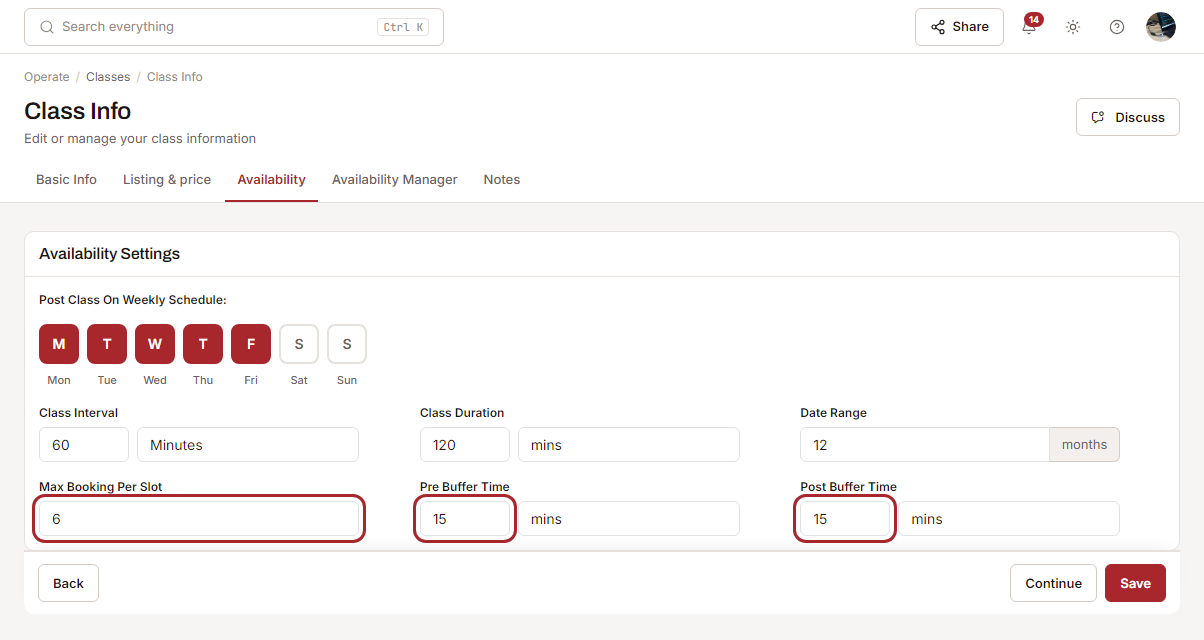
5. Set the slot length, class size and buffers
Open the class and go to Class Info › Availability. Pick the days in Post Class On Weekly Schedule, how often a slot starts in Class Interval, how long it runs in Class Duration and how far ahead students can book in Date Range.
- Max Booking Per Slot is how many students one instructor takes in a session.
- Pre Buffer Time and Post Buffer Time keep the instructor and the room free before and after each session for setup and cleanup. Plan any travel between locations into them.
For example, with 3 students per instructor, two instructors at a location and 2 sessions at once there, up to 6 students can train at that location at the same time.
We offer a time when the location is open, an instructor who teaches there is free, the room has space and the buffers fit. We check each instructor's sessions in all your classes, their connected Google or Outlook calendar and their time off. Opening hours come from each location's and instructor's Schedule Availability. Where none is set, we use 8:00 AM to 5:00 PM every day.
6. Check why a time is not offered
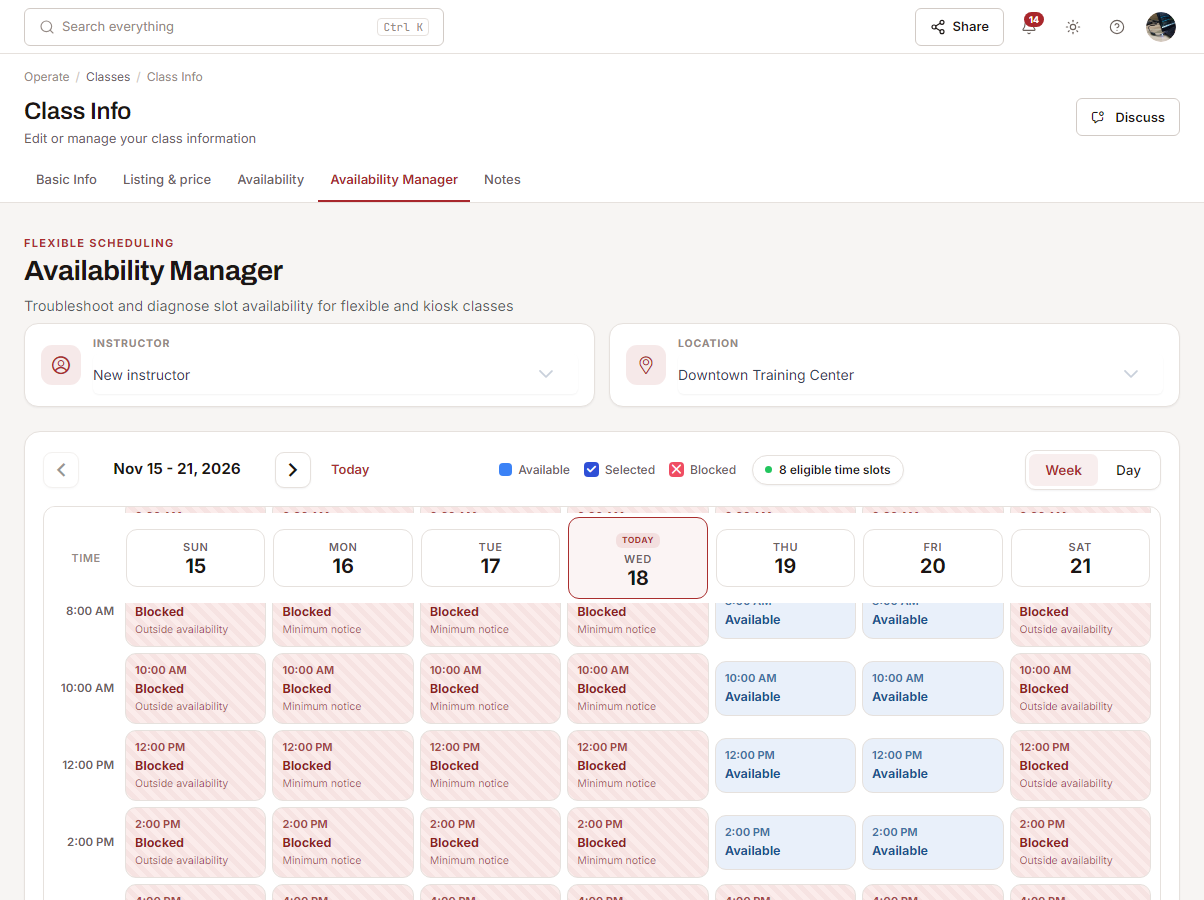
Go to Class Info › Availability Manager. Pick an instructor and a location to see their week. Each time is marked Available or Blocked, with the reason, such as "Outside availability" or "Minimum notice". Use it when a student asks why a time is missing. It only shows availability; to change it, use the steps above.
Part 2: Booking
Students book on your registration page or on Class Finder. Your team books from the class in the Portal. All of them follow the same three steps.
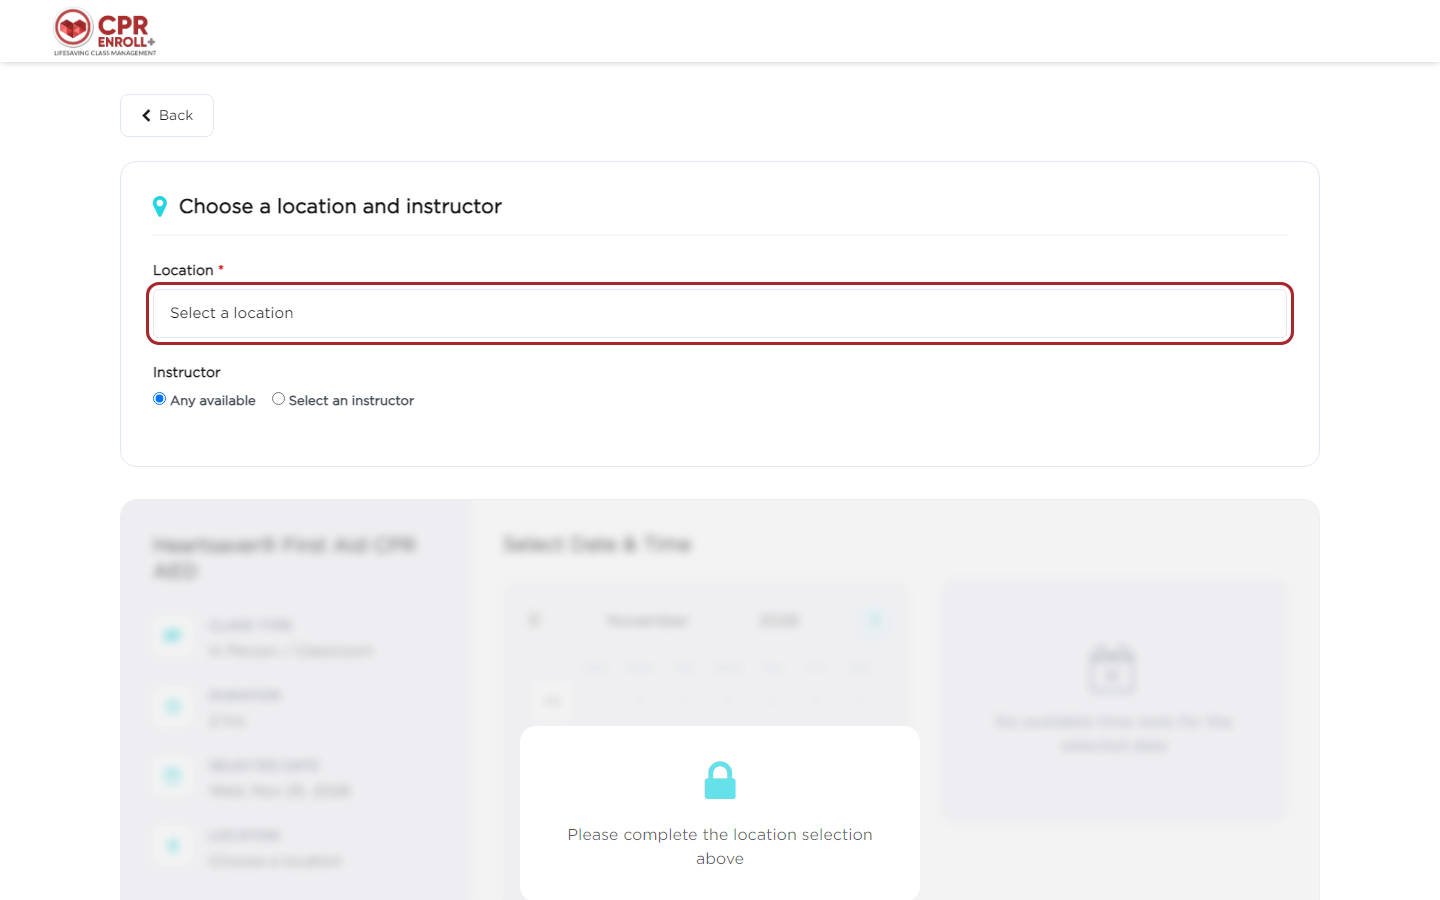
Step 1: Choose a location
The student picks a location first. The list shows each location's price and leaves out any location with no instructor. On the registration page, the calendar stays locked until a location is chosen.
Step 2: Choose an instructor
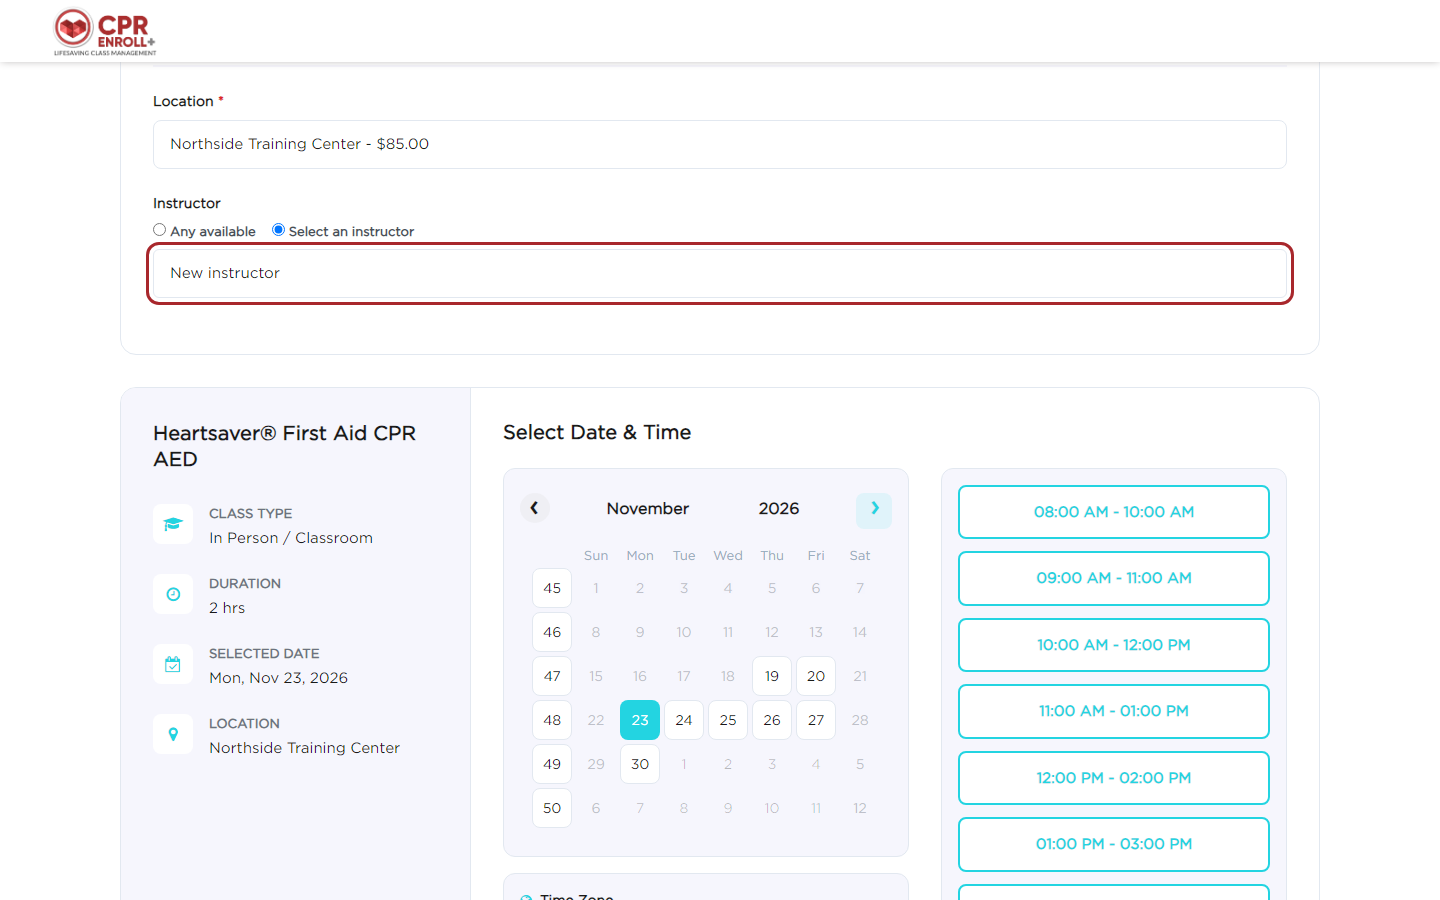
Next, the student picks Any available or Select an instructor. Only instructors who teach at that location are listed. With a named instructor, the calendar shows only that instructor's open times, and on the registration page it stays locked until one is picked.
Step 3: Pick a time and pay
The student picks a day and a time, and pays the price and deposit for the location they chose. For Any available, we assign the instructor with the fewest bookings that week. Students who book the same instructor, location and time share one session, with one roster and one calendar entry, and the instructor is paid for one session.
Booking for a student in the Portal
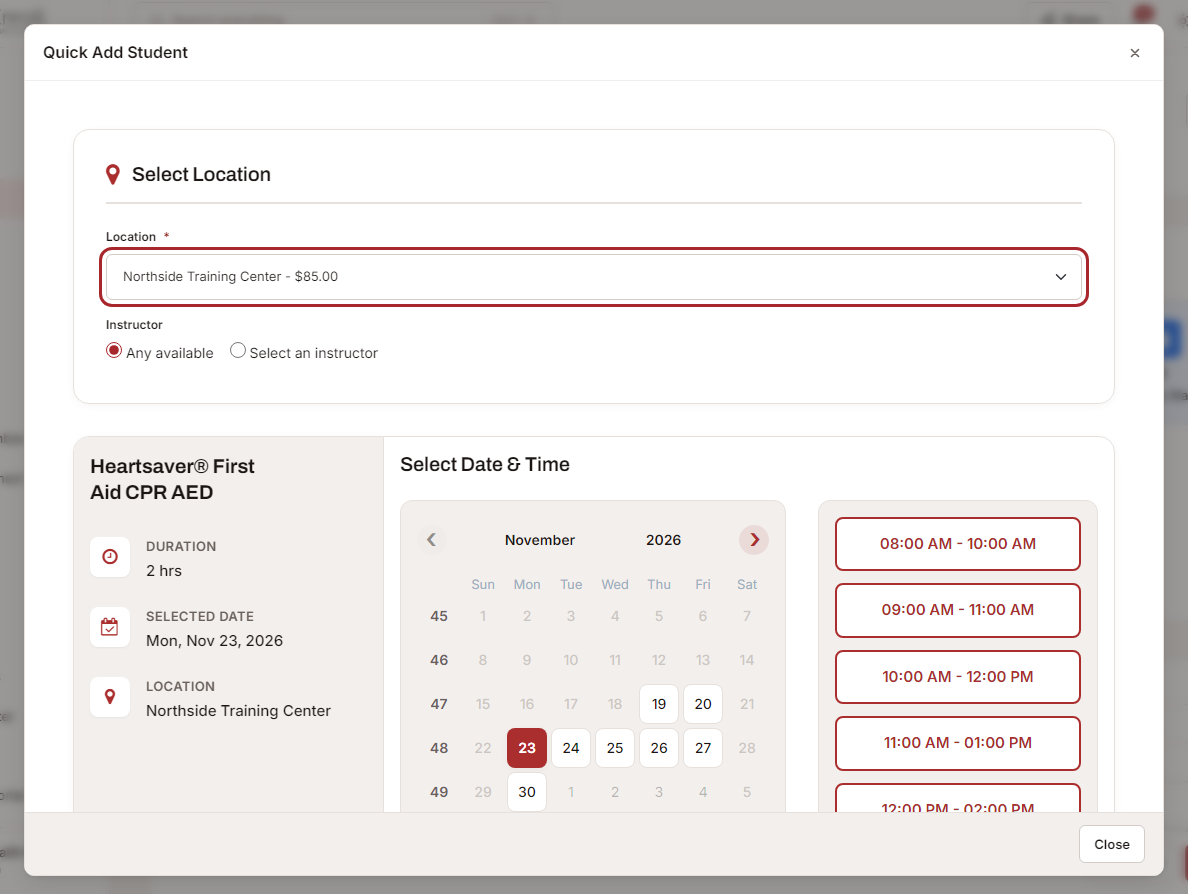
Open the class and click Quick Add or Add Student. You get the same choices: location first, then any available instructor or a named one. When only one instructor teaches at the location, we select them for you. The amount to pay and the processing charge follow the location's price.
Rescheduling
- When a student who chose Any available is rescheduled, the new time can be with a different instructor, and both instructors are told.
- When a student chose a named instructor, rescheduling shows that instructor's times, with the option to switch to any available instructor.
- Your team can always move a booking to another instructor by hand, and Custom Date & Time works for these classes too.
What instructors see
Every instructor who teaches at one of the class's locations sees the class in their class list. Each session belongs to the instructor teaching it: it is on their calendar, roster and pay.
An instructor who opens the class sees their colleagues' names but cannot change them. They can still change their own locations and prices.
Good to know
- Existing classes: a flexible class with one instructor and one location works as before. Nothing has to change.
- Clashes with other classes: flexible classes now check the instructor's and the room's other classes, so a time already taken elsewhere is not offered. This applies to existing flexible classes too.
- Wait list: the wait list switch is not offered for flexible classes.
- Other class types: Virtual flexible, Mobile Location and Kiosk/VAM classes work as before.
- Update Price on several classes: it is refused for a Kiosk/VAM class with different prices per location, or a Virtual class with different prices per instructor. Edit the class to change those prices.
Was this article helpful?