A Saved View remembers a combination of filters, sorting, columns and display preferences so you can return to it in one click. If you find yourself re-applying the same three filters every morning, that is a Saved View waiting to be made.
Before You Begin
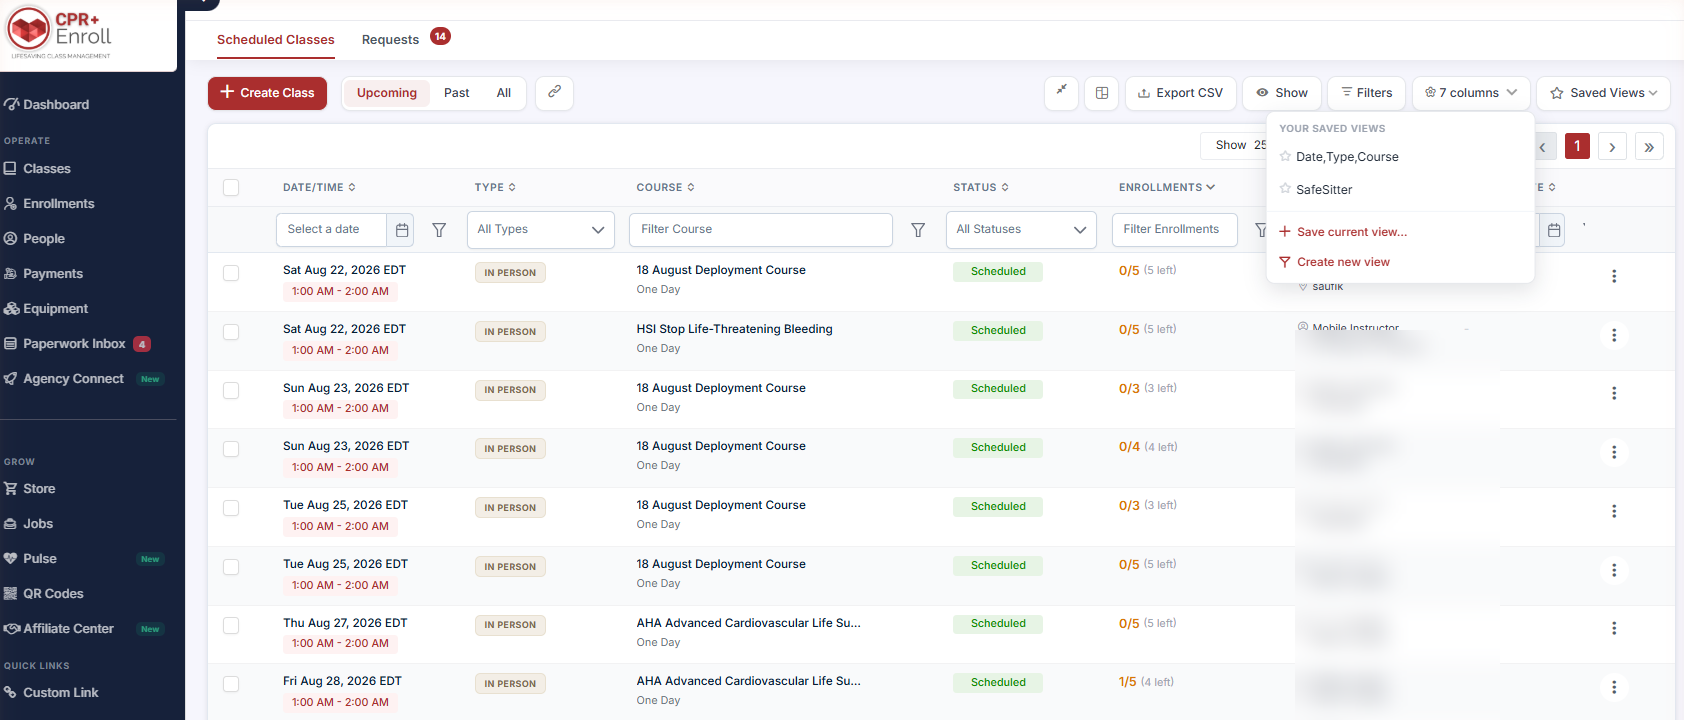
- Saved Views are reached from the Saved Views button in the Classes toolbar.
- They are also available on the Requests tab.
- Decide before saving whether the view is just for you or should be shared with your organization.
Step 1: Save the View You Are Already Looking At
This is the easiest route — configure first, save second.
- Set up the page the way you want it: filters, sort order, visible columns, comfortable or compact layout.
- Click Saved Views.
- Choose Save current view…
- Give it a name.
Step 2: Or Create a View From Scratch
- Click Saved Views → Create new view.
- Define the filters directly in the dialog.
- Name and save it.
Step 3: Use a Saved View
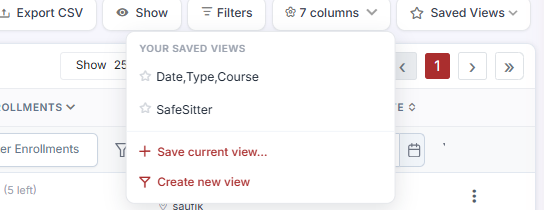
- Open Saved Views.
- Click a name under YOUR SAVED VIEWS.
- The grid reconfigures immediately.
Step 4: Decide Private or Shared
Views can be private to you or shared with your organization. Shared views are useful for standardizing how a team works — for example, a Needs Paperwork view that every coordinator opens each morning.
✔ Shared views are a training tool. Naming a view after the task it serves (“Needs an instructor”) teaches new coordinators the workflow without a handbook.
Step 5: Build the Views Worth Having
These five cover most day-to-day coordination work:
| View | Filters |
|---|---|
| This week | Upcoming, date range = next 7 days |
| Needs an instructor | Assigned To empty, Upcoming |
| Under-enrolled | Enrollments below minimum, Upcoming |
| Awaiting paperwork | Status = Awaiting Paperwork |
| Archived audit | Show archived on |
What Is Remembered Without a Saved View
Even without saving, the Classes, Enrollments and People grids retain their pagination and filter state as you navigate away and back, and breadcrumb navigation keeps previously entered data.
So Saved Views are not there to survive a single round-trip — they are for switching deliberately between working sets.
Best Practices
- Name views after the task, not the filter (“Needs an instructor”, not “Assigned To empty”).
- Share the views your whole team should be working from; keep experimental ones private.
- Include the columns the view needs and hide the rest — column visibility is saved too.
- Review shared views quarterly. A view nobody opens is clutter in everyone’s menu.
- Build an Archived audit view before an audit rather than during one.
Frequently Asked Questions
| Question | Answer |
|---|---|
| Where is the Saved Views button? | In the Classes toolbar. It is also on the Requests tab. |
| What exactly gets saved? | Filters, sorting, columns and display preferences — including comfortable or compact layout. |
| Can my team use my views? | Yes. Views can be private to you or shared with your organization. |
| Do I lose my filters if I navigate away? | No. The Classes, Enrollments and People grids retain pagination and filter state on return. |
| Can I build a view without configuring the grid first? | Yes — use Saved Views → Create new view and define the filters directly. |
✔ You’re all set. Next, read Working the Class Requests and Group Training Leads Queues to handle the inbound side of the Classes page.
Was this article helpful?
That’s Great!
Thank you for your feedback
Sorry! We couldn't be helpful
Thank you for your feedback
Feedback sent
We appreciate your effort and will try to fix the article