
CPR Enroll+ uses two separate logo upload areas: one for your student-facing registration pages (Branding), and one for your business profile and internal documents. Make sure you upload to both for a consistent experience across your account.
This article walks you through uploading your registration page logos and your business logo, plus how to replace or remove a logo later.
Before You Begin
- Prepare your logo files — PNG with a transparent background is recommended for the best results on both light and dark page themes.
- Avoid logos with thin text, since they can become unreadable at small sizes.
- Know which logo you're updating: Header Logo, Footer Logo (student-facing), or Business Logo (internal).
Step-by-Step Instructions
Step 1: Upload Registration Page Logos (Header and Footer)
These logos appear on your public-facing pages at classes.cprenroll.com and in student emails.
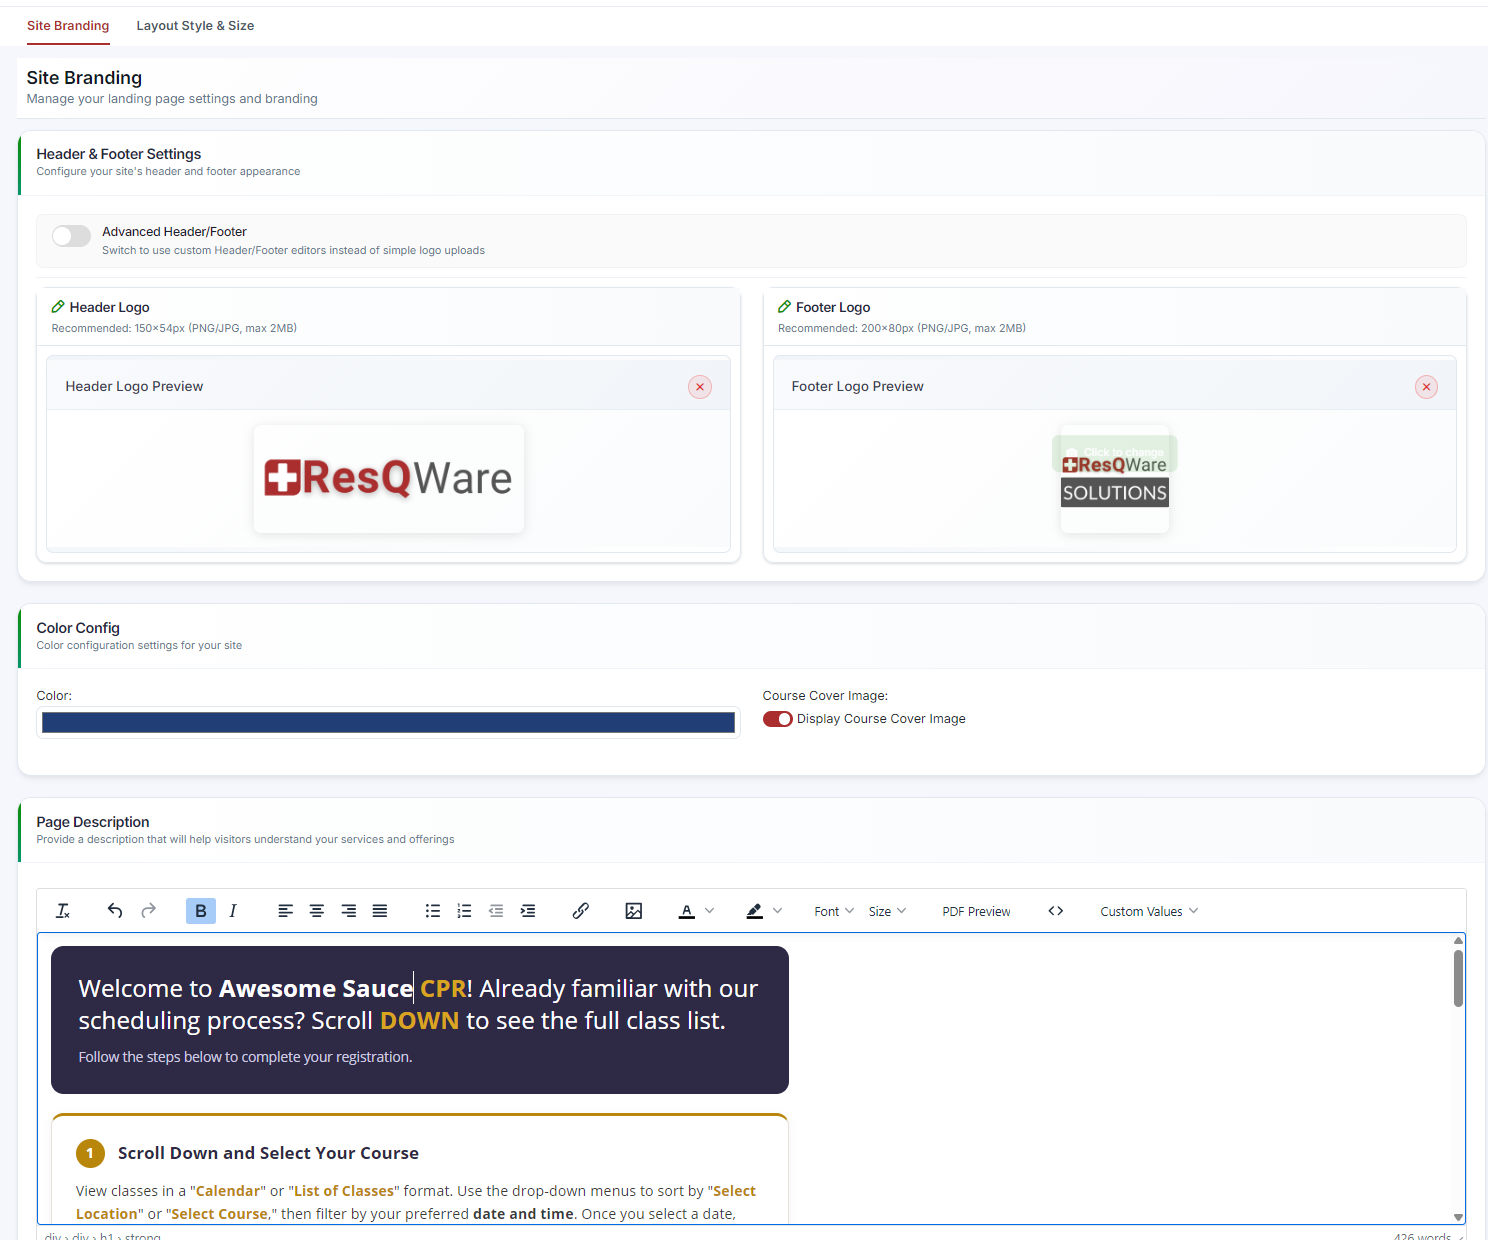
- From the sidebar, go to Settings > Branding.
- Click the Site Branding tab.
- In the Header & Footer Settings section, click Upload next to Header Logo. Recommended format: PNG with a transparent background. Recommended size: 150 × 54 pixels. Maximum file size: 2 MB.
- Repeat for Footer Logo if desired (recommended size: 200 × 80 pixels).
- Click Save.
✔ Logo format tip: Use a PNG with a transparent background for the best results on both light and dark page themes. Avoid logos with thin text that becomes unreadable at small sizes.
Step 2: Upload the Business Logo
This logo is used in internal documents and may appear on certificates depending on your configuration.
- Go to Settings > Business Profile.
- In the Update Business Profile section, click Upload next to the Business Logo placeholder. Recommended size: 100 × 100 pixels. Maximum file size: 2.5 MB. Supported formats: PNG, JPG.
- Click Save Settings.
✔ Logo format tip: Use a PNG with a transparent background for the best results on both light and dark page themes. Avoid logos with thin text that becomes unreadable at small sizes.
Step 3: Replace or Remove a Logo
To replace a logo, upload a new image following the same steps; the new upload overwrites the previous one. To remove a logo, click the Remove button next to the uploaded preview.
Best Practices
- Upload to both Branding and Business Profile so your logo is consistent across student-facing pages and internal documents.
- Stick to the recommended dimensions for each logo slot to avoid stretching or cropping.
- Use transparent PNGs so your logo looks clean on both light and dark themes.
- Re-check certificates and registration pages after updating a logo to confirm it displays as expected.
Frequently Asked Questions
| Question | Answer |
|---|---|
| What's the difference between the Branding logos and the Business Logo? | Branding logos (Header and Footer) appear on student-facing registration pages and emails, while the Business Logo is used in internal documents and may appear on certificates depending on your configuration. |
| How do I replace an existing logo? | Upload a new image following the same steps; the new upload automatically overwrites the previous one. |
| How do I remove a logo entirely? | Click the Remove button next to the uploaded preview in the relevant settings section. |
✔ You're all set. Your logos are now live across your student-facing pages and internal documents.
Was this article helpful?
That’s Great!
Thank you for your feedback
Sorry! We couldn't be helpful
Thank you for your feedback
Feedback sent
We appreciate your effort and will try to fix the article