
Setting the correct time zone in CPR Enroll+ is critical for class scheduling accuracy. If your time zone is set incorrectly, class times will display incorrectly on student registration pages and in email confirmations — leading to missed classes and student frustration.
This article walks you through setting your time zone at the account level, at the individual location level, and on an existing class.
Before You Begin
Before configuring your time zone, decide:
- Which time zone your business primarily operates in — this becomes your account-level default.
- Whether any of your physical locations operate in a different time zone than your account default, or sit near a time zone border.
- Whether your region observes daylight saving time.
✔ Important: Set your time zone before scheduling your first class. Location-level time zones take priority over the account-level setting, so review both if you operate across multiple regions.
Step-by-Step Instructions
Step 1: Set the Account-Level Time Zone
- From the sidebar, go to Settings > Business Profile.
- On the right side of the page, find the Business Physical Address section.
- Open the Select Time Zone dropdown and choose your timezone (e.g. "(UTC-05:00) Eastern Time (US & Canada)" for Eastern, "(UTC-06:00) Central Time" for Central, etc.).
- Toggle Adjust for daylight saving ON if your region observes daylight saving time.
- Click Save Settings in the Business Physical Address section.
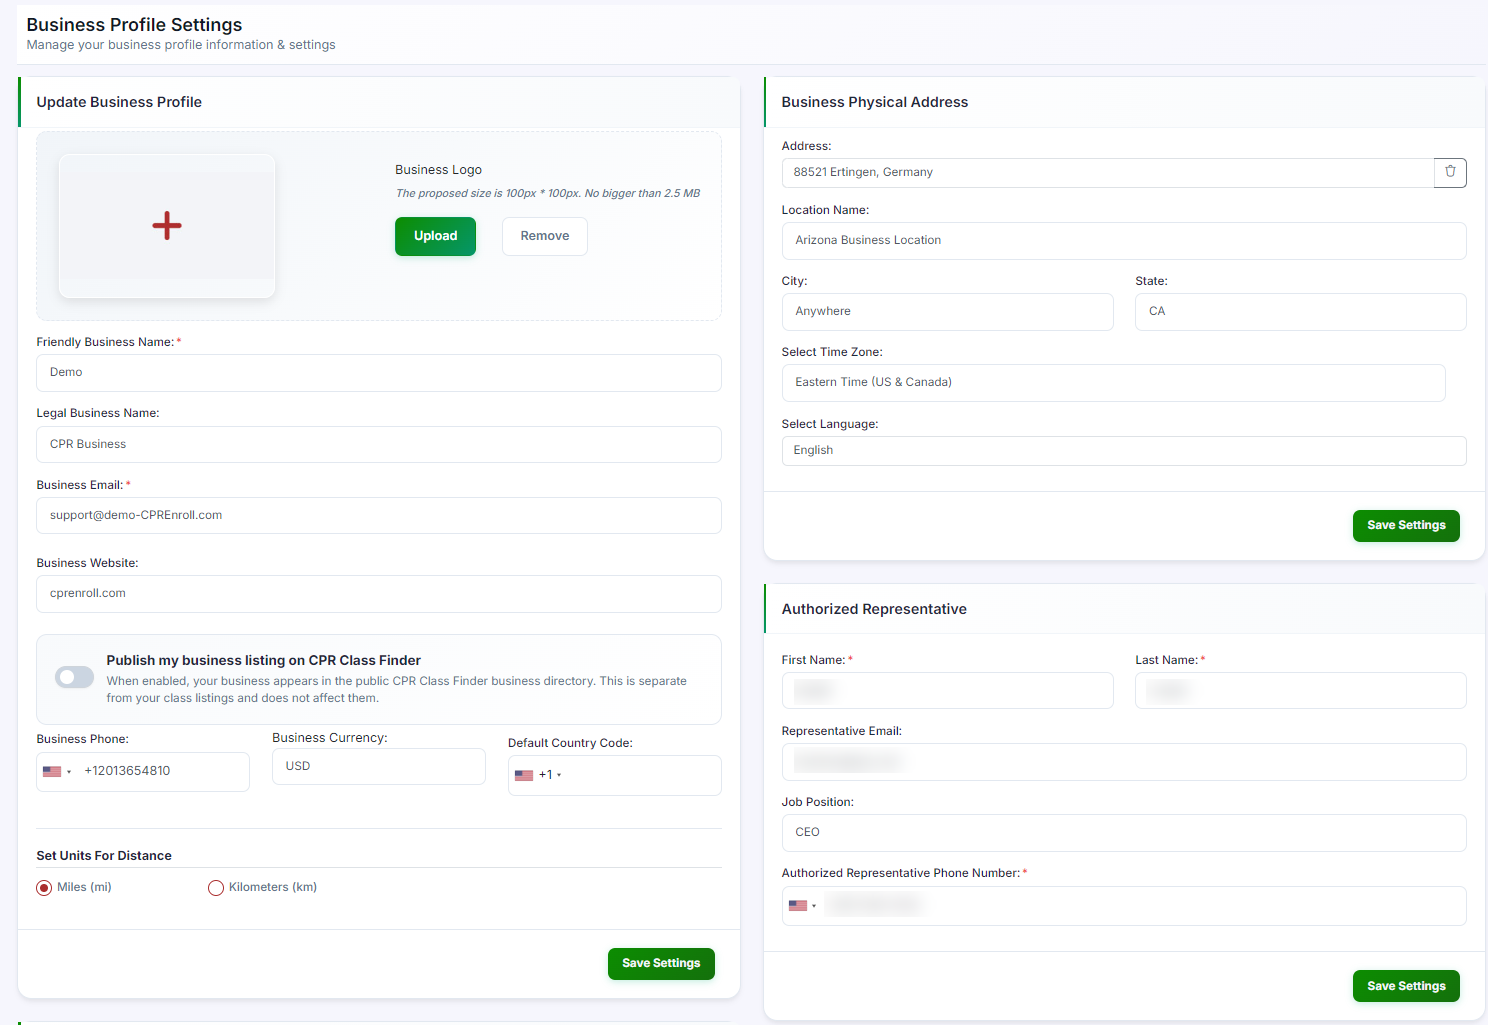
Step 2: Set Time Zones on Individual Locations
Each location also has its own time zone setting, which takes priority over the account-level setting for classes at that location. This is useful if you manage locations across multiple time zones.
- Go to Course Builder > Locations.
- Click ⋮ > Edit on a location.
- In the Select Primary Time Zone field, choose the correct time zone.
- Physical locations also support a Secondary Time zone (click + Add secondary time zone) — useful for locations near a time zone border.
- Click Save.
✔ Which time zone displays on the registration page? The class time zone is shown on student registration pages. Always verify the time zone on a test class before publishing it.
Step 3: Change the Time Zone on an Existing Class
If you have already scheduled classes with the wrong time zone:
- Go to Classes in the sidebar.
- Click ⋮ > Edit on the affected class.
- In the Timings section, update the Time zone field.
- Click Create (or Save).
⚠ Heads up: Enrolled students do not receive automatic notification of time zone changes — send a manual communication if students are already enrolled.
Best Practices
- Set your account-level time zone before scheduling your first class to avoid retroactive corrections.
- Review location-level time zones separately if you operate across multiple regions, since they override the account default.
- Always verify the time zone on a test class before publishing it to students.
- Notify enrolled students manually whenever you change the time zone on a class they've already registered for.
Frequently Asked Questions
| Question | Answer |
|---|---|
| Which time zone takes priority: account-level or location-level? | Location-level time zones take priority over the account-level setting for classes at that location. |
| Will students be notified if I change a class's time zone after they've enrolled? | No. Enrolled students do not receive an automatic notification, so you'll need to send a manual communication. |
| What is the Secondary Time zone field used for? | It's useful for physical locations near a time zone border, letting you account for a nearby zone in addition to the primary one. |
✔ You're all set. Your account, locations, and classes are now displaying the correct time zone, keeping registration pages and email confirmations accurate for your students.
Was this article helpful?
That’s Great!
Thank you for your feedback
Sorry! We couldn't be helpful
Thank you for your feedback
Feedback sent
We appreciate your effort and will try to fix the article